Contents
- Pricing & Availability
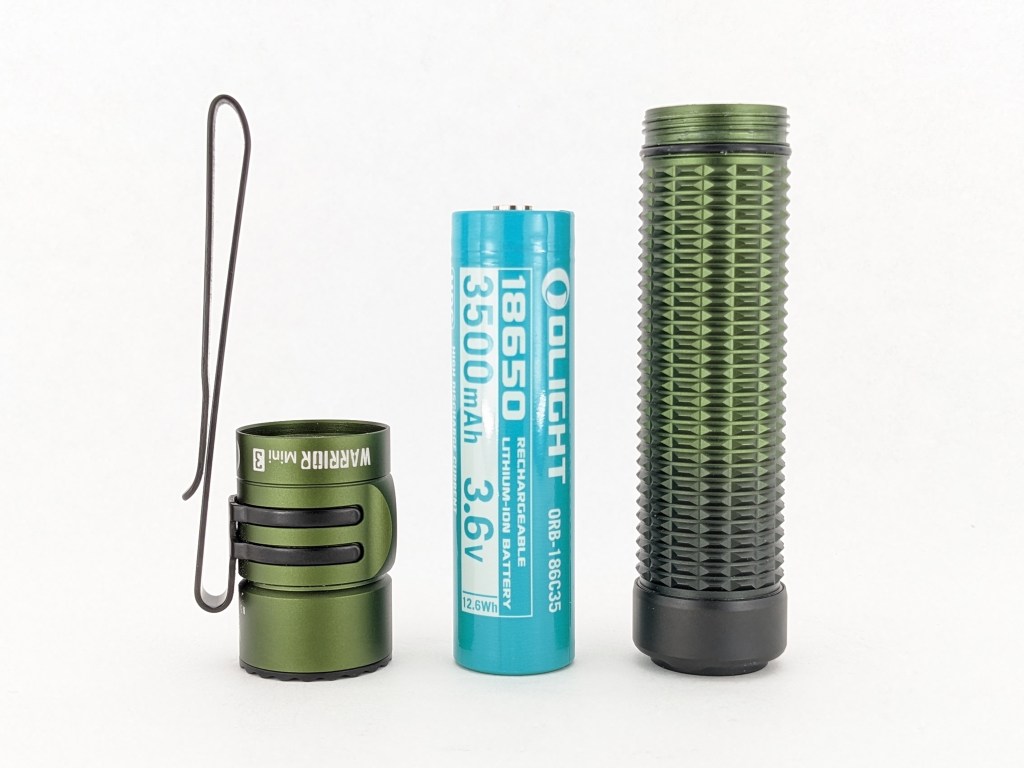
- What comes in the box?
- Design & Construction
- Size & Measurements
- User Interface
- Emitter & Beam
- Mode Chart
- Runtime
- Driver & Regulation
- Switch
- Carry & Ergonomics
- Batteries & Charging
- Proximity Sensor
- Competition
- Conclusion
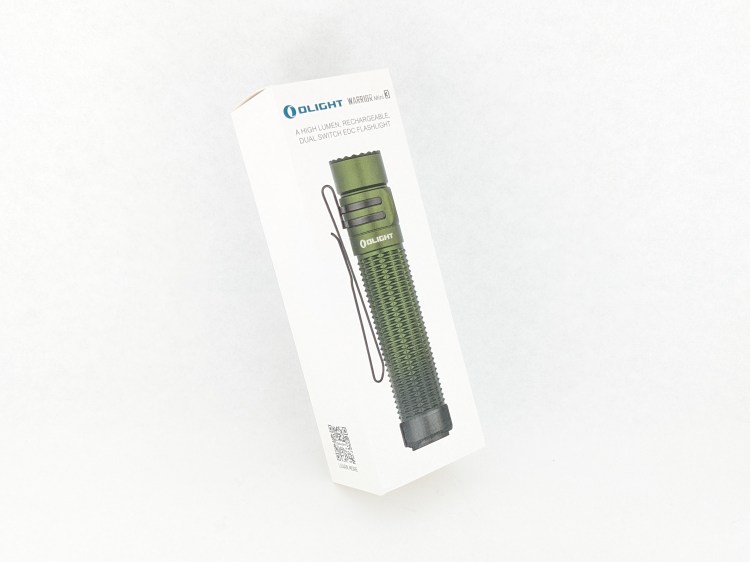
Pricing & Availability
Olight sent me this light in exchange for making an honest review of it and including some information about their upcoming summer sale (July 10-14) where this light will be discounted. Here are links to their website, the official product page, and the temporary bundle page where you can see current pricing. Those are affiliate links that let them know I sent you, but I’ve chosen not to earn any commission. Code “tgreviews” is 10% off most items that aren’t otherwise on sale. All customers will get a free keychain light with purchase (i3E for new customers, i1R2 Pro for existing customers) during the sale as well.
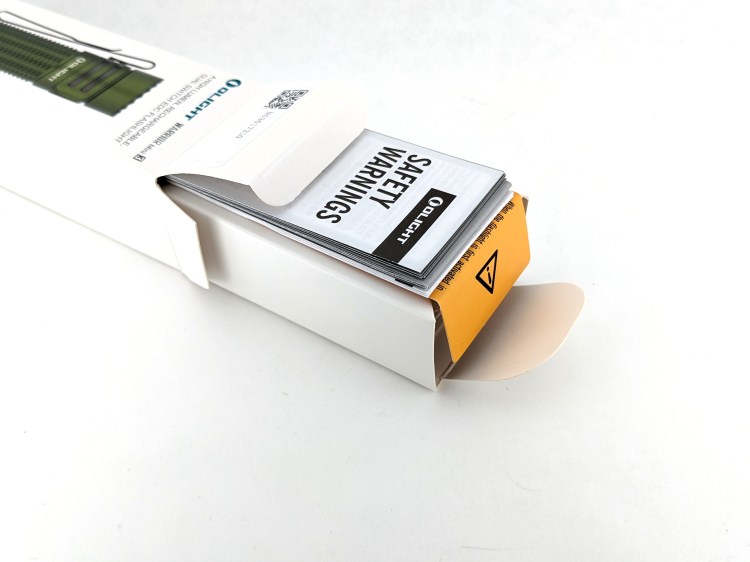
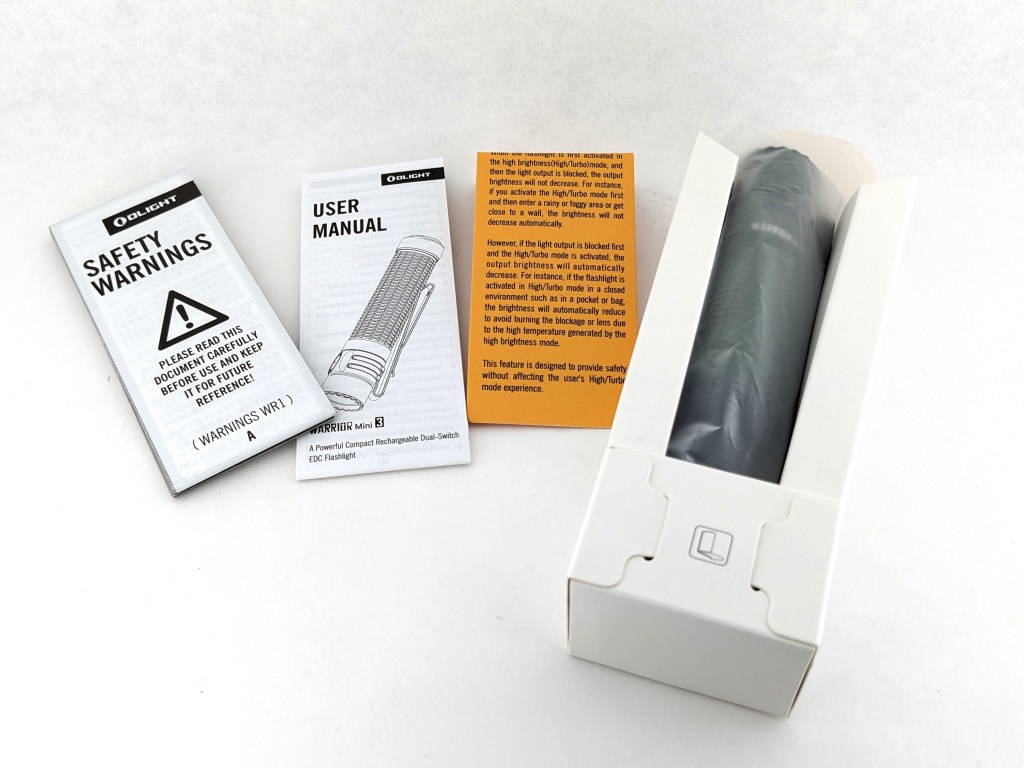
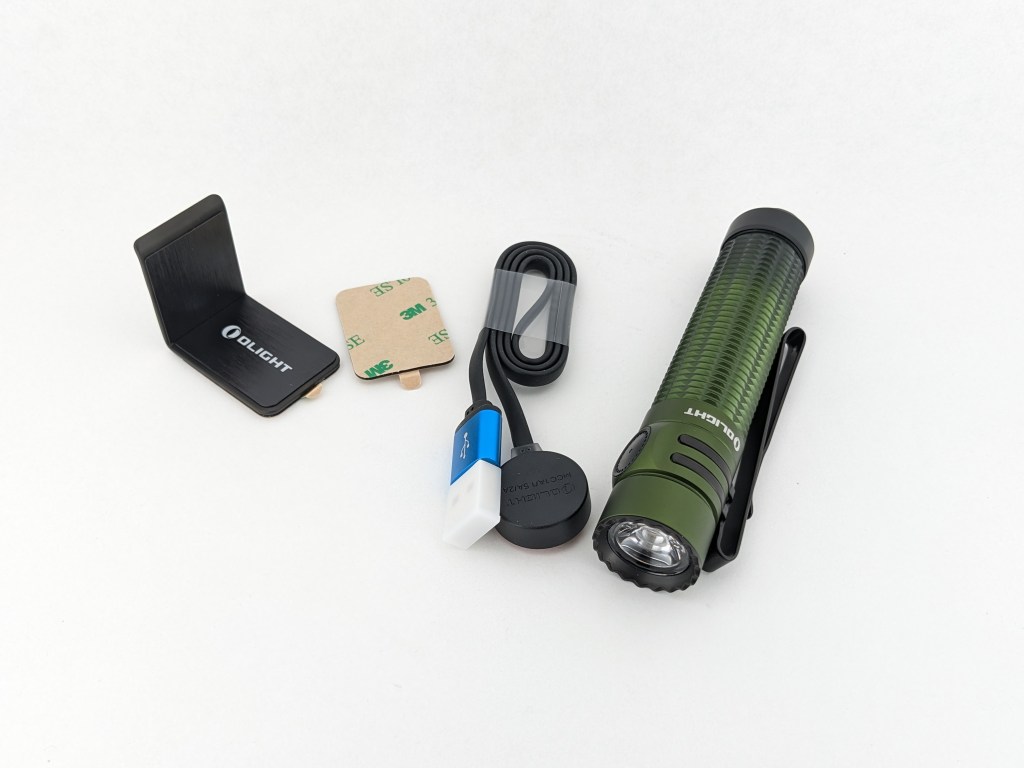
What comes in the box?
Warrior Mini 3 comes in Olight’s cheaper packaging: a nicely printed white cardstock box. There’s a folded cardstock insert that holds the light and accessories in place. It’s fairly difficult to re-pack everything into the box neatly once it’s open.
- The light itself
- Battery (inside the light)
- Quick start card, user manual & safety booklet
- Magnetic USB charging cable
- Steel bracket
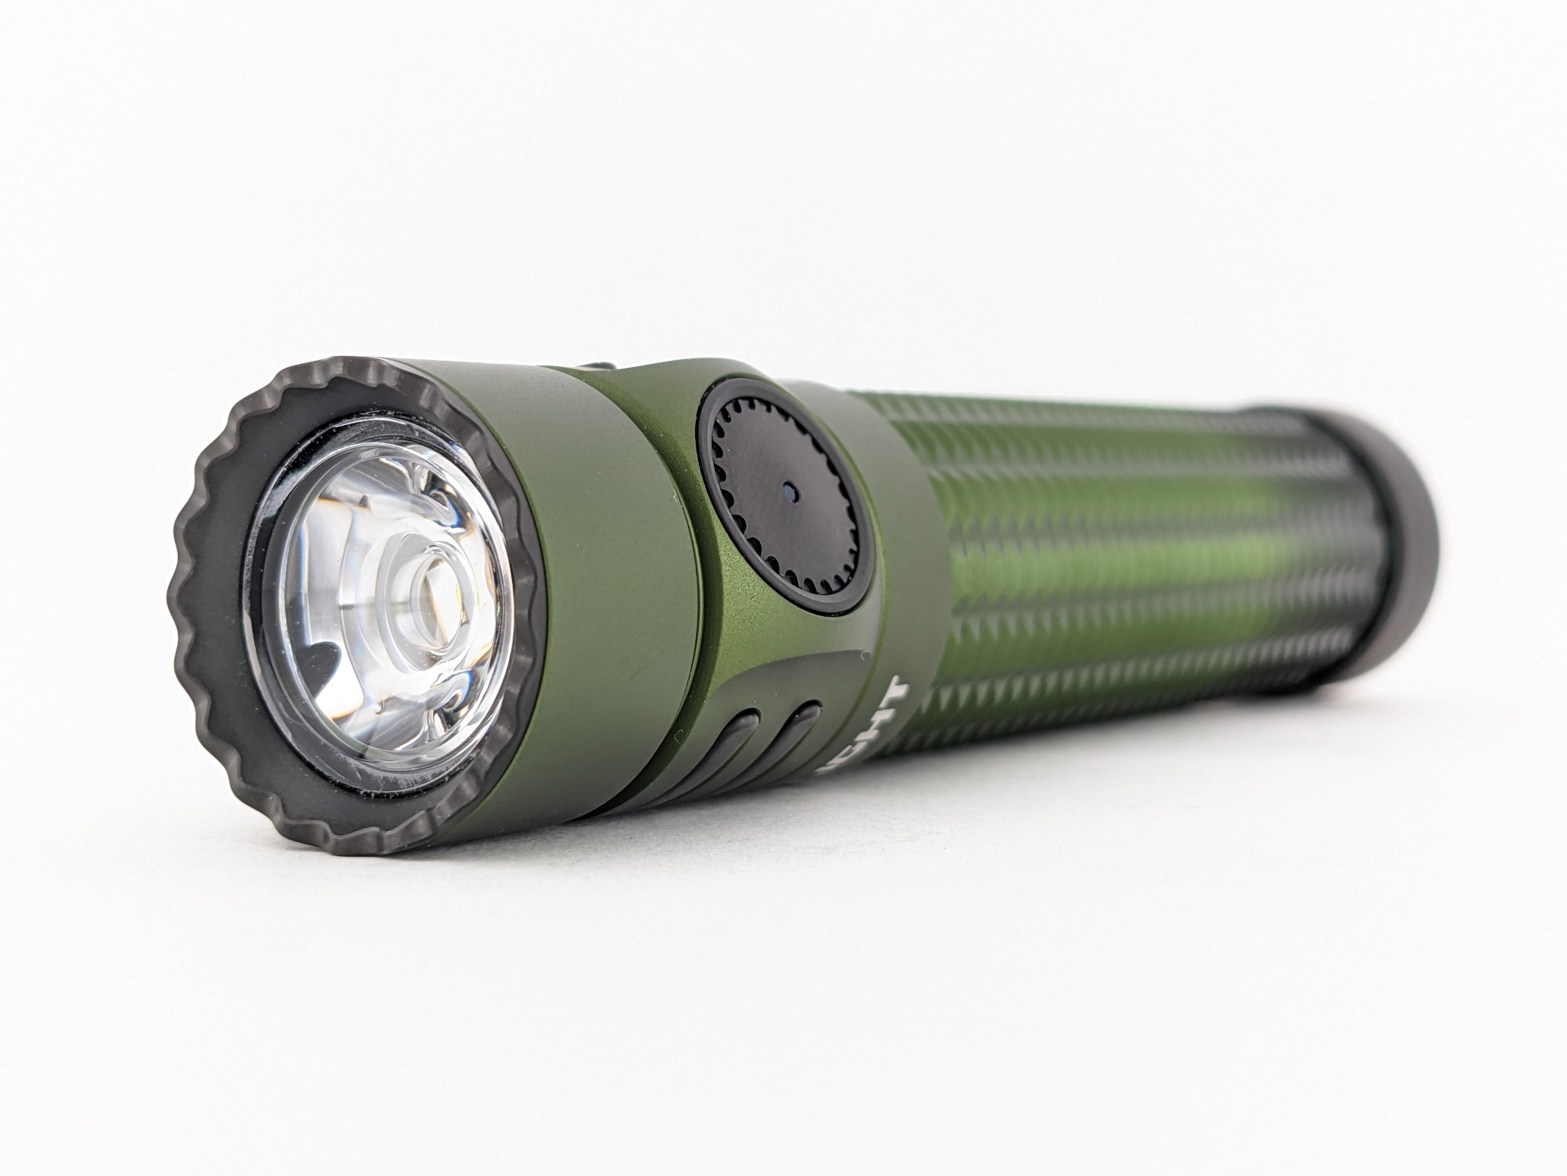
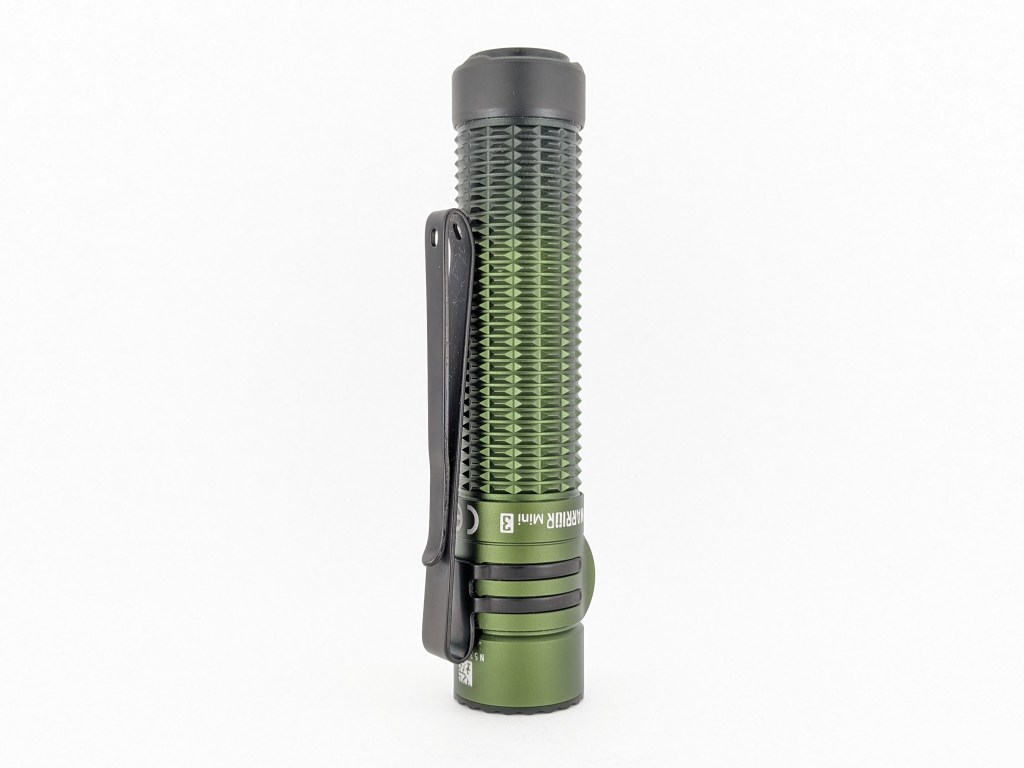
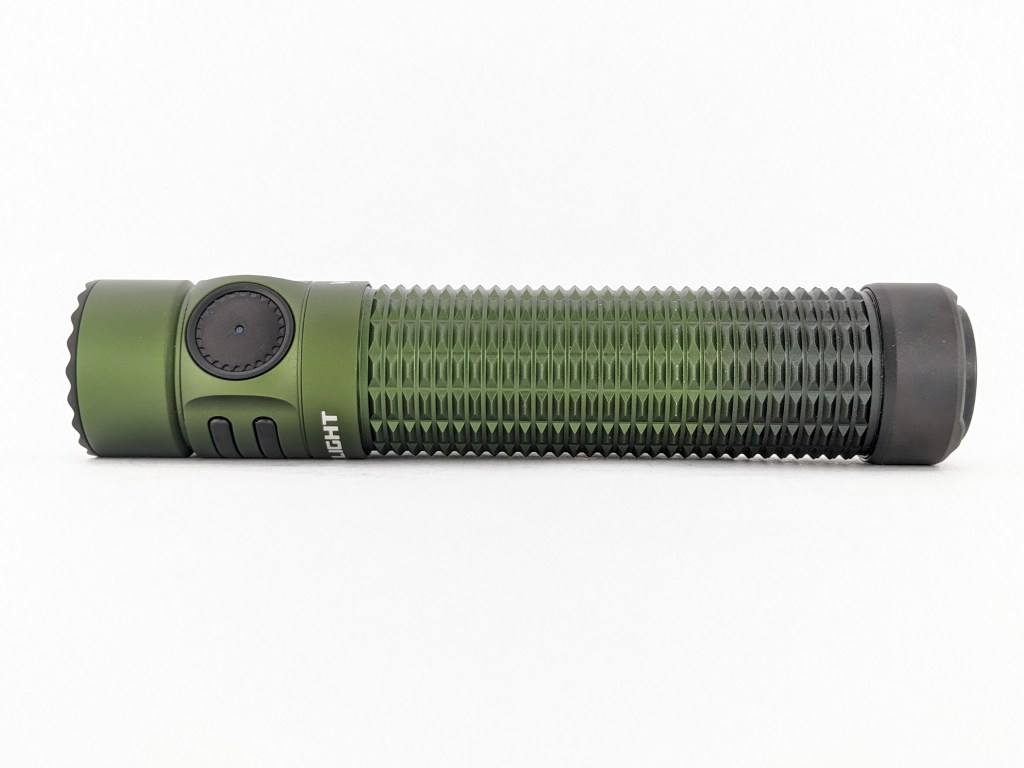
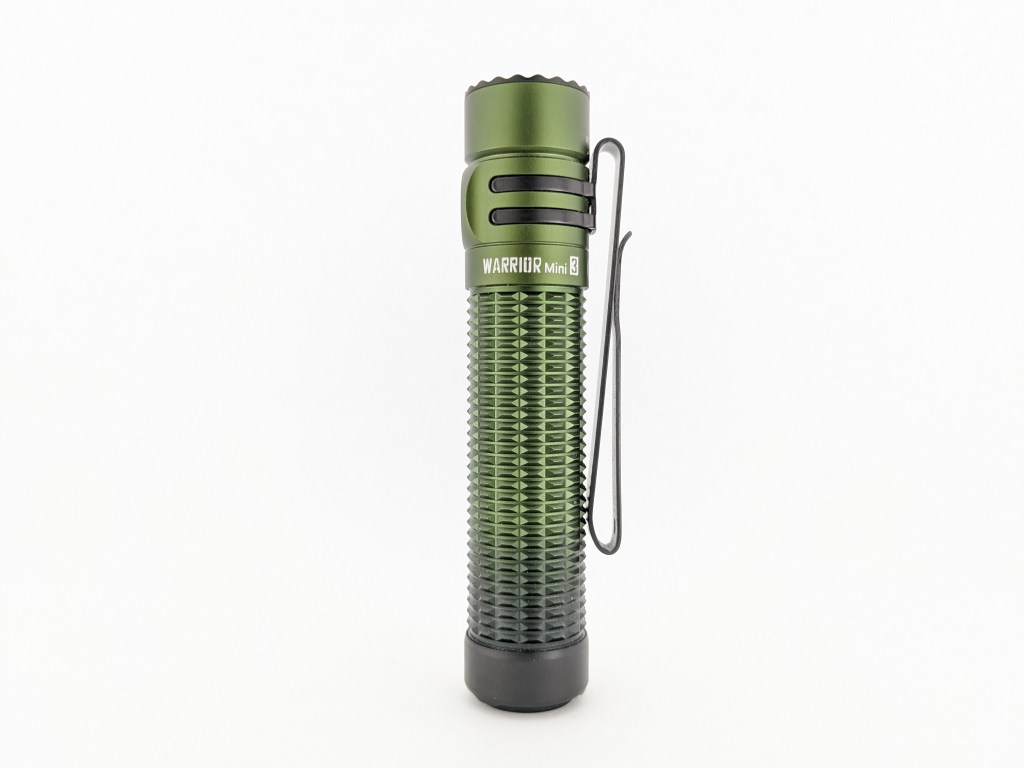
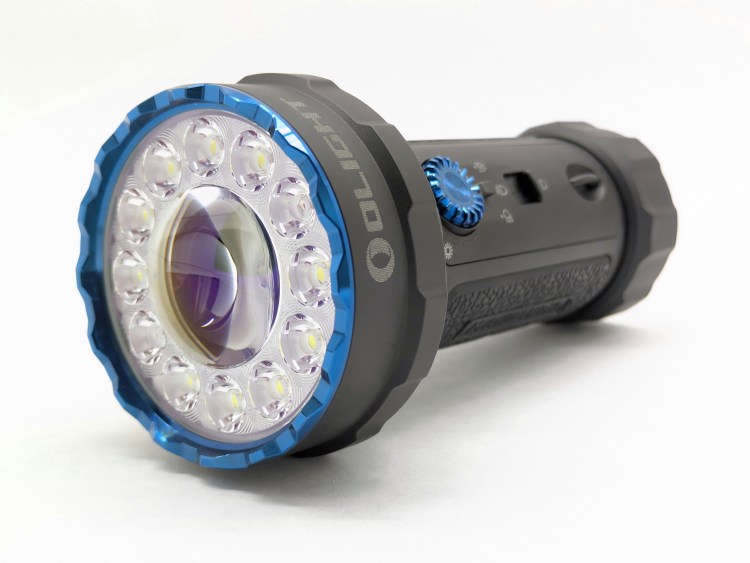
Design & Construction
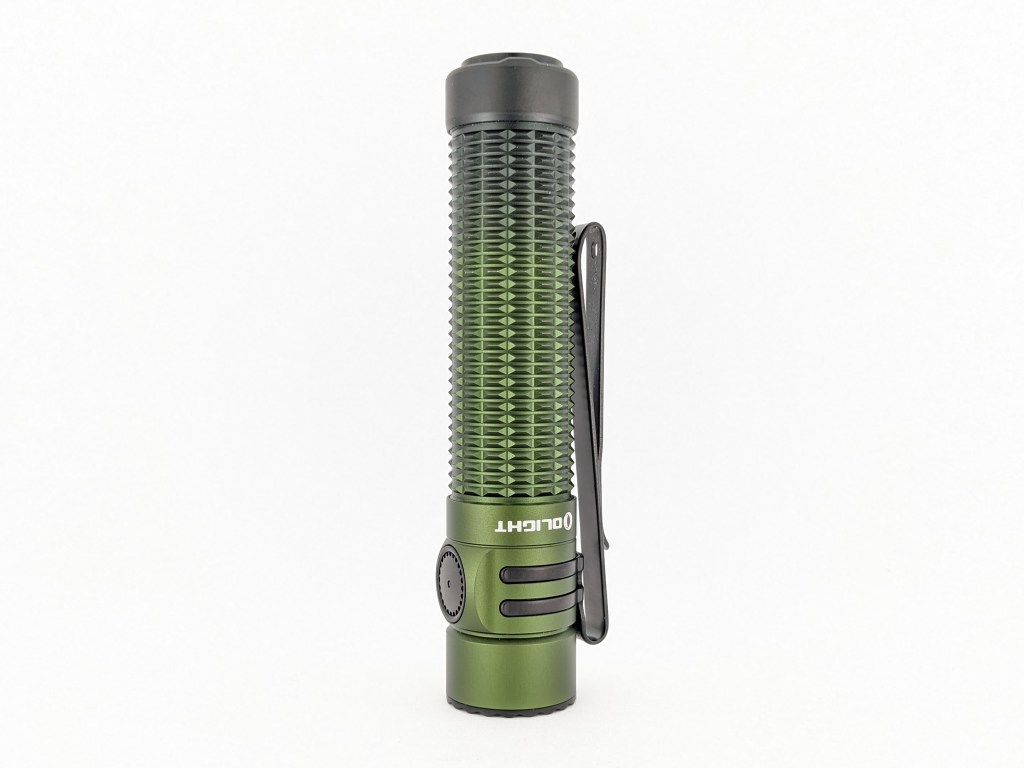
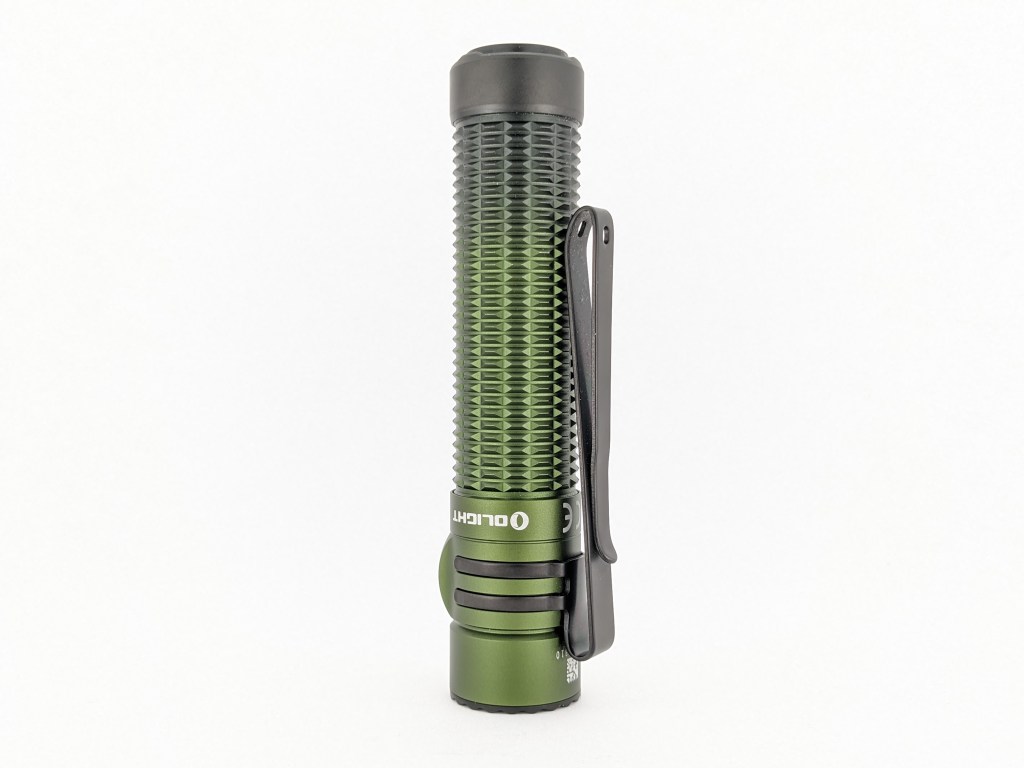
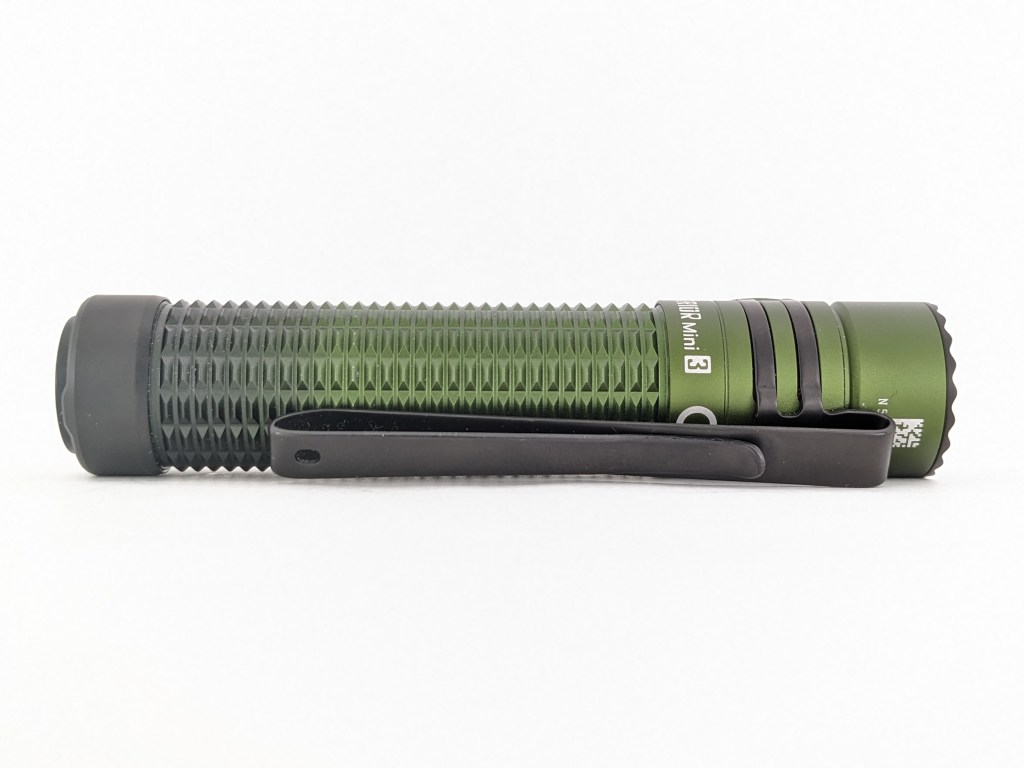
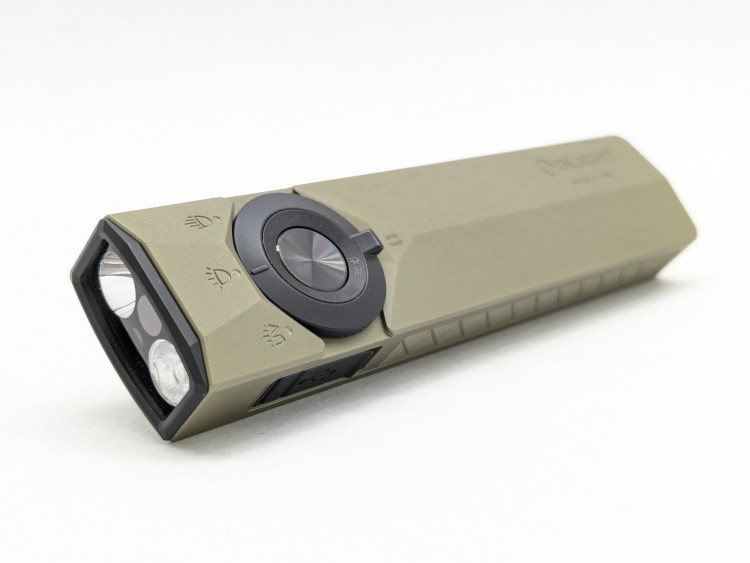
The design is more similar to the original Warrior Mini than Warrior Mini 2. The head doesn’t flare or stick out as much and the clip only attaches to the head (more on that later). I think it looks markedly more attractive than the previous generation.
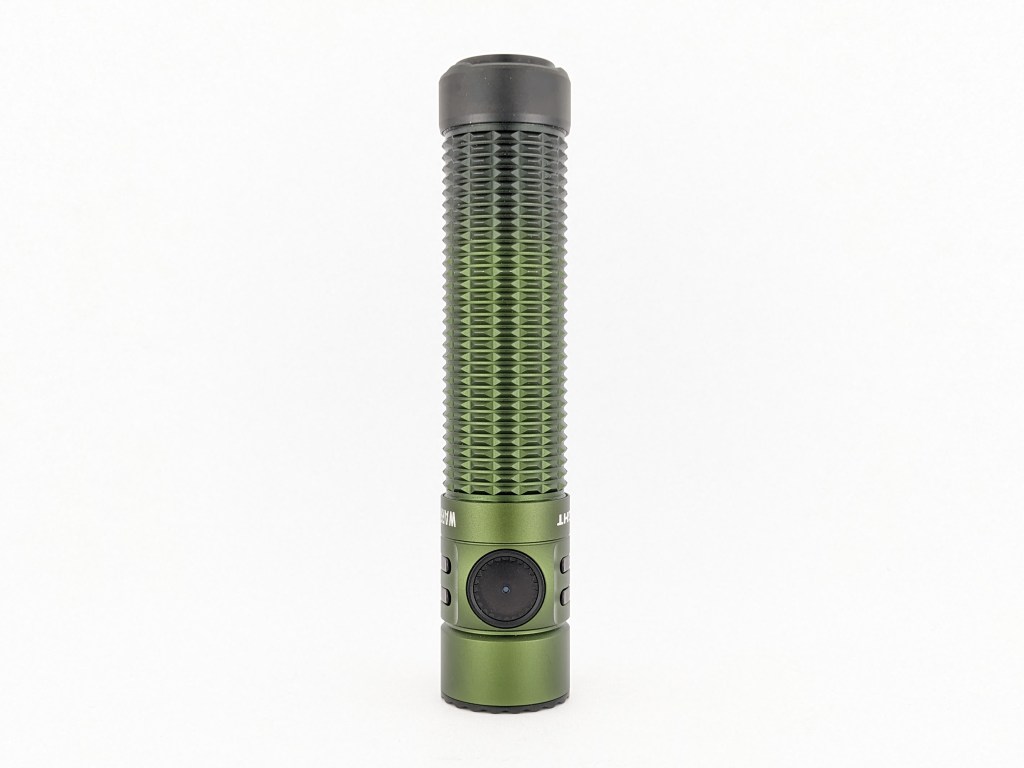
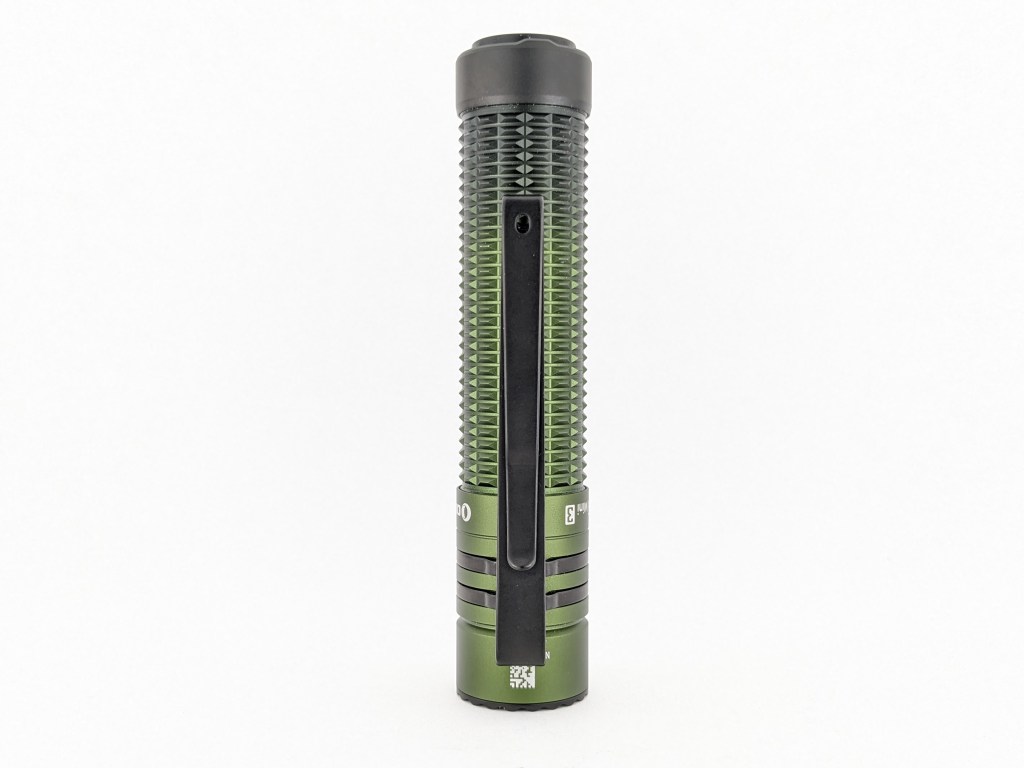


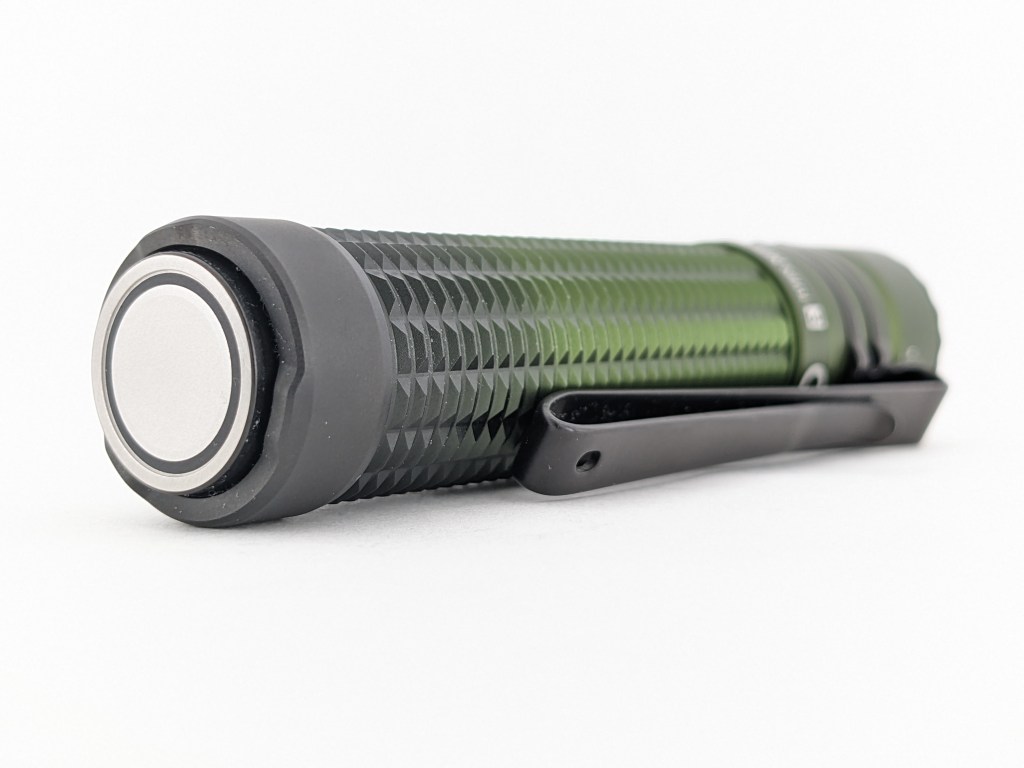


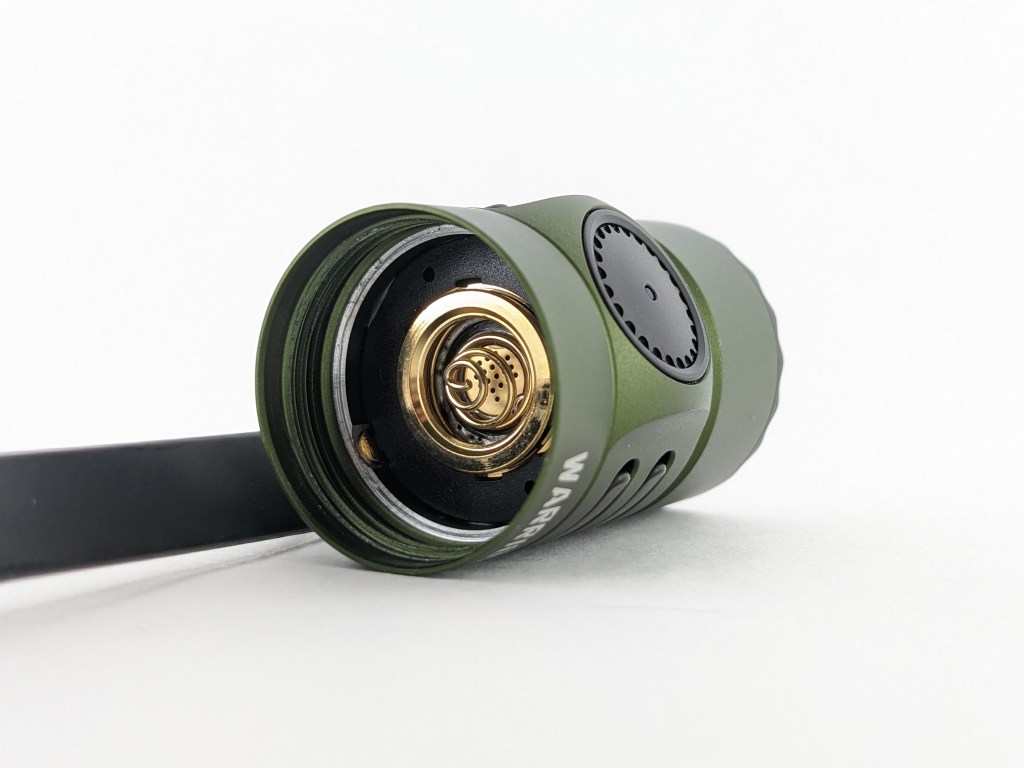
The build quality is excellent, as I’ve come to expect from Olight. The machining and anodizing are top-notch. It’s got a feeling of quality that you just don’t get from budget brands like Sofirn or Convoy. Below is what the inside of the tail looks like if you’re curious.
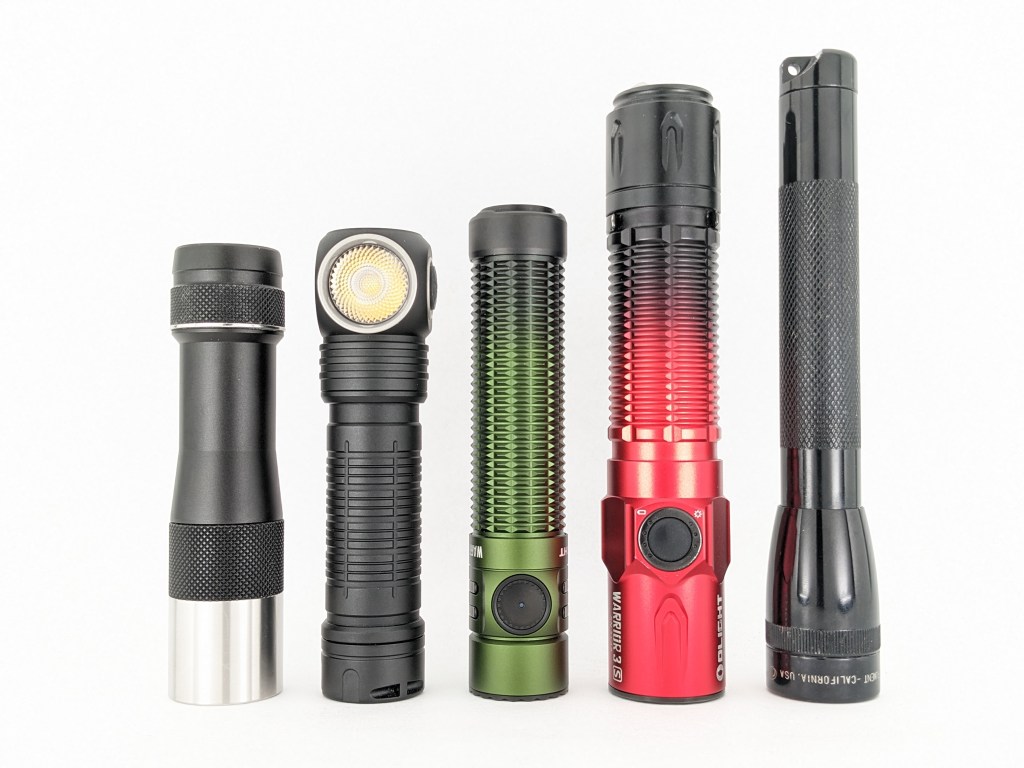
Size & Measurements
Lumintop FW1A | Skilhunt H300 | Olight Warrior Mini 3 | Olight Warrior 3S | Mini Maglite
| Measurement | Measured (mm) |
|---|---|
| Bezel Diameter | 23.0 |
| Maximum Head Diameter | 24.8 |
| Length | 111.0 |
| Tail Switch Diameter | 17.8 |
| Tail Switch Proudness | 1.5-2.2 |
| Side Switch Diameter | 11.0 |
| Side Switch Proudness | 0.0 |
| MCPCB Size | u/m (probably proprietary) |
| Body Tube Diameter (internal) | 19.2 |
| Body Tube Diameter (maximum) | 23.2 |
| Body Tube Diameter (mode) | 22.2 |
| Body Tube Length | 82.7 |
| Ride Height (sticking out of pocket) | 9.6 |
| Pocket Clip Space (for pants material) | 4.0 |
| Pocket Clip Space (at mouth) | ~3 |
| Pocket Clip Width | 8-4.8 (tapered) |
| Pocket Clip Thickness | 1.0 |
| Pocket Clip Slot Width | 2.8 (x2) |
| Pocket Clip Slot Diameter | 21.0 |
| Driver Diameter | u/m |
| Included Battery Length | 68.9 |
| Included Battery Diameter | 18.2 |
Weight with included battery: 121g
User Interface
This is an excellent user interface for an EDC light with a tactical/duty flare.
| State | Action | Result |
|---|---|---|
| Off | Half press and hold | momentary Medium | momentary Turbo |
| Off | Half press and release | constant Medium | momentary Turbo |
| Off | Full press and hold | momentary Turbo | momentary strobe |
| Off | Full press and release | constant Turbo | momentary strobe |
| On (constant) | Press and release | Off |
The entire tailswitch UI is excellent and I wouldn’t change anything about it. Having access to constant or momentary, Medium, or Turbo all from the same switch with ONE press is awesome for daily use. It’s also great that you can switch it over to the more tactical mode group to get momentary-only Turbo and Strobe.
The following actions are # of presses followed by a hold (H) or a release (C). So, “1C” is one click and release. “2H” is two clicks but you hold down the last one.
| State | Action | Result |
|---|---|---|
| Off | 1C | On (mode memory, mostly*) |
| Off | 1H (short) | Moonlight (memorized) |
| Off | 1H (long) | Lockout |
| Lockout | 1C | Battery indicator glows red |
| Lockout | 1H (long) | Unlock (to Moonlight) |
| Moonlight | 1H | Low |
| Any | 3C | Strobe |
| Any | 2C | Turbo (not memorized) |
| Turbo | 2C | Return to previous mode (mostly*) |
| On | 1H | Cycle mode (low-med-high) |
What they got right (side switch UI):
- 1C on/off and 1H to cycle modes (this is the basis of most good UIs)
- Dedicated shortcuts for Moonlight, Turbo, and Strobe that provide quick access. It’s great that they are shared with most other manufacturers so there’s no learning curve when switching lights.
- 5 brightness levels (having more is cumbersome)
- Turbo isn’t memorized. It has a dedicated shortcut so it doesn’t need to be memorized and using it won’t override your memorized mode.
- 2C from Turbo returns to the previously used mode*.
- 1H from Moonlight goes to Low.
What they got wrong (side switch UI, all minor nitpicks):
- *High Mode Memory: If you turn it off High mode and then wait a few minutes it will forget the mode memory and go to Medium the next time you turn it on. I don’t like this because sometimes I want High mode to be memorized but it forgets and turns on in Medium. Medium & Low modes are memorized normally.
- Moonlight is memorized and it should not be. There’s a dedicated shortcut for Moonlight so you can always access it when needed without relying on memory. As it is, accessing moonlight will override your memorized mode.
- Lockout: 1H to escape lockout is too easily done by accident when a light is in a bag or pocket or is accessed by a small child. Lockout should require multiple clicks to unlock. A few other manufacturers are using 4 clicks to unlock and that works well. It’s worth noting that mechanical lockout (loosening the body a bit) does not work.
- No timer function: this isn’t critical, but I find the timer function useful on other models from Olight and other makers. I wish it was included in this model.
Emitter & Beam
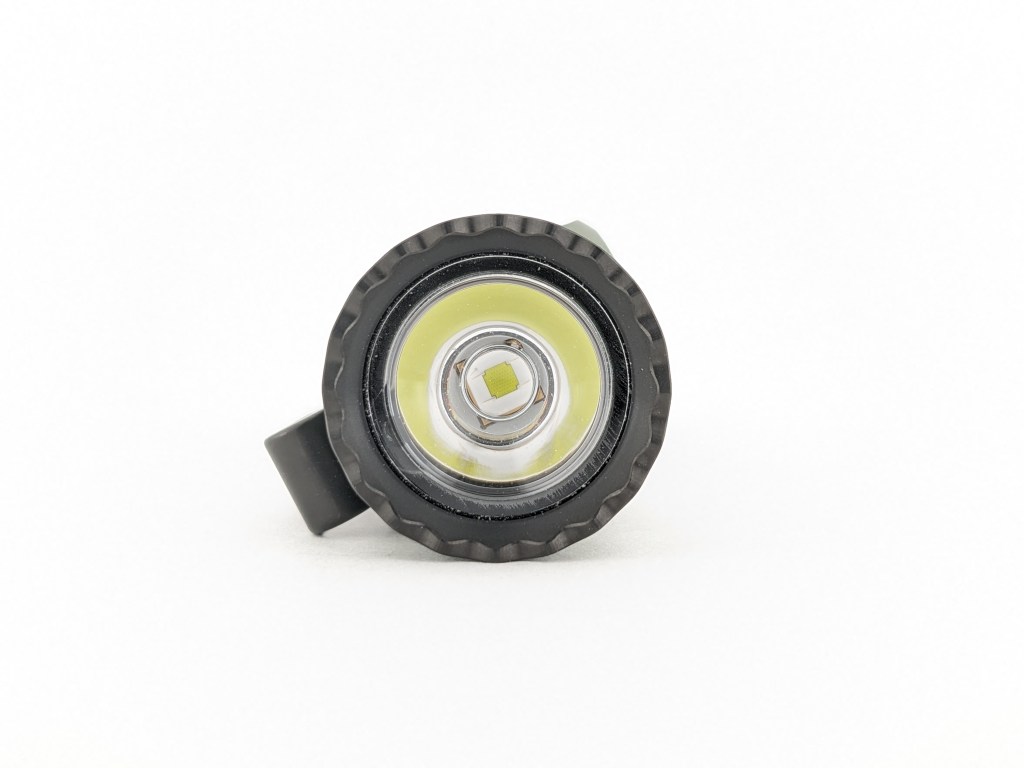
Warrior Mini 3 includes a Luminus SFT40 LED. I think that’s a great choice for this model. It’s bright, focused, and relatively simple to drive. It’s only available in cool white with standard CRI at the time of writing. It would be nice to also have a neutral-warm, high CRI LED option from the factory though. The LED sits behind a plastic TIR optic with no glass lens. That means it can get scratched or damaged more easily. I was unable to unscrew the bezel.
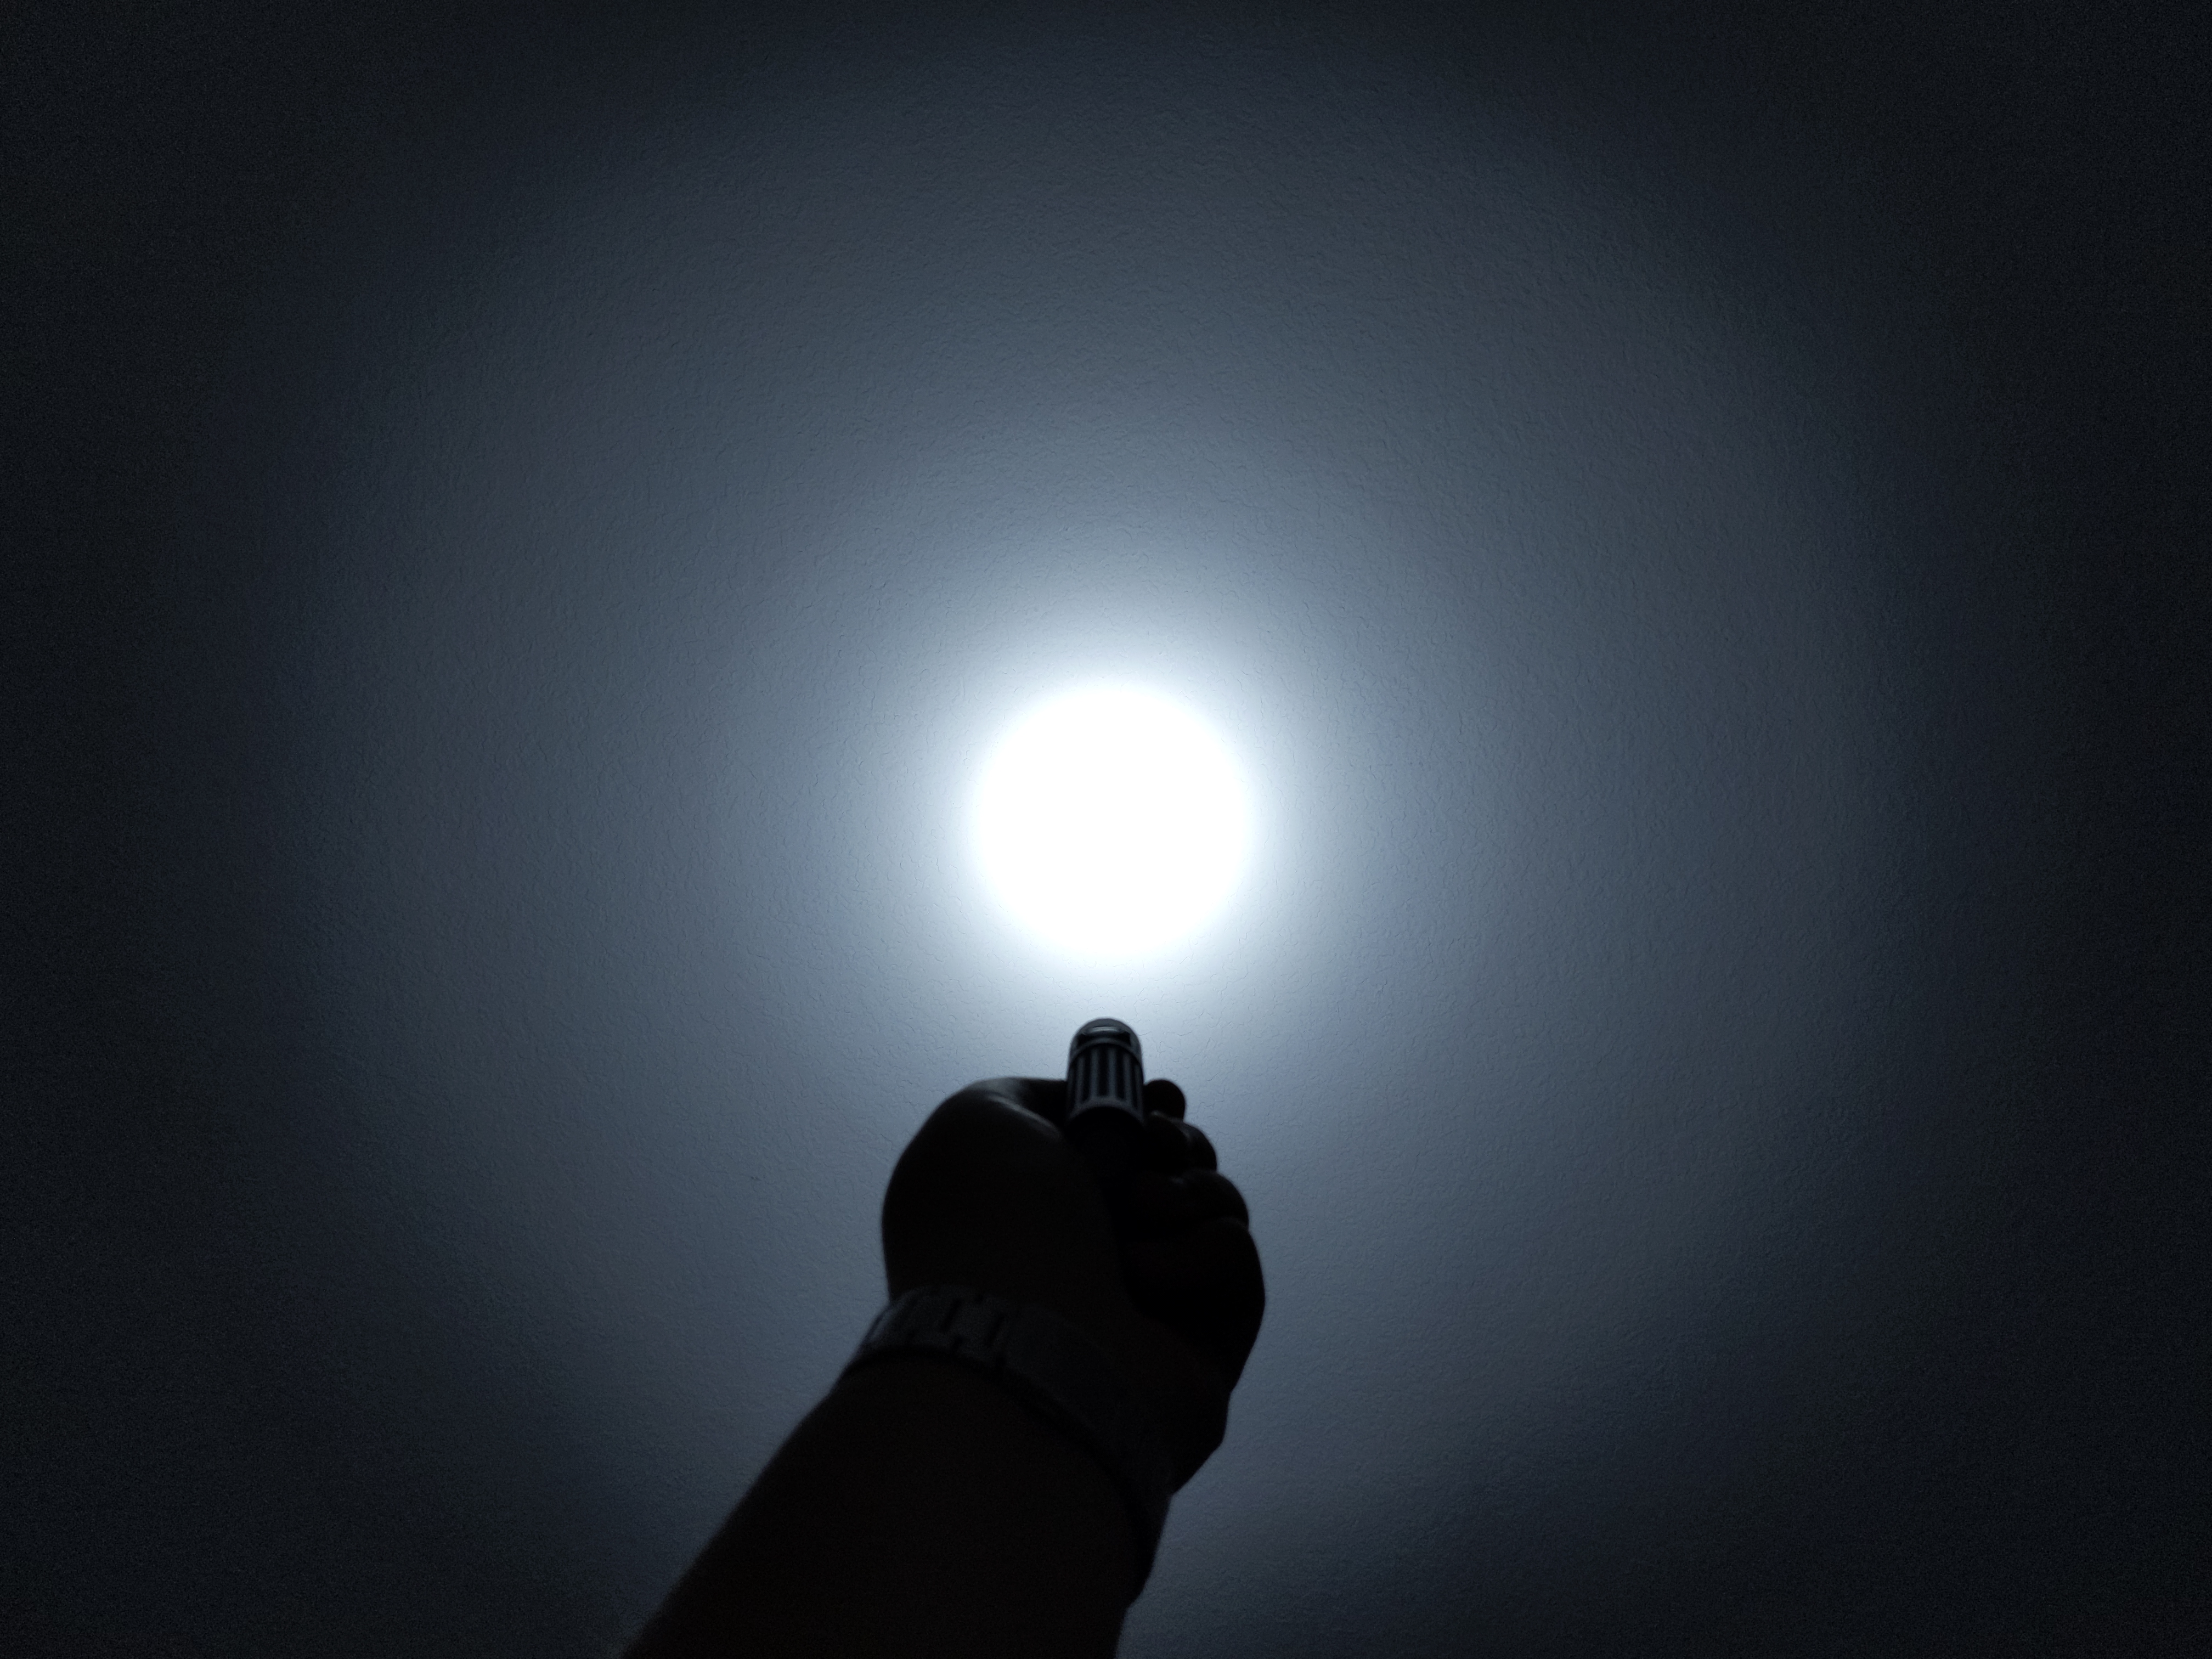
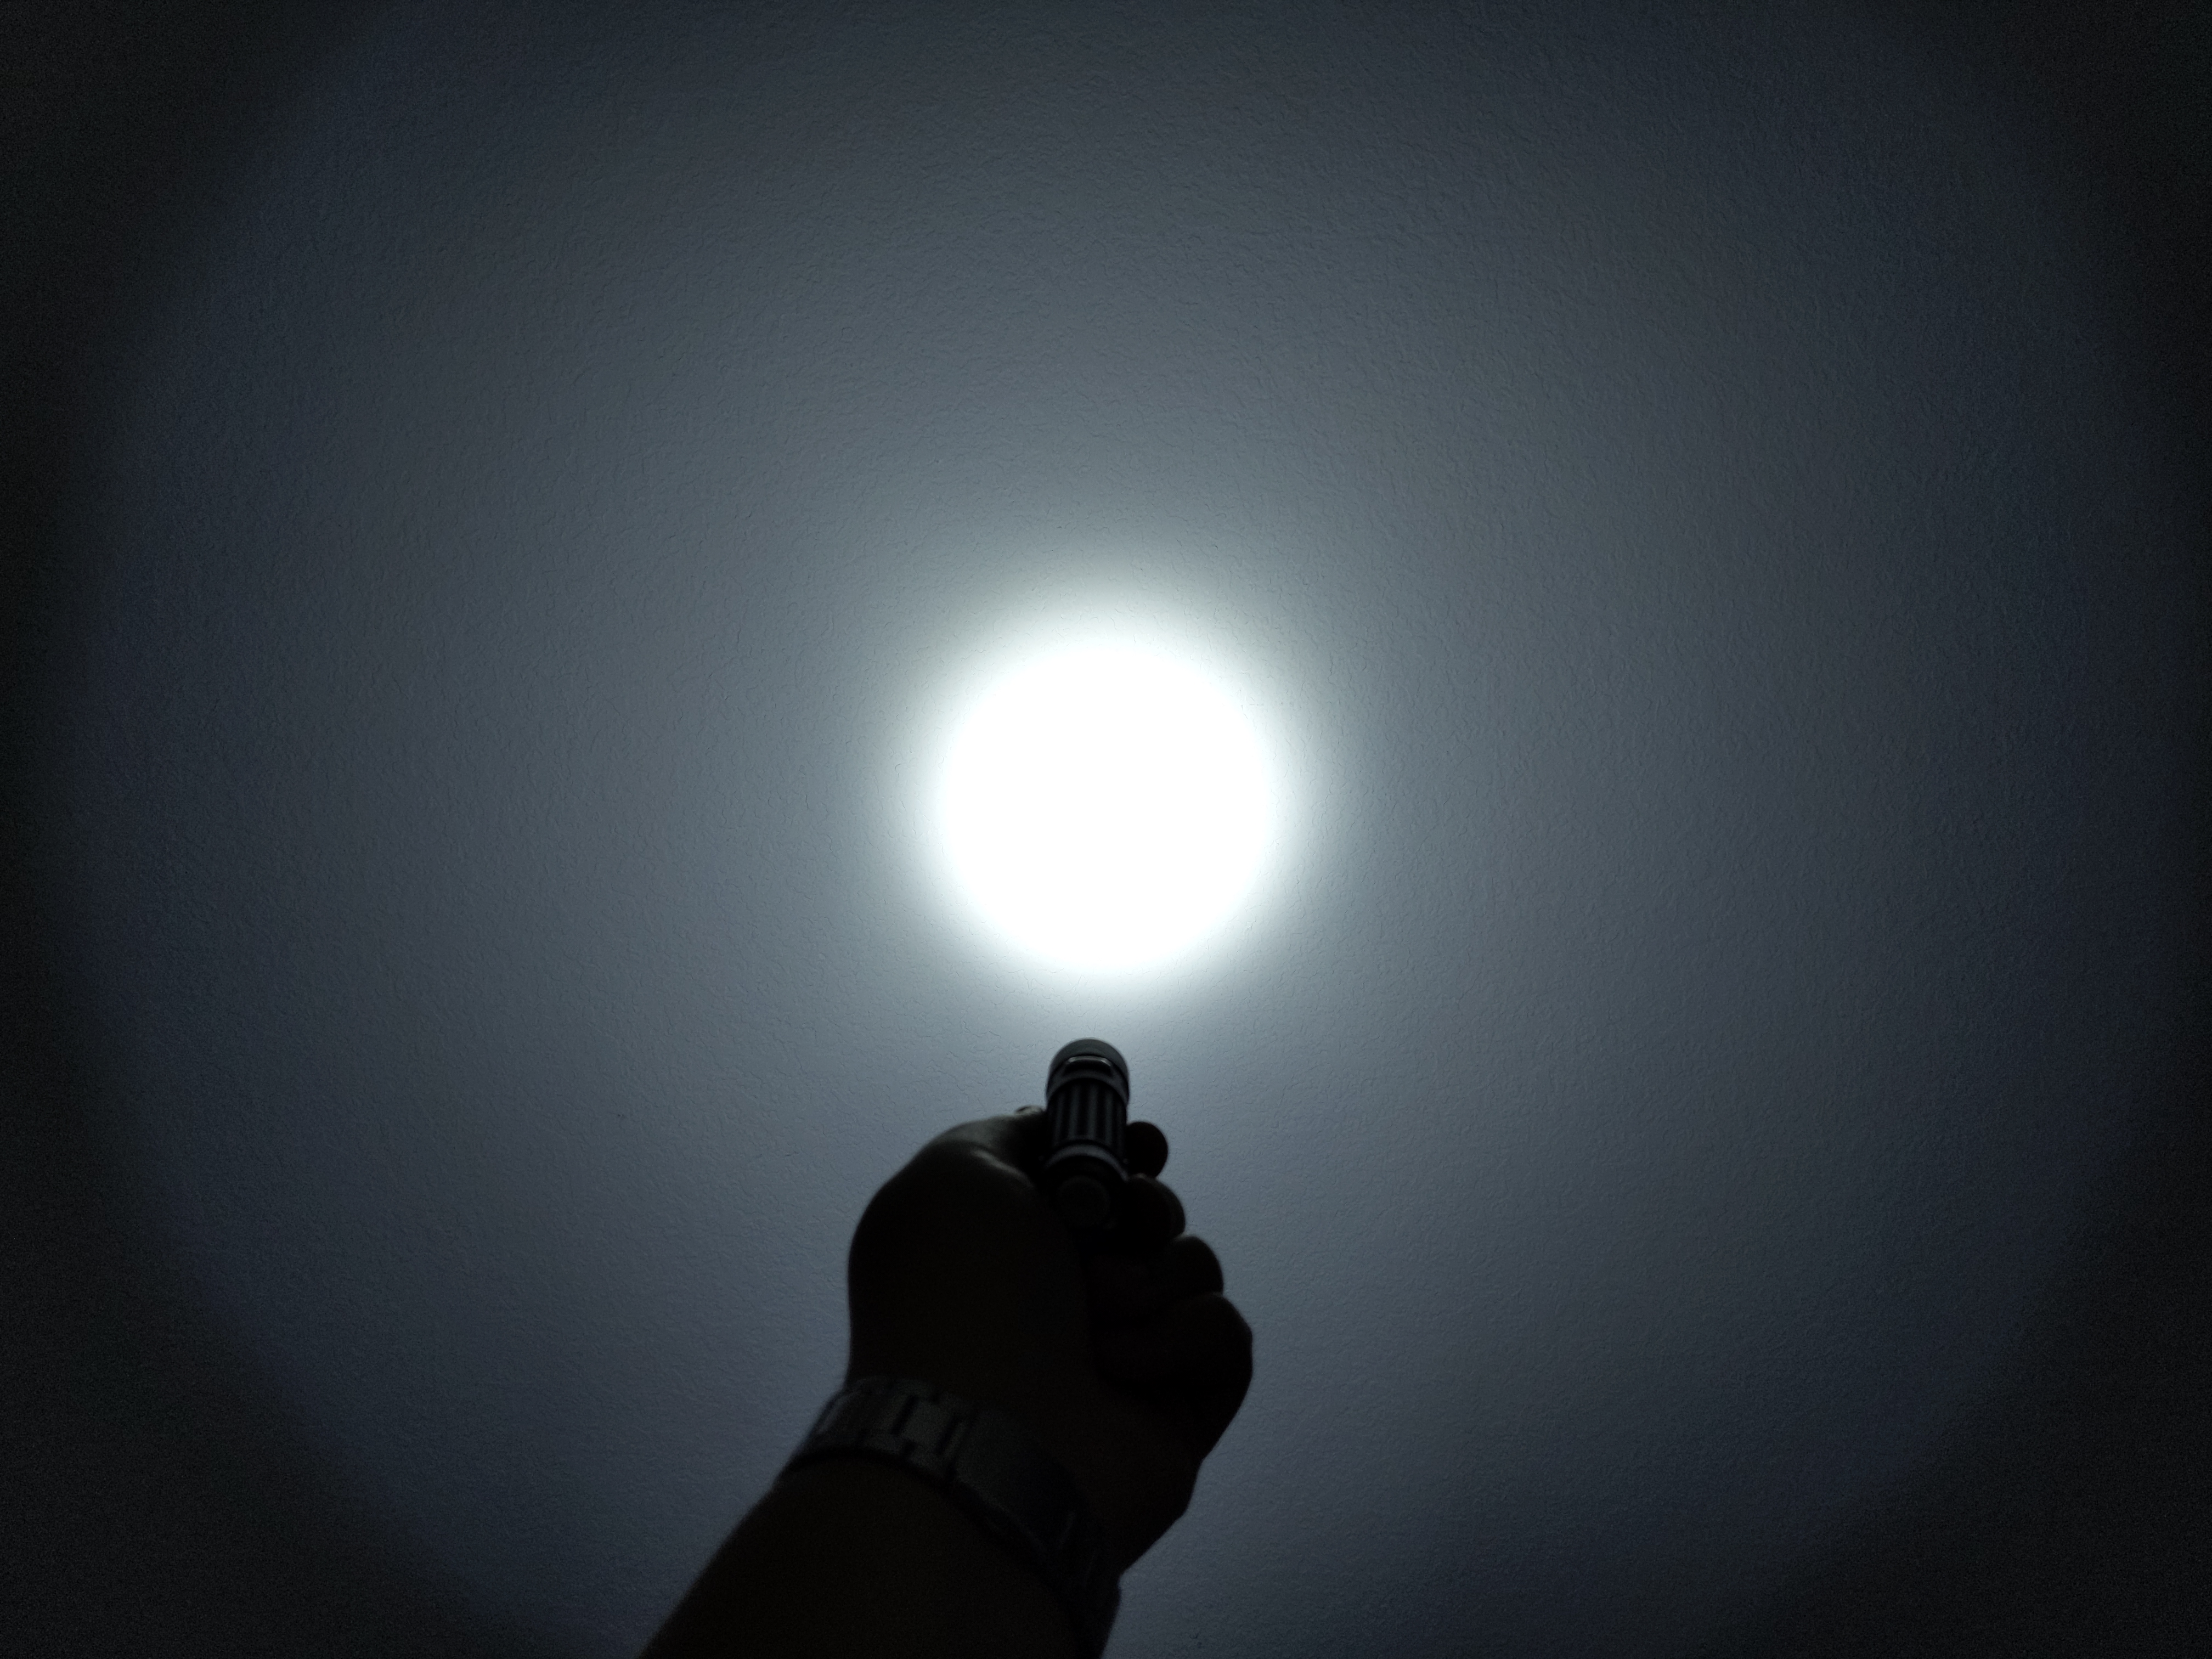
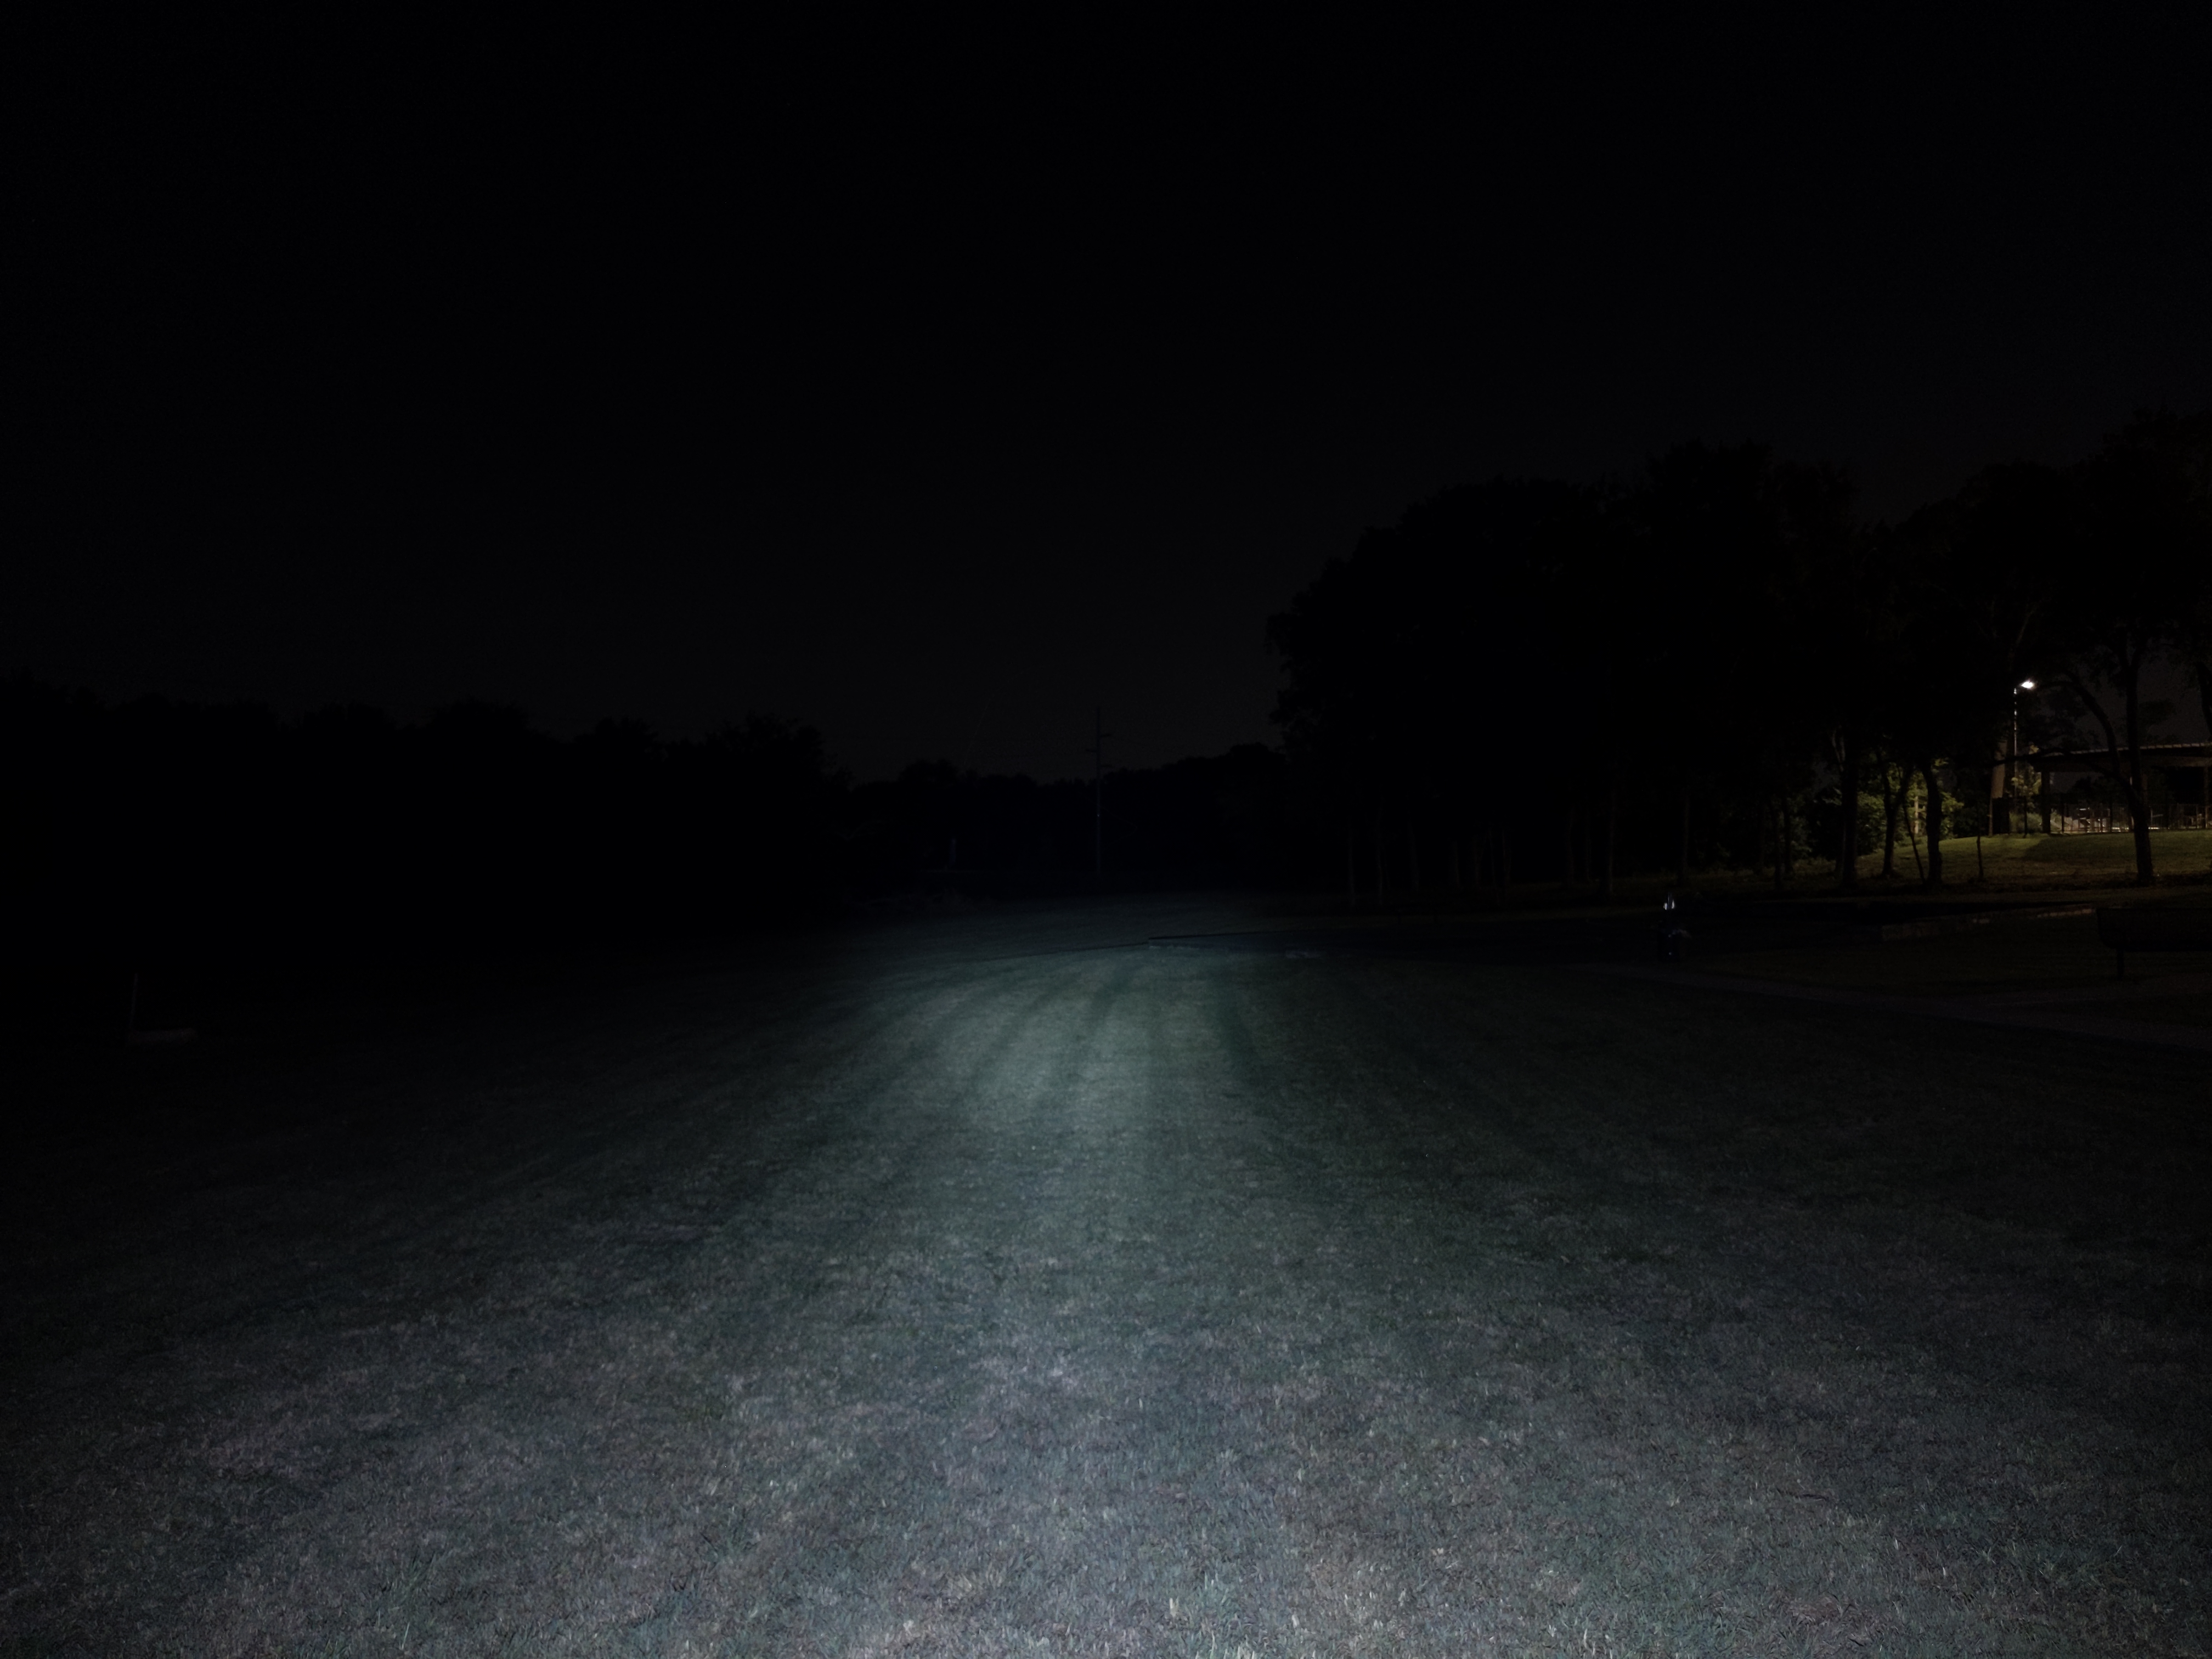
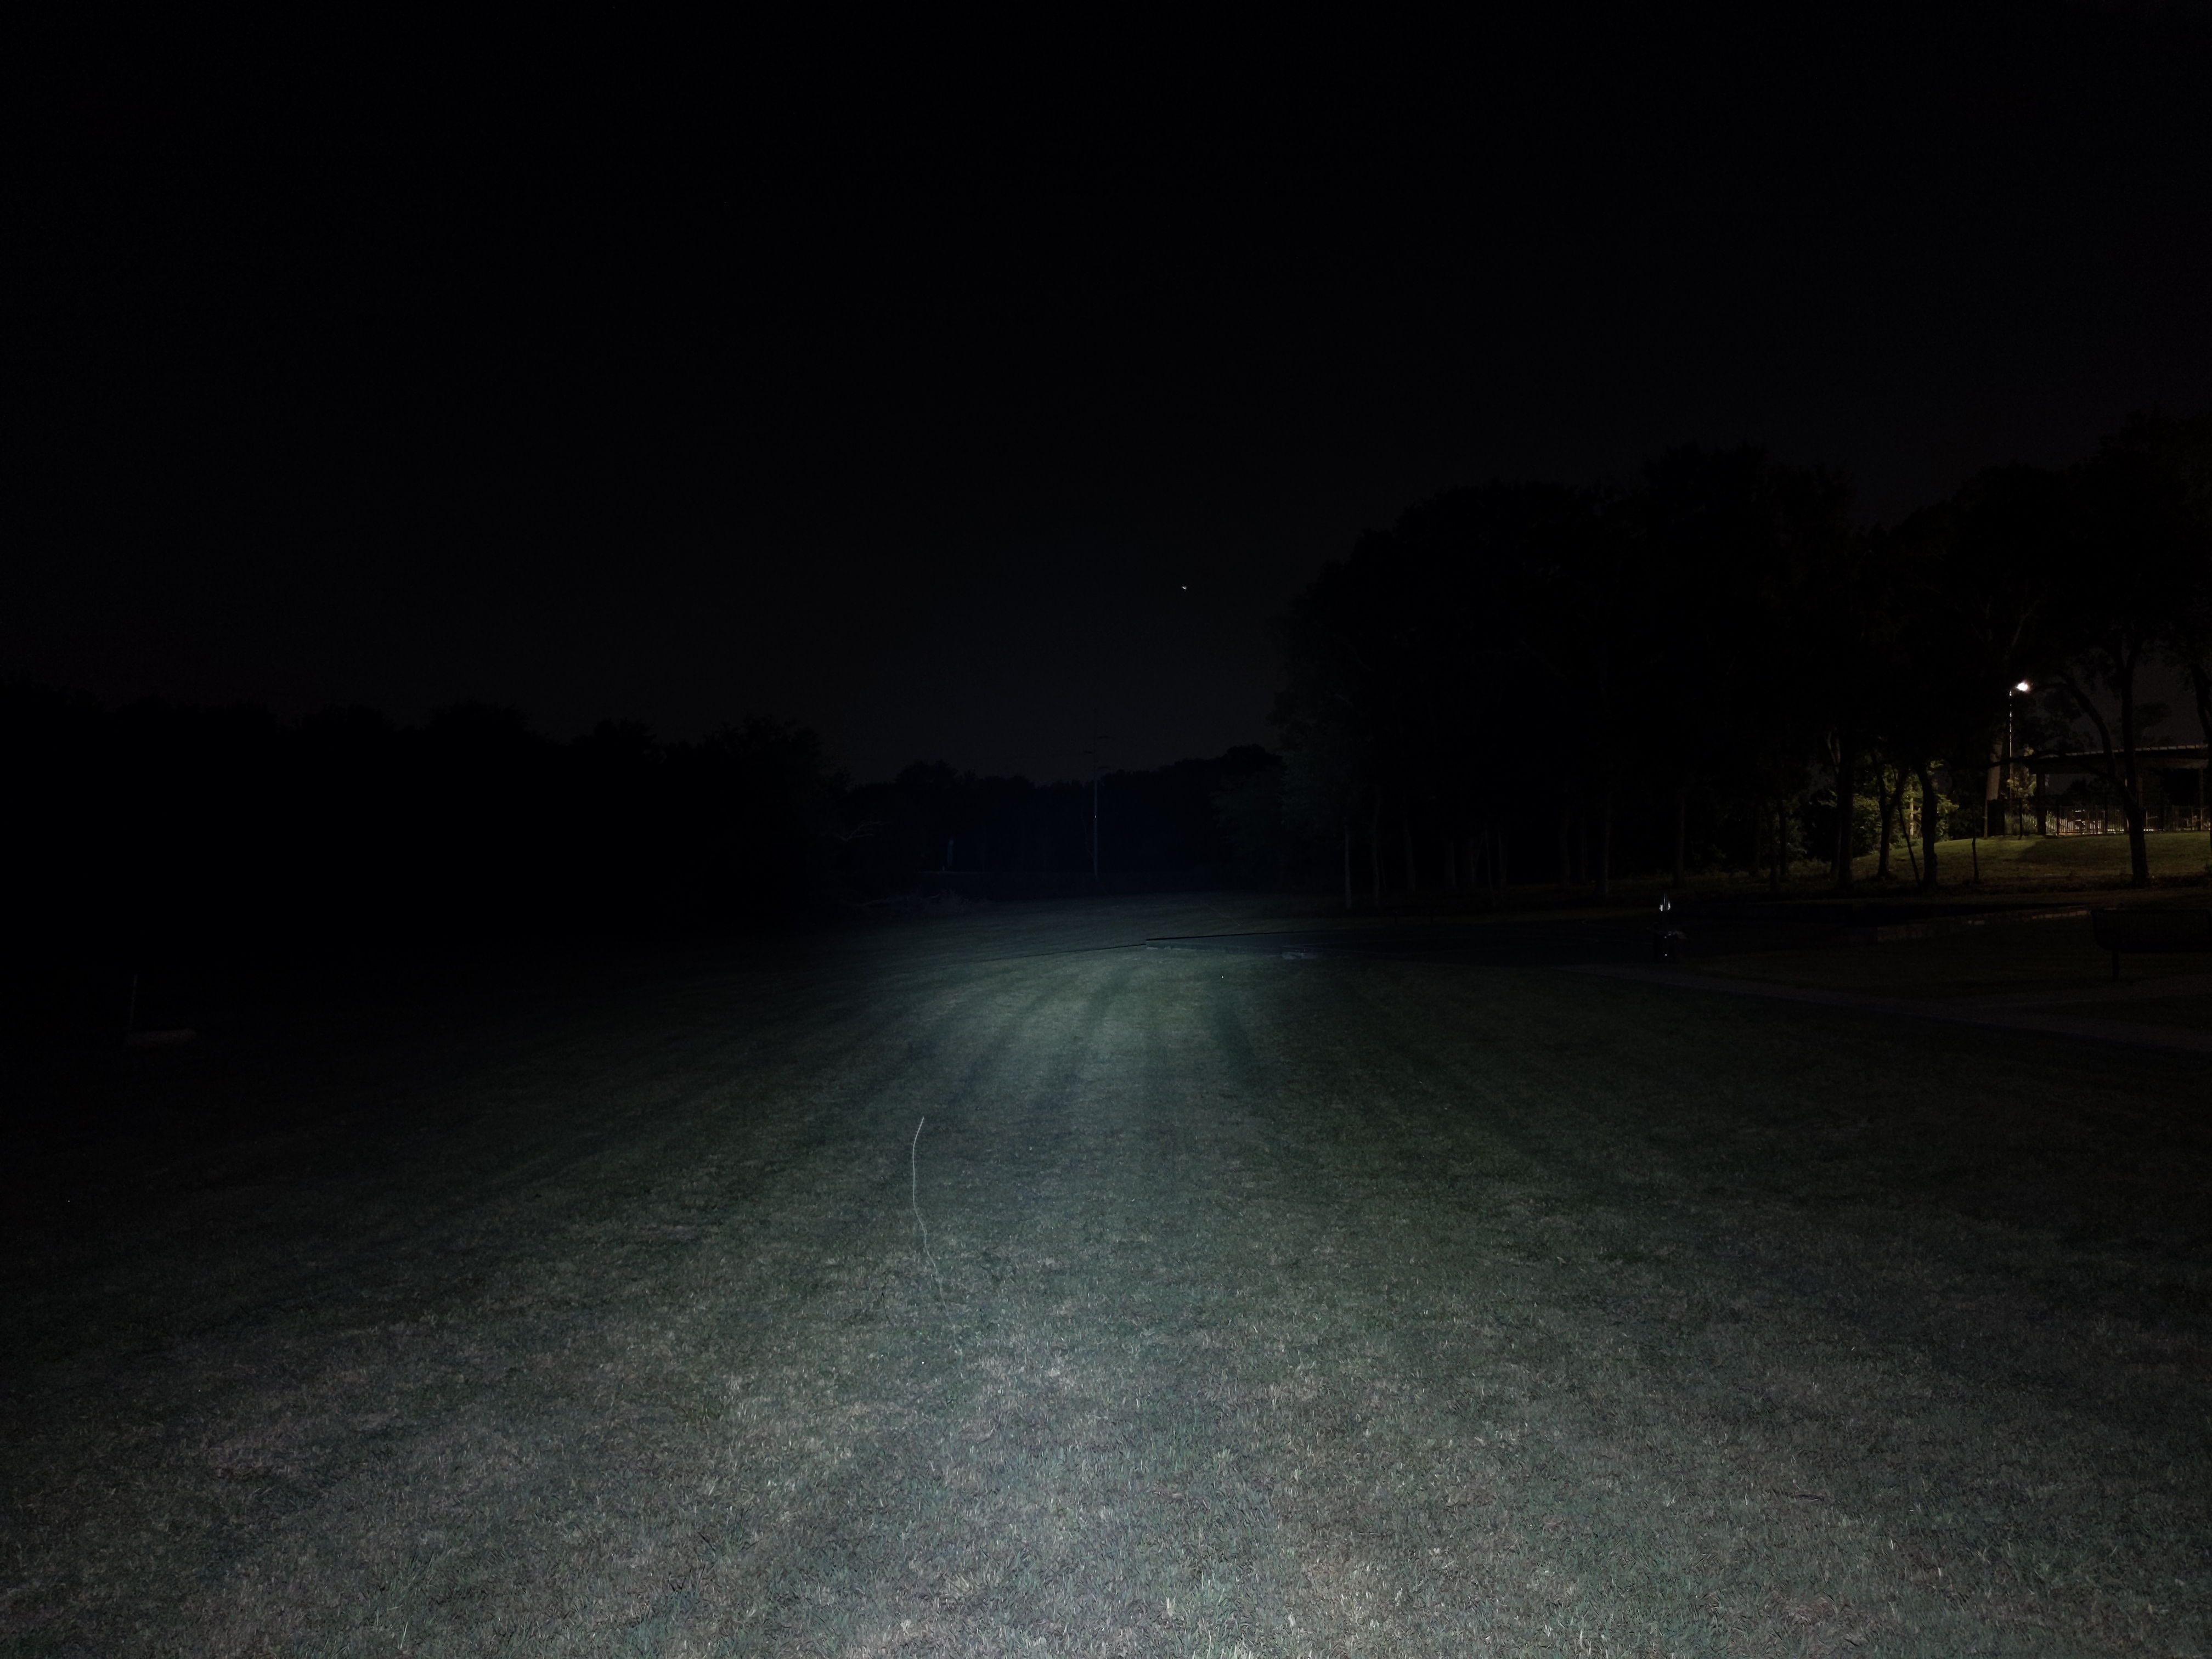
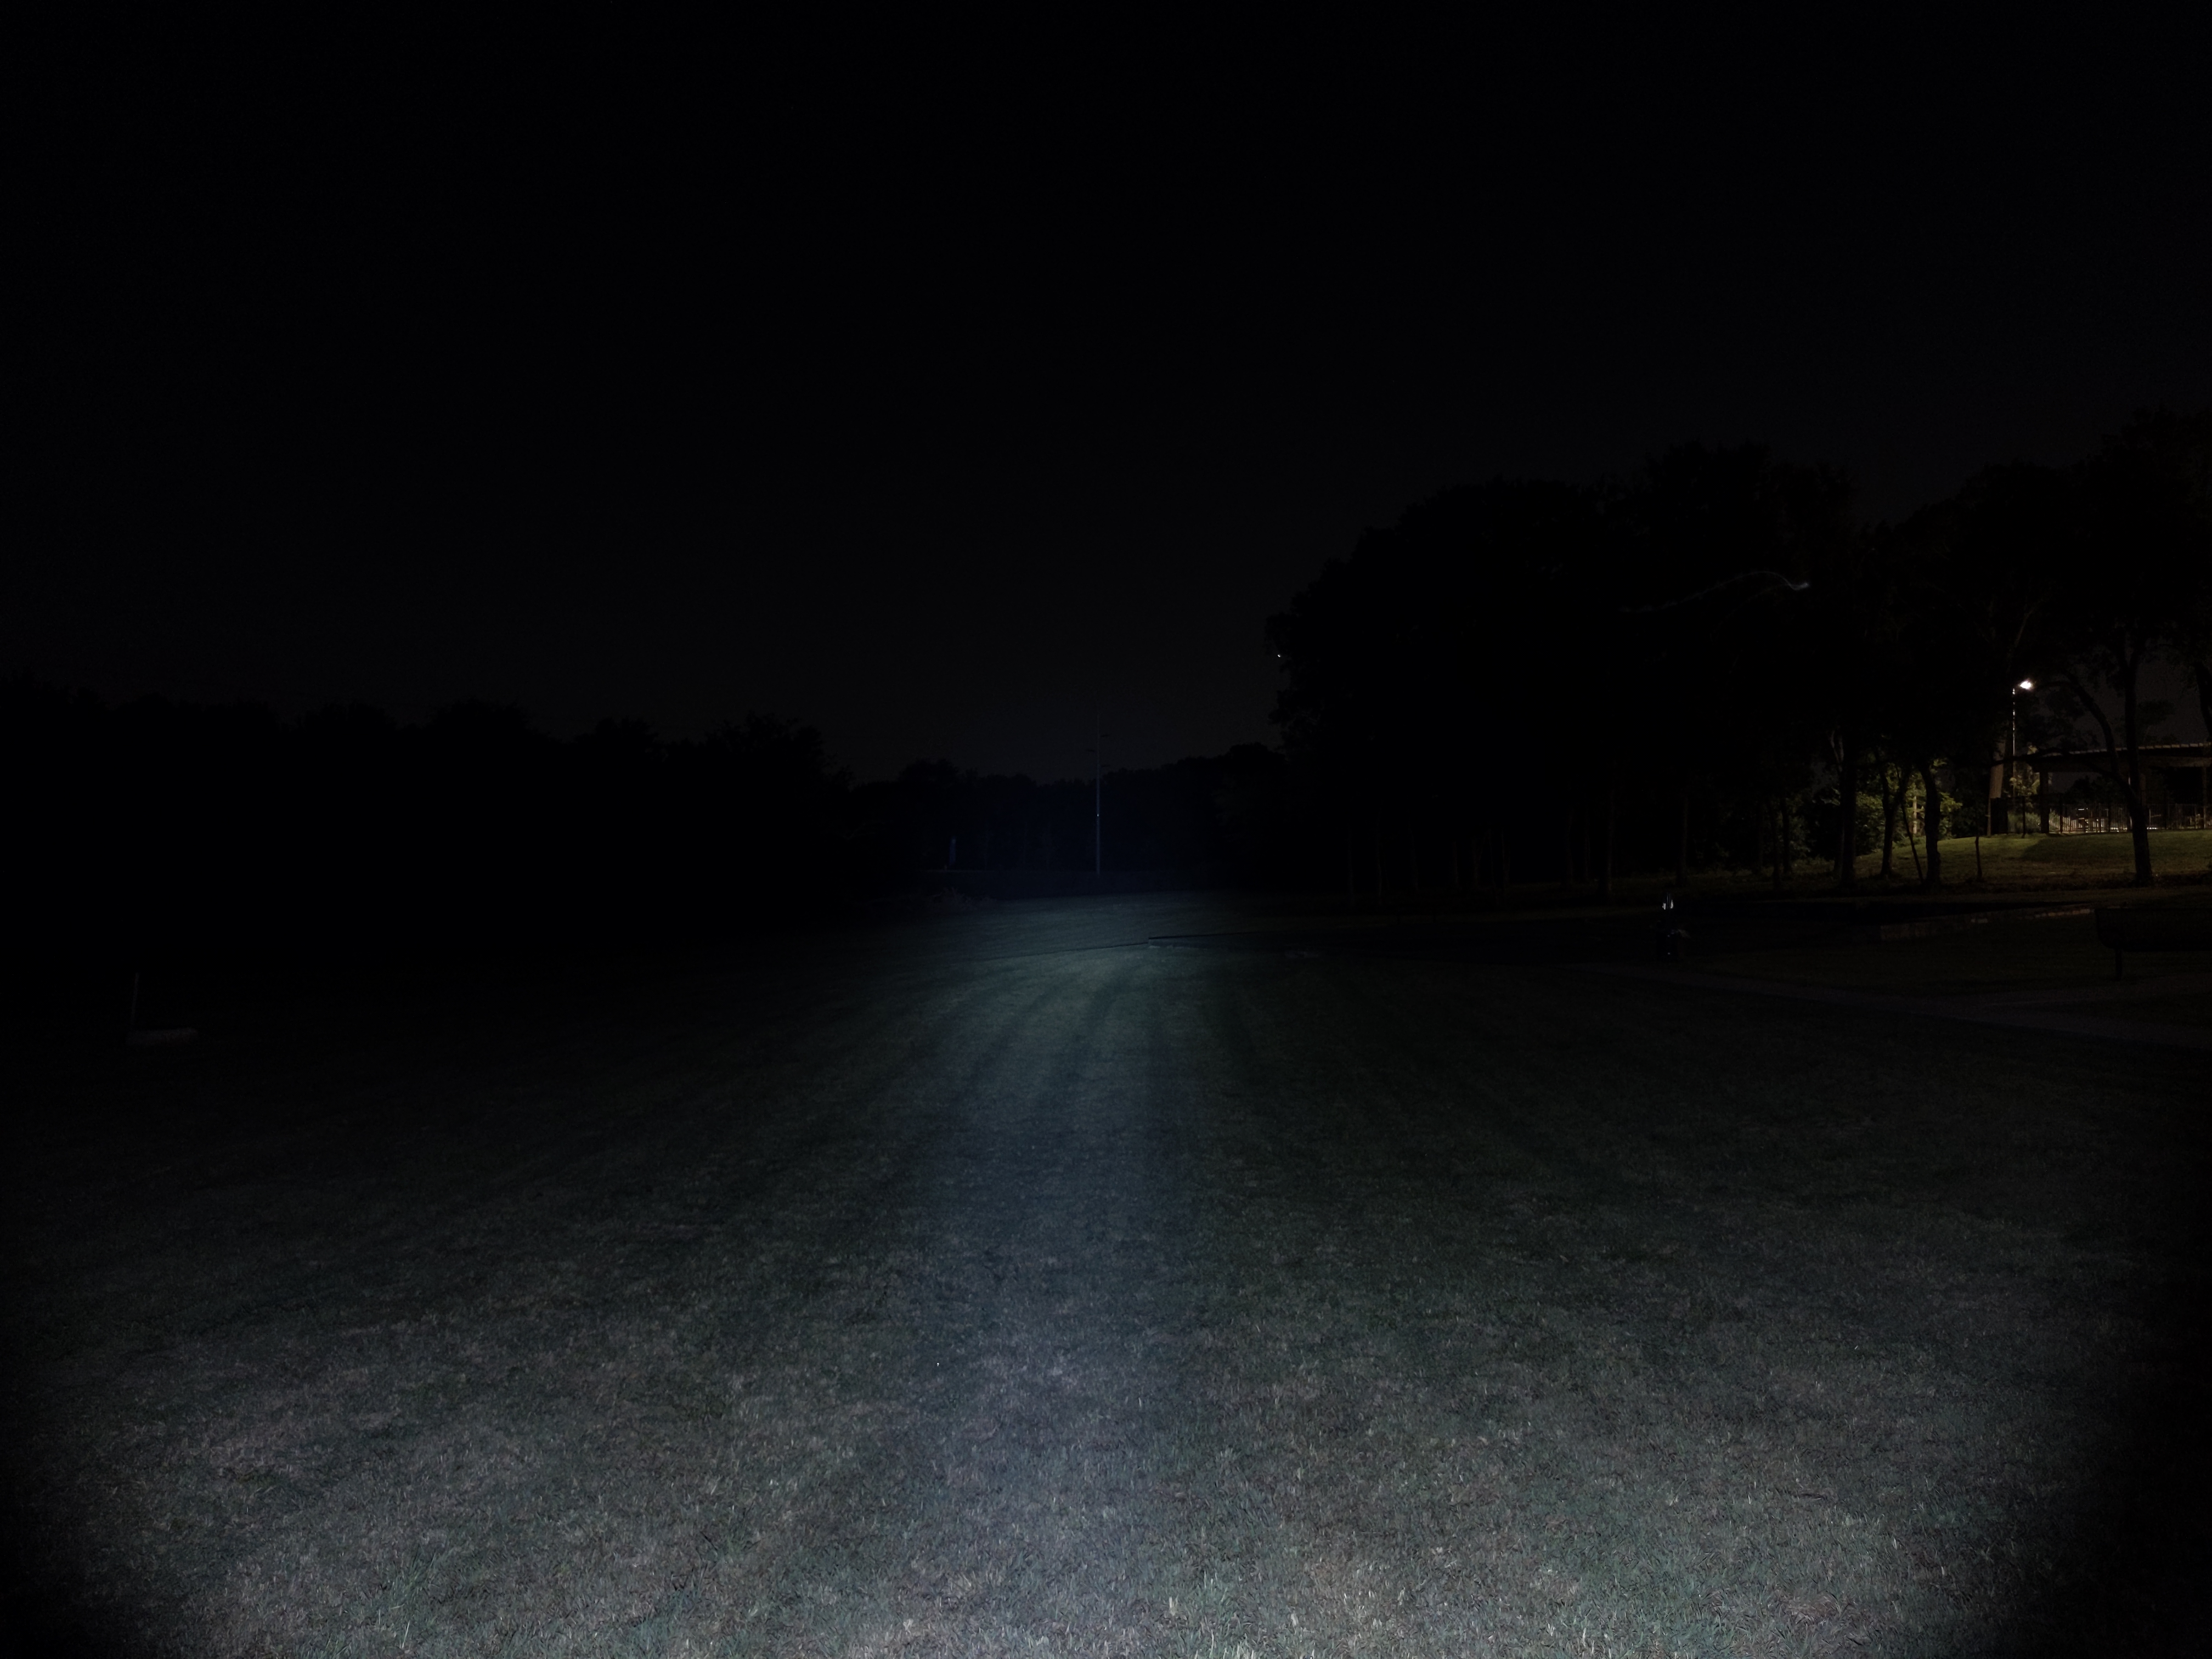
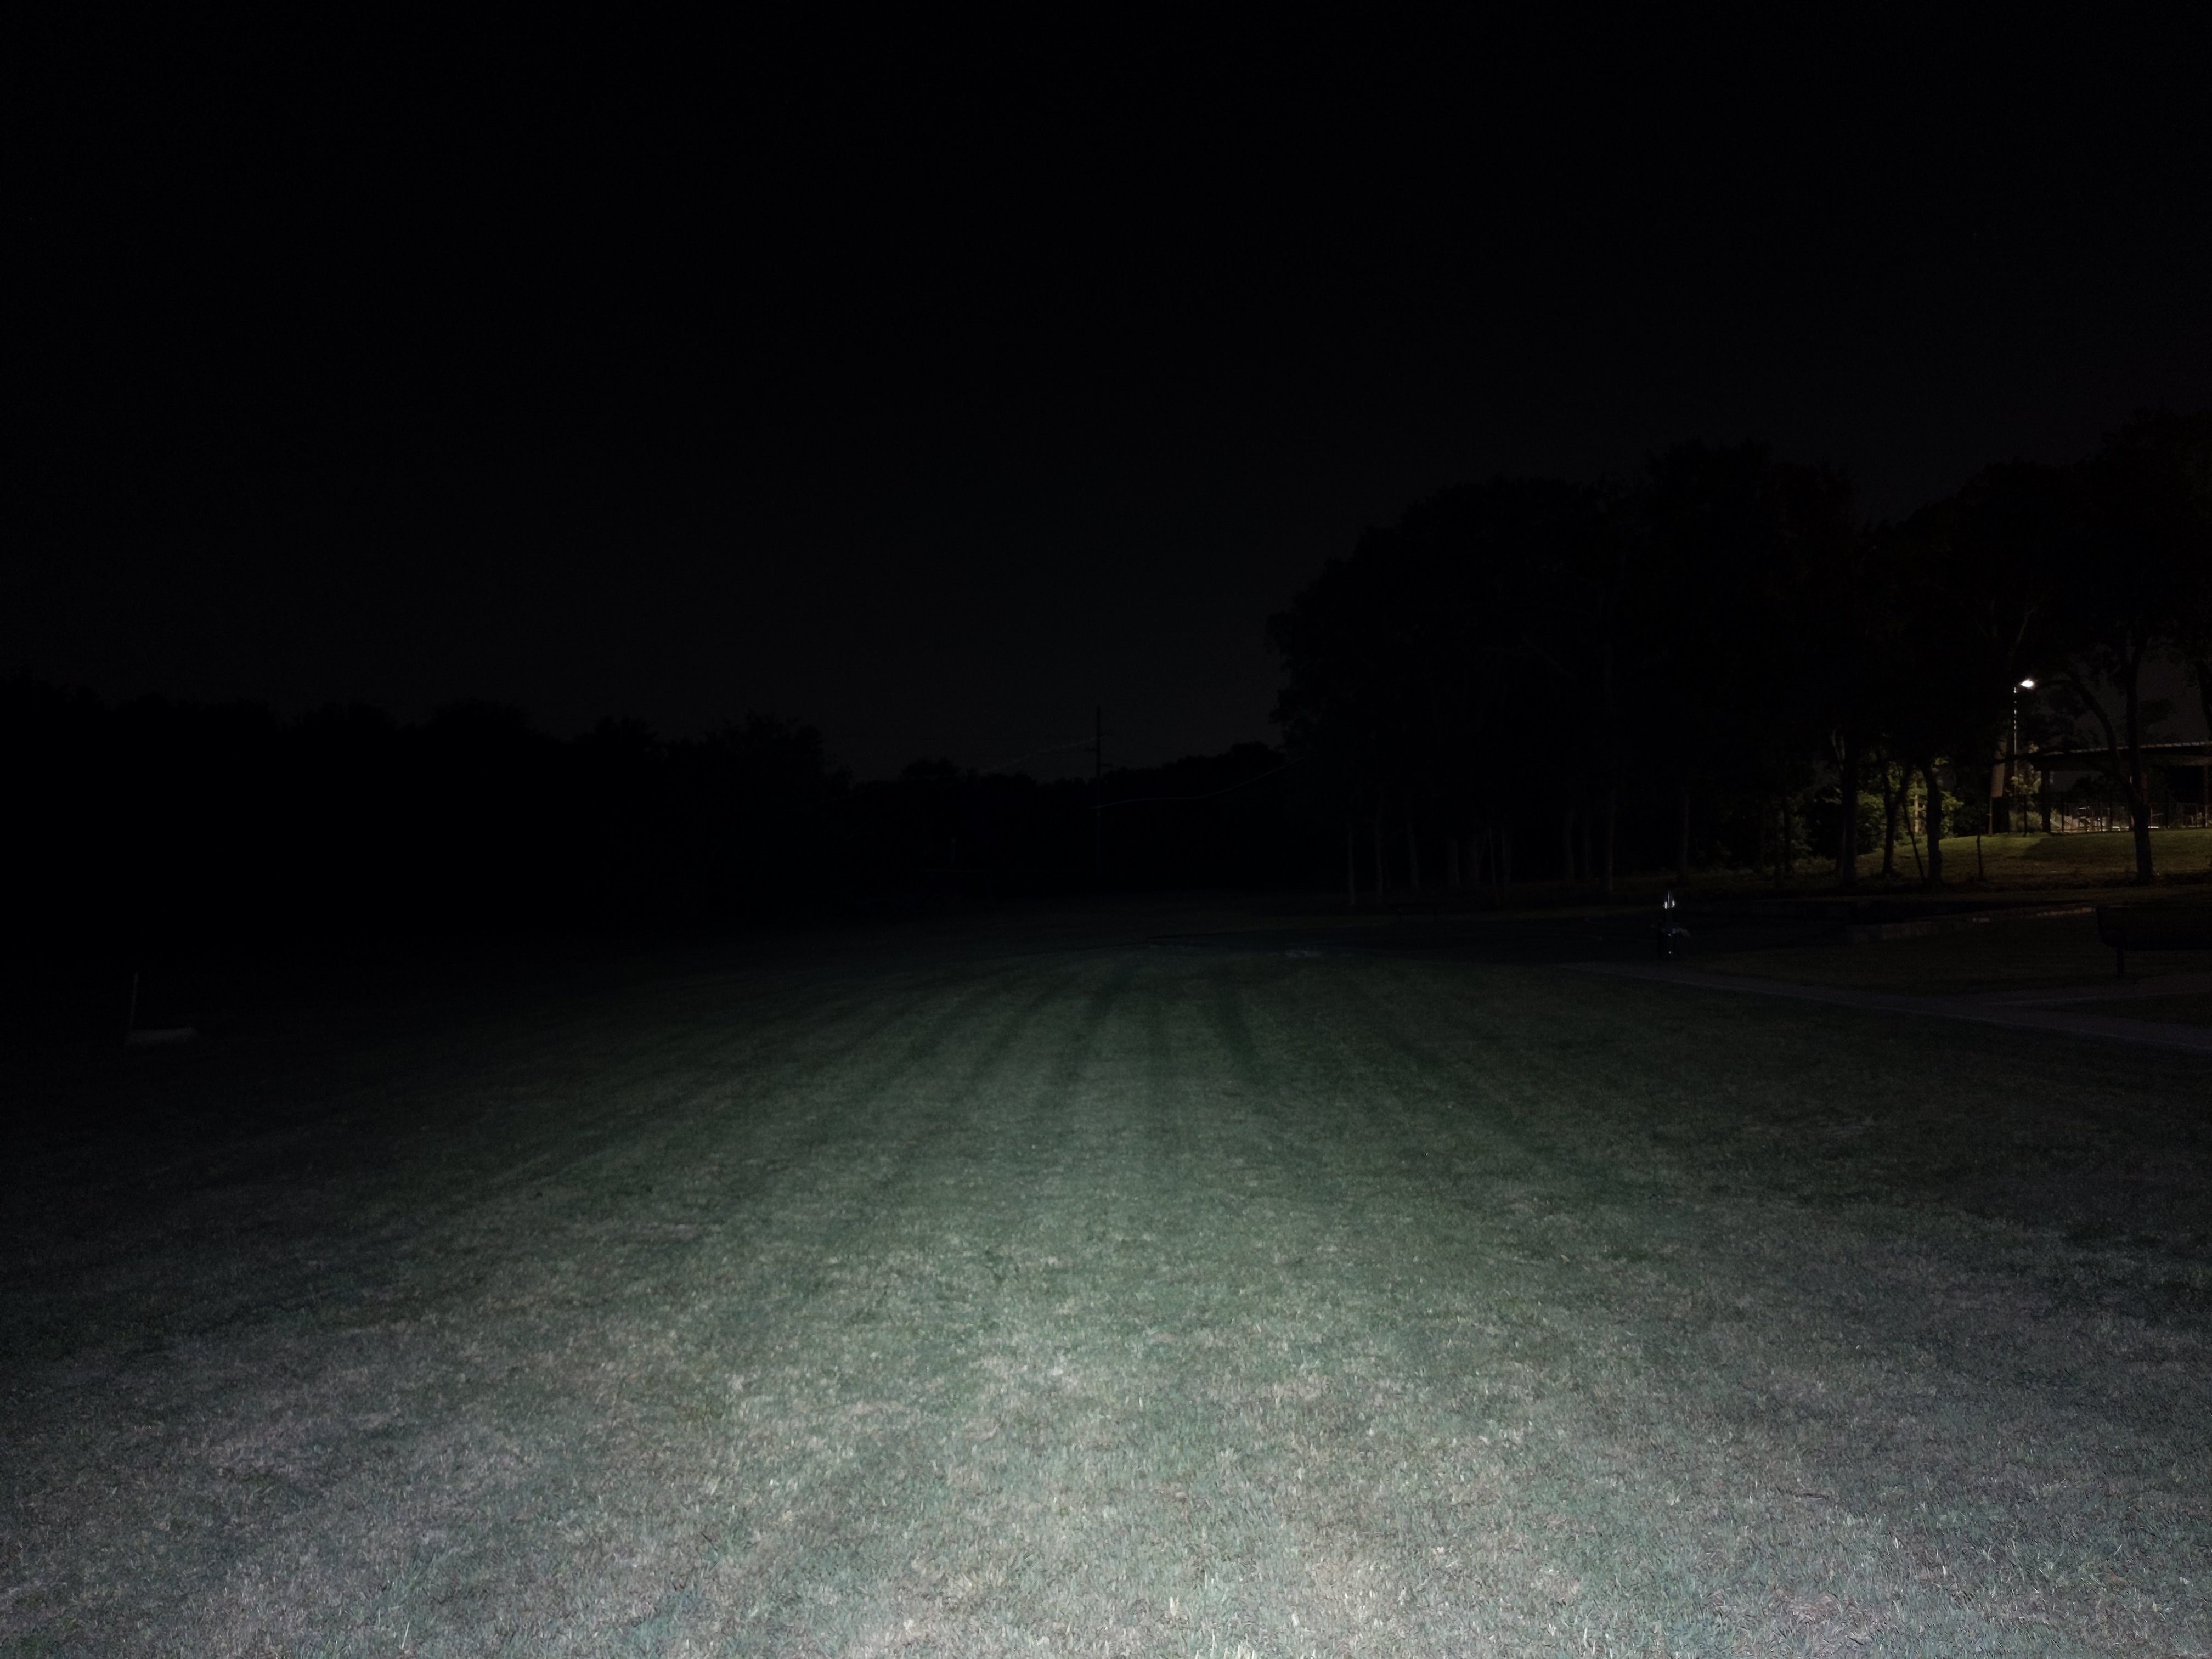
The beam is fine, but not perfect. The hotspot is relatively crisp and is narrower than you’d usually find on an EDC light. The spill is relatively narrow for a light with a TIR optic too, and it has some ringing. I was hoping for an even narrower hotspot for even better throw, and a cleaner beam overall. My Warrior Mini 2 beam is wider, but cleaner.
In the beamshots below, the green concrete corner to the right of the hotspot is 39M away and the power pole in the center is 185M away.

Mode Chart
Disclaimer: All of my measurements are taken at turn-on. Lumen measurements were taken on a Texas Ace 3.5″ Lumen Tube. A candela measurement was taken at 10 meters with an Opple Light Master III on the highest brightness, and other candela figures were calculated relative to that. CRI, CCT, & DUV data were taken for each mode from a few feet away at the center of the hotspot with the Opple Light Master and Waveform DUV Calculator. Runtime tests were performed with the Ceilingbounce app on my smartphone. All of these tests were performed with a fully charged included battery unless otherwise specified. I cannot measure moonlight directly, so moonlight readings are calculated based on the brightness relative to the next-lowest mode. None of this is professional equipment, so take all of these measurements with a grain of salt.
| Level | Lumens Advertised | Lumens Measured | Candela Advertised | Candela Measured | Throw Measured (Meters) | CRI (Ra) | Color Temp. (K) | DUV (Tint) |
| Turbo | 1750 | 1500 | 14400 | 14500 | 241 | 71 | 7800 | 0.0001 |
| High | 500 | 390 | N/A | 3770 | 123 | 68 | 6570 | 0.0058 |
| Med | 120 | 93 | N/A | 899 | 60 | 66 | 6230 | 0.0085 |
| Low | 15 | 8 | N/A | 77 | 18 | 69 | 6550 | 0.0068 |
| Moon | 0.5 | 0.1 | N/A | 1 | 2 | 70 | 6510 | 0.0066 |
Does it meet advertised specs? Candela is right on, but lumens fall about 20% short of whats advertised. That’s more than the margin of error for my equipment, but it’s not so large that you’ll notice a difference. This shouldn’t be a deal-breaker for anyone. Previous Olights I’ve tested have all met their advertised specifications so it’s disappointing to see Olight over-inflating performance specs here.
Mode Spacing: It’s ok. There’s an unusually large jump between High and Turbo. I would like to have seen High and Medium modes be brighter to shrink that gap. That would also allow it to have a higher sustained output level.
Runtime
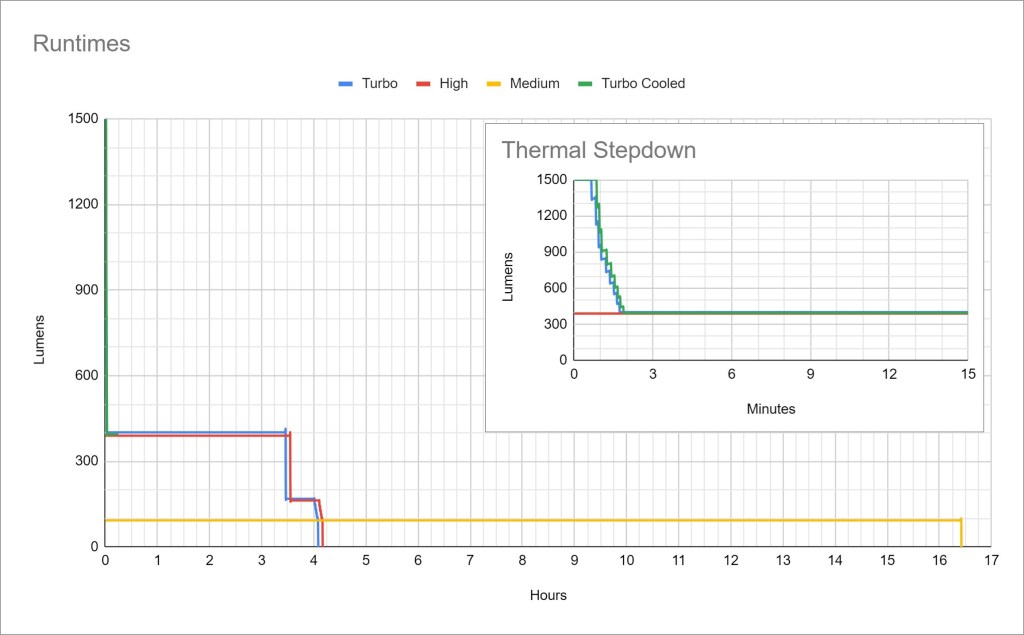
Performance: Turbo lasts 1 minute before a timed stepdown to High mode. High mode is fairly conservative at 400 lumens and only gets warm, but it lasts a substantial 3.5-4rs. Medium lasts over 16 hours and is also extremely stable.
Thermal regulation: There is no active thermal regulation here. There is only a timed step-down at 1 minute from Turbo mode down to High. That means the light will perform very consistently but may also overheat in hot weather or leave some performance on the table in cold weather.
Driver & Regulation
Olight tends to use either Buck or Boost drivers, which are the best kinds of drivers. They typically provide the best efficiency and regulation. Since this light’s battery voltage is higher than the LED voltage, it’s probably using a Buck driver.
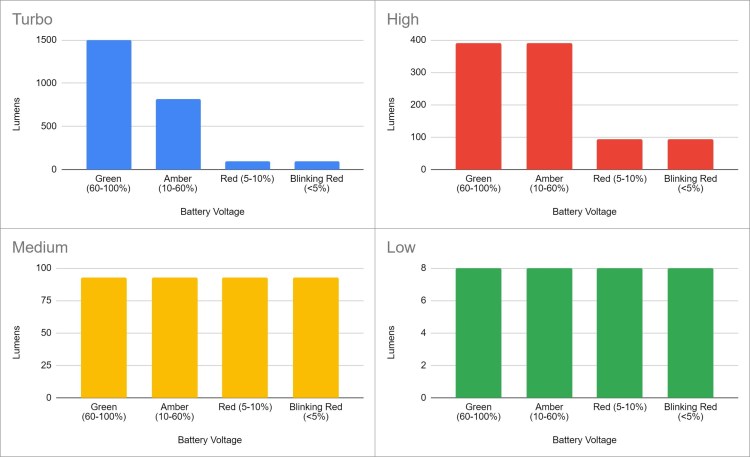
Regulation here is fairly good. Turbo and High modes are both affected by battery voltage but are only significantly affected when the battery is near empty (<10% remaining).
Note: All regulation measurements are taken at turn-on so they do not reflect any thermal or low voltage stepdowns that may occur. A value of 0 indicates low voltage shutoff immediately upon activation.
PWM: No PWM is visible to my eyes nor audible to my ears, but my phone camera was able to pick up some flickering on the middle 3 modes.
Parasitic Drain: I was unable to measure due to the proprietary battery.
Switch
Warrior Mini 3 has two switches that are totally independent; one on the side and one on the tail.
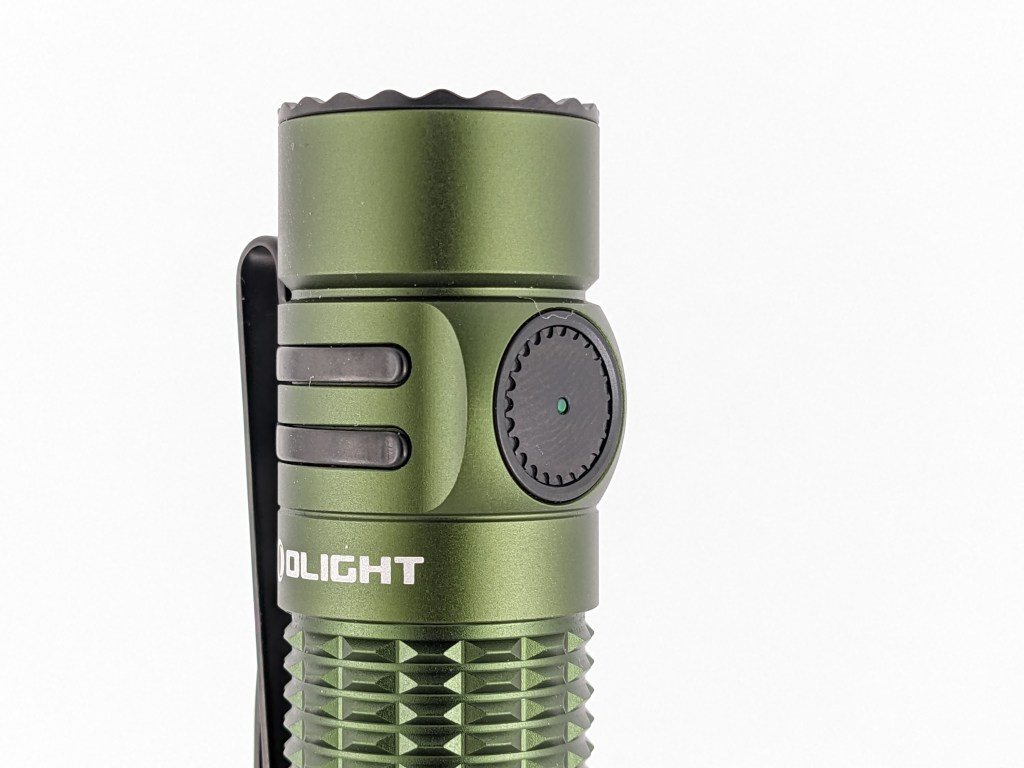
There’s a side switch that works like most other Olights. You can use it to turn the light on and off and change modes. Unlike previous versions, this switch has a hard boot. Instead of silicone, this is made of plastic or metal. There’s an LED right in the center that glows to indicate battery status.
- Green (60-100%)
- Amber (10-60%)
- Red (5-10%)
- Blinking Red (0-5%)
I don’t like those steps very much. I’d much rather have steps in 25% increments (100-75%, 75-50%, 50-25%, 25-0%). Even better would be a bank of dedicated battery indicator LED’s like the ones found on Warrior 3S. Perhaps that’s something they can add in the next version.
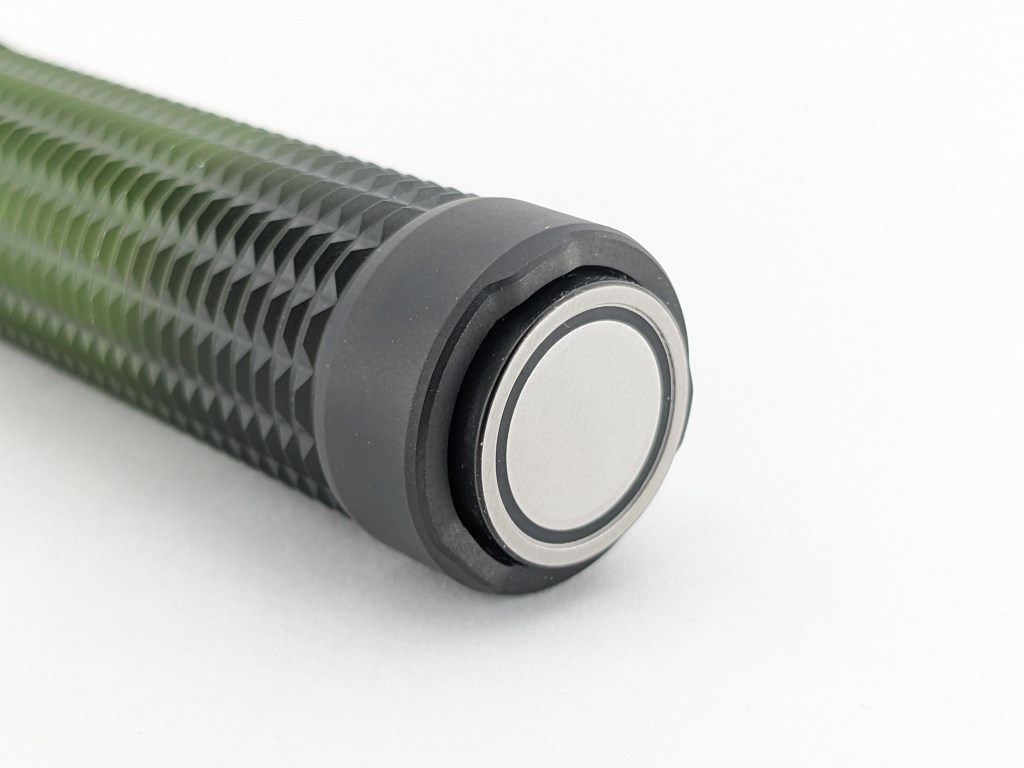
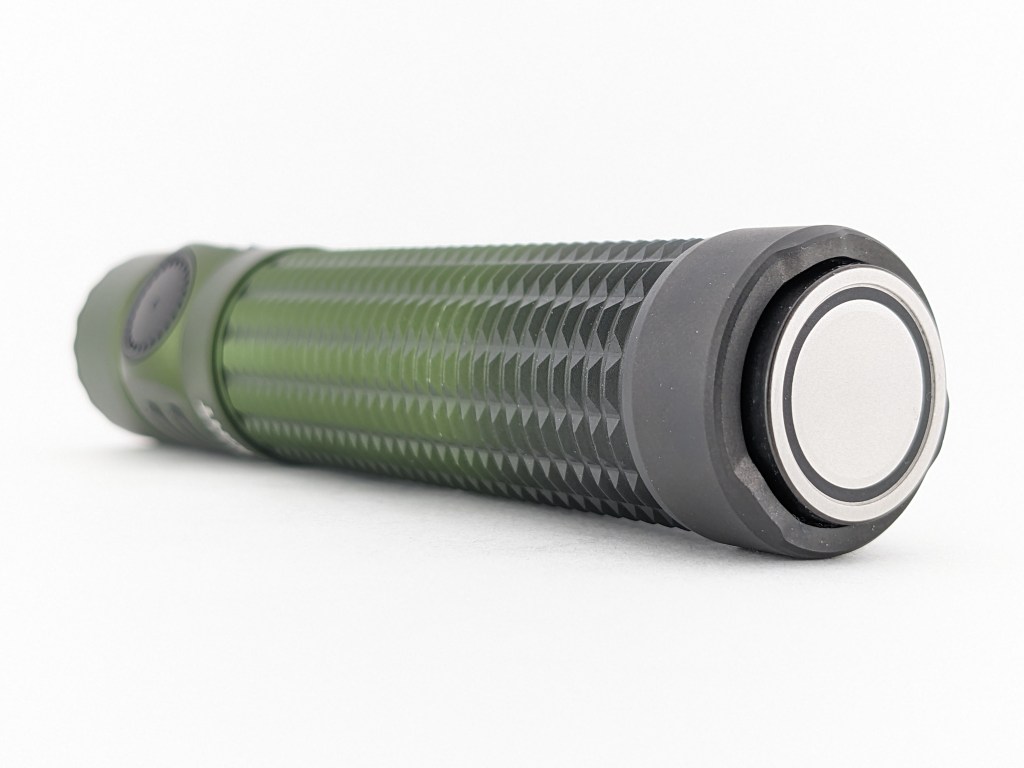
The tail switch has been redesigned for the first time in several generations of Warrior series lights. Previous models had the outer charging contacts sticking up slightly past the switch. This new switch has all the charging contacts on one almost flat switch that sticks out past the rest of the tail. That makes it a lot easier to clean off metal shavings or other magnetic debris. The switch doesn’t feel as nice as previous generations though, and it has more wobble.
Normally, having a proud tailswitch prevents tailstanding, but this switch is wide and slightly concave so the light can tailtand just on the switch. It’s plenty stable, and the switch is still a magnet so you can still stick the light to ferrous surfaces. It’s even strong enough to hold up the light on a vertical surface, but just barely.
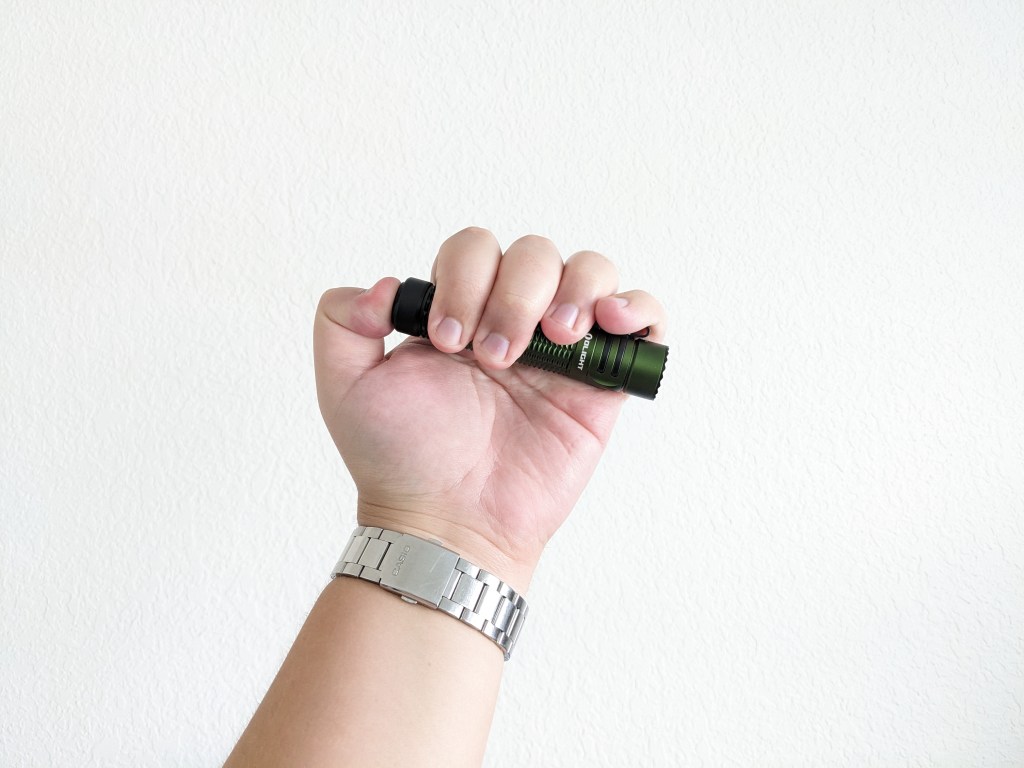
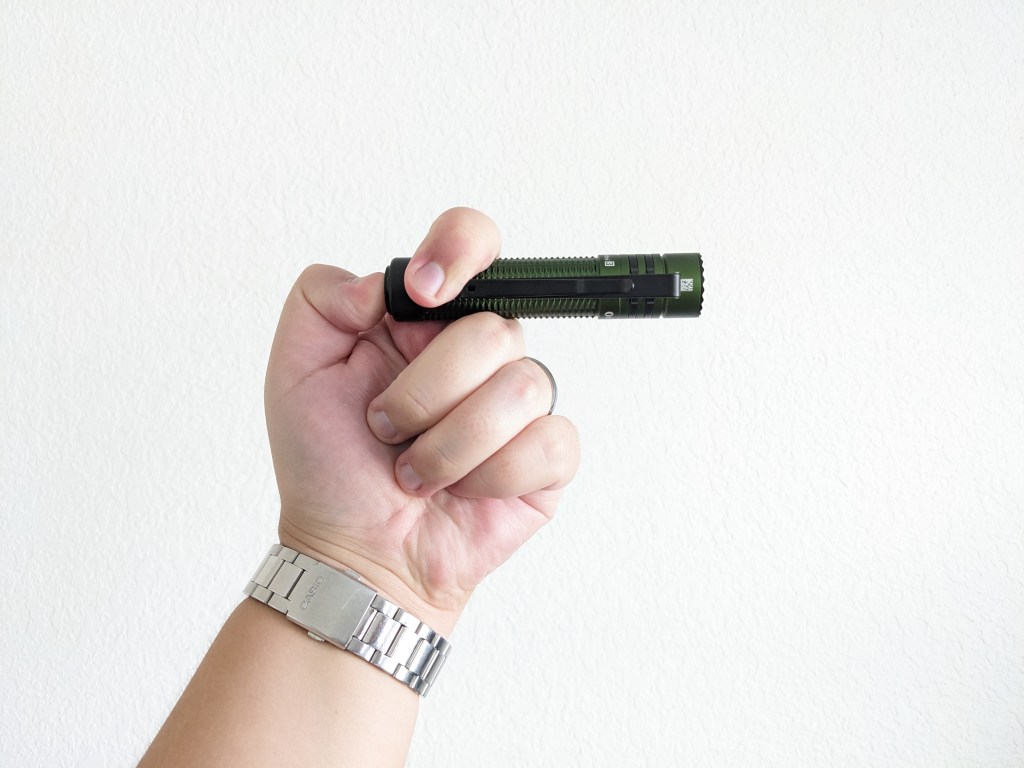
Carry & Ergonomics
The ergonomics are fairly good. It’s just a little bit too short for me to comfortably use a reverse grip with my large hands, but a cigar grip and forward grip are both very comfortable. There are no hotspots or sharp edges, and the milling on the body tube provides plenty of grip.

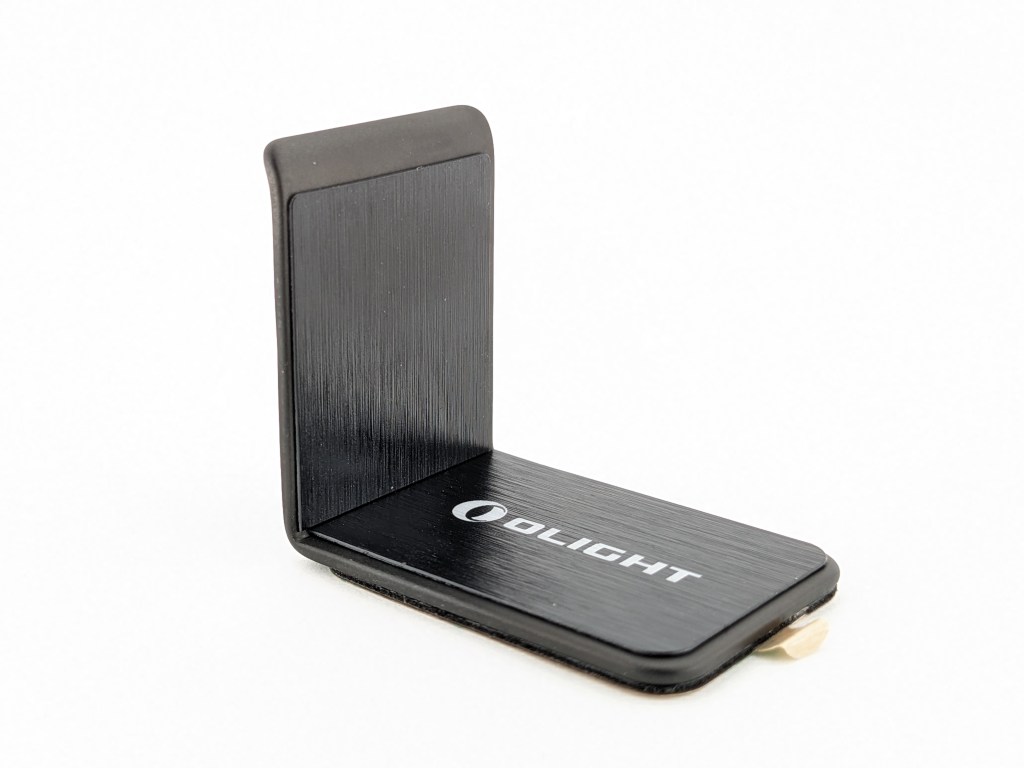
I’m tremendously disappointed by this pocket clip because it can’t attach to the tail. That means you can’t carry the light with the bezel facing down, which I strongly prefer. Doing so with this clip leaves too much of the light sticking out, and it’s hard to get your pocket edge into the clip correctly. The clip already lets you attach the light to a hat, so the extra loop back just means it will snag on seatbelts and bend/break more often. That’s happened to me twice with my Warrior 3S. Warrior Mini 2 had a great clip that could attach to the head or tail, but Olight chose to use this new, worse design on Warrior Mini 3.
Batteries & Charging
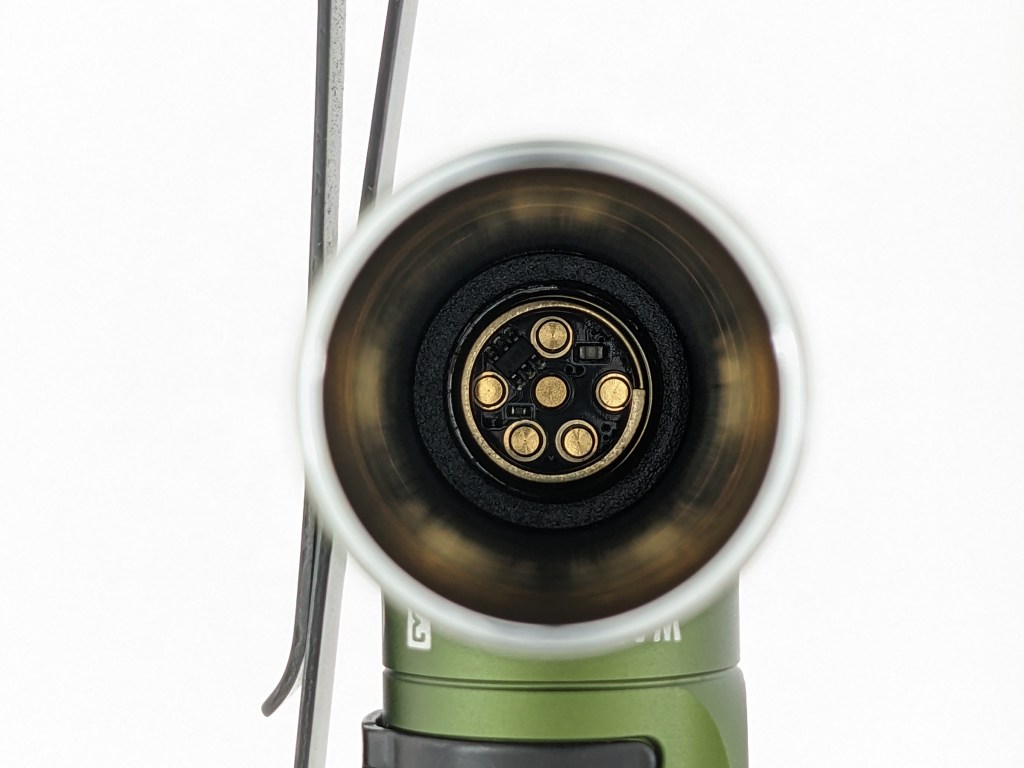
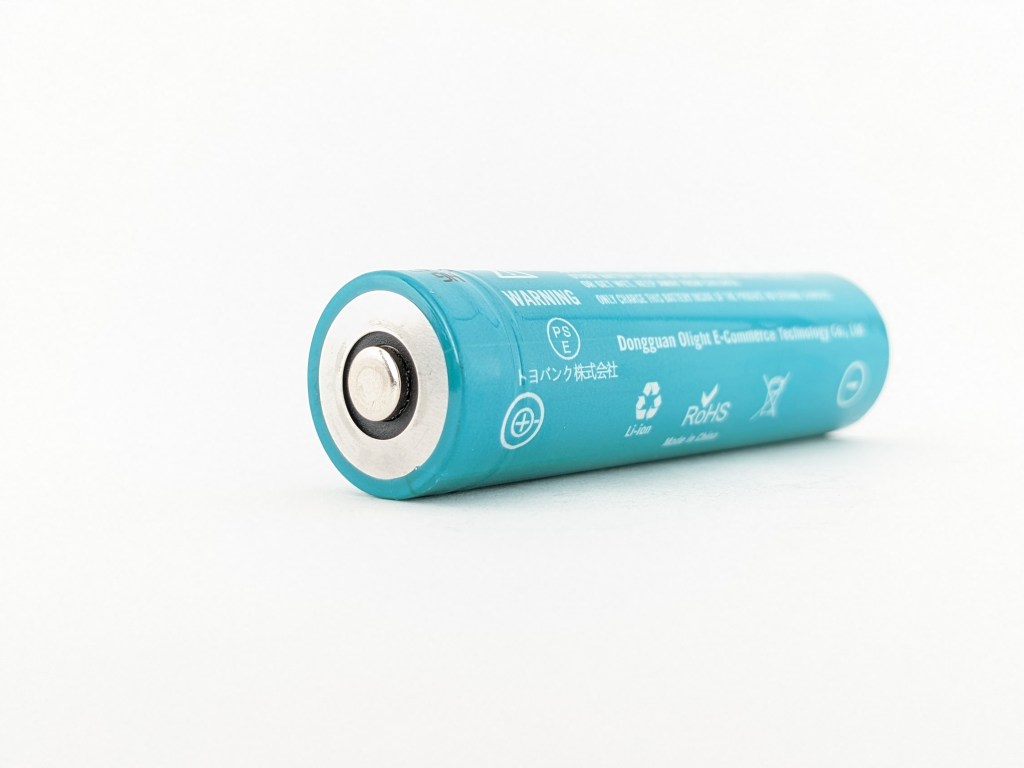
Warrior Mini 3 uses a proprietary 18650 battery with an extra negative terminal on the traditionally positive end of the cell. Warrior Mini 3 will only accept this proprietary cell. No other 18650 batteries will work at all. Replacements are fairly expensive and you have to rely on Olight continuing to make these proprietary cells in the future. This particular cell has a proud positive terminal so you can charge it with a normal bay charger and possibly use it in other flashlights.
Charging is facilitated by Olight’s proprietary magnetic tailcap charging system. A USB-A charging cable is included that magnetically snaps onto the tailcap of the light. The puck has an LED indicator that glows red while charging and glows green when not charging. It’s easy to see but it’s a little too bright to have on your nightstand at night. The light is usable while charging.
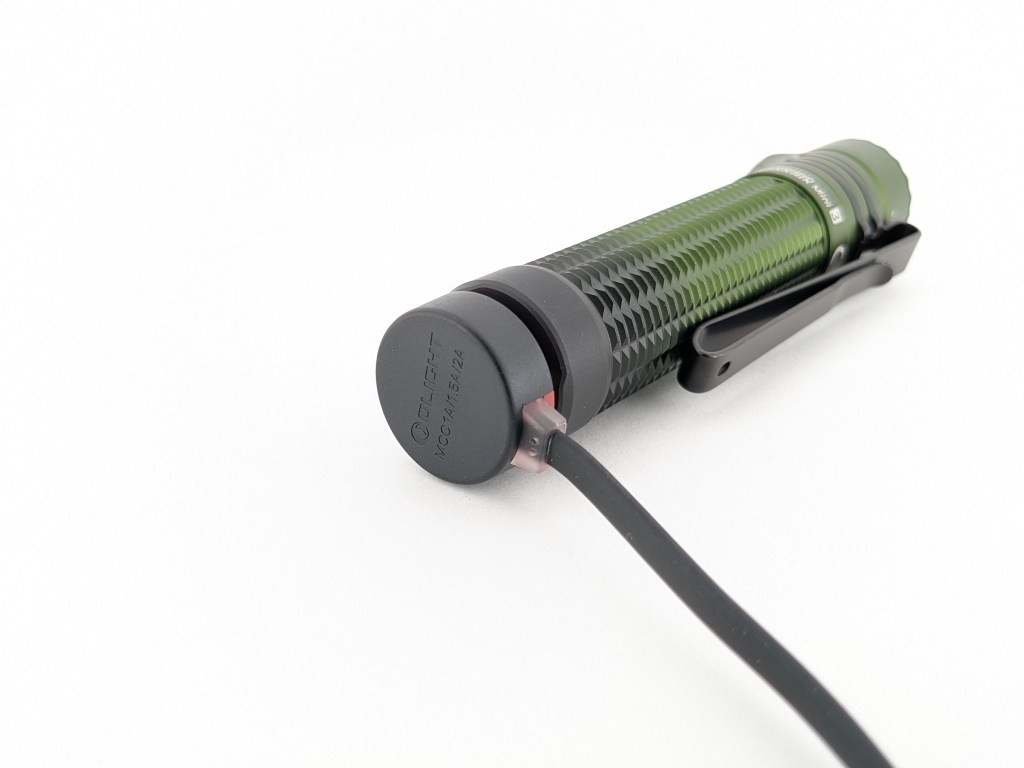
This magnetic charging system is tremendously convenient if you have a designated spot where you always charge your light because you can just wave the light near the charger and it will connect. When you’re finished, just grab the light and pull. It’s not very convenient if you like to charge in different locations or on the go because you have to have that proprietary charging cable. It’s worth mentioning that I haven’t found these magnetic charging systems to be as reliable as a traditional USB port. On rare occasions, they just don’t work for no apparent reason.
Proximity Sensor & Wall Mount
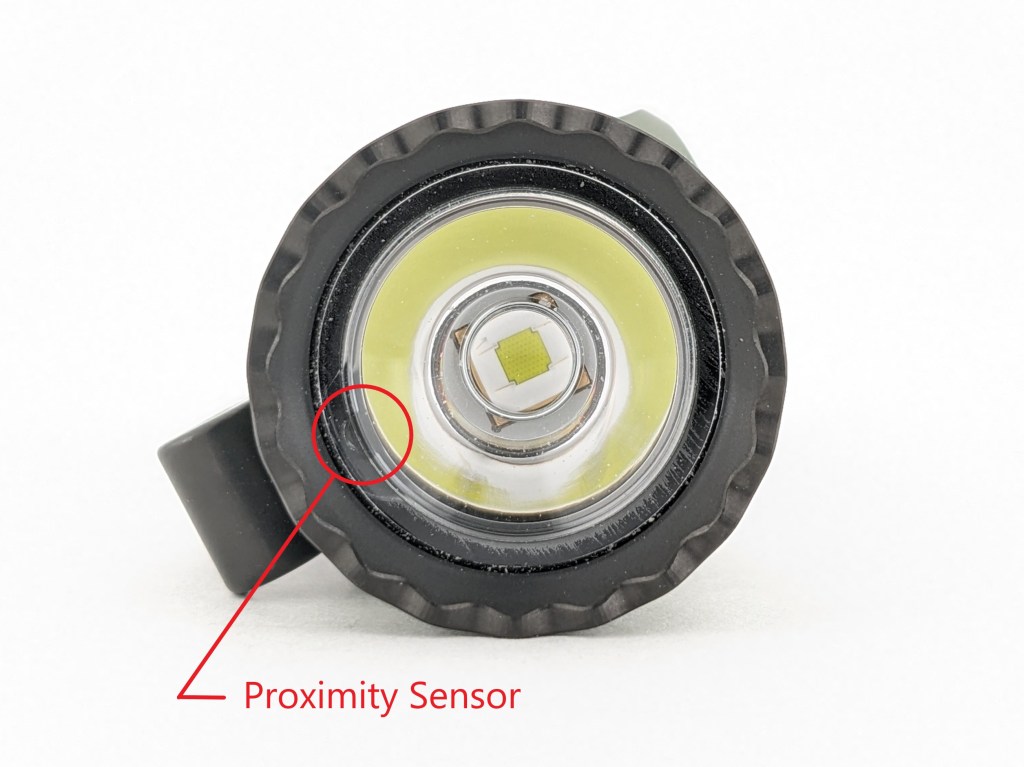
Warrior Mini 3 includes a proximity sensor that will dim the light if it’s turned on while close to an object to prevent the light from burning that object. This is an updated sensor that’s much smaller and it only dims the light if the light is already close to an object when it’s turned on. That should allow it to keep your pockets safe without getting in the way of normal operation.
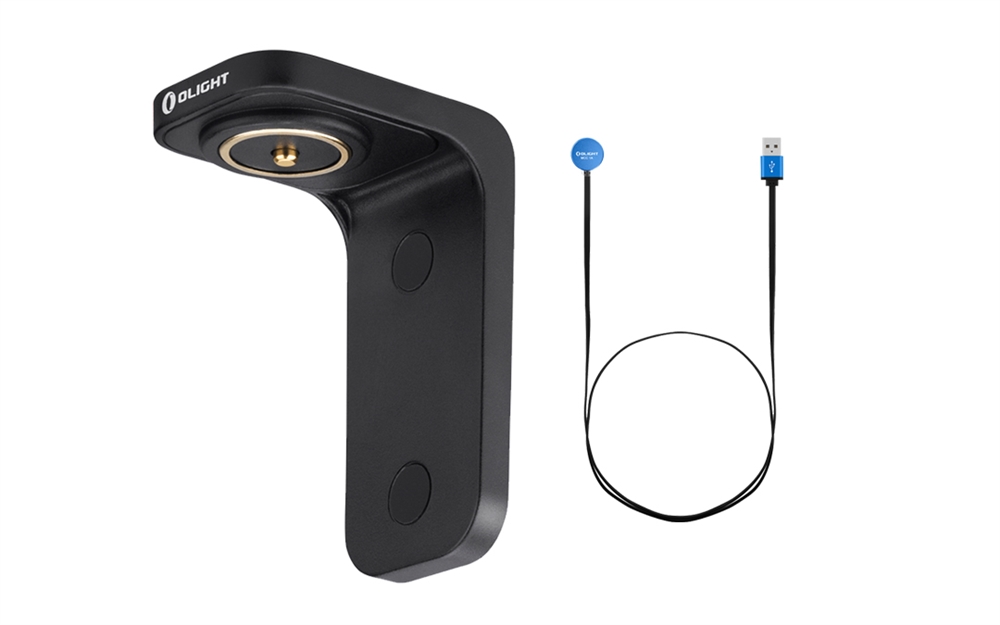
Olight also includes a small L-shaped piece of steel in the box. It’s got adhesive on one side and the idea is to stick it somewhere that you want the light to live. Then you can magnet the light to it and it will always be there ready for you to use. It’s a neat idea, but I wish it had a pass-through for charging like the dock accessory Olight used to sell (shown below).
Competition
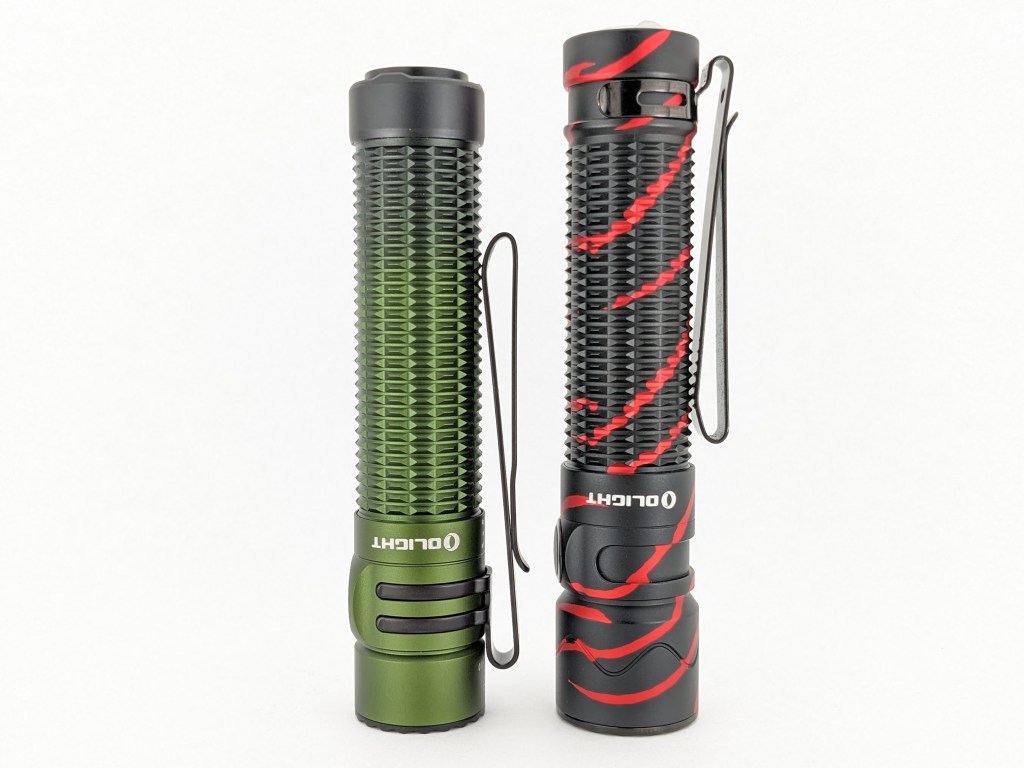
Here are some lights in the same class and how they compare. There’s nothing else this small that also has these dual independent switches.
Thrunite TN12 Pro: marginally larger, about half the price, turbo-only tail switch, unregulated driver, more lumens and more throw, USB-C charging, bezel-down clip
Olight Warrior 3S: larger, heavier, brighter, throwier, more expensive, basically an upscaled Warrior Mini
This section is not comprehensive. If I didn’t include a particular light here, it doesn’t mean it’s bad or doesn’t deserve to be here. I simply cannot list every possible competitor.
Conclusion
This is a really cool light. The looks, size, build, performance, switches, and UI are all excellent. It’s got a lot of small improvements over Warrior Mini 2 that make it a better light overall. For me though the bezel-up-only pocket clip is a deal breaker. I actually went out and purchased my own Warrior Mini 2 because I liked this Mini 3 so much except for the clip.
Thanks to Olight for sending me this light for review!


Just got my Warrior Mini 3 – and it seems to have active thermal regulation: in these hot summer days I cannot get 1 minute Turbo, but when I put the light in a bowl of cold water it won‘t step down in several minutes. Clear signs of active regulation, don‘t you think 😉
LikeLike
Have you done any actual measurements and testing to show there’s thermal regulation? I’d love to be wrong. I’m just going off my Turbo and Turbo-cooled tests where the light performed identically whether there was a fan blowing directly on it or not.
LikeLike
Just with a luxmeter. Try it – in a bowl of liquid or in the kitchen sink…
LikeLike