
Contents
- Pricing & Availability
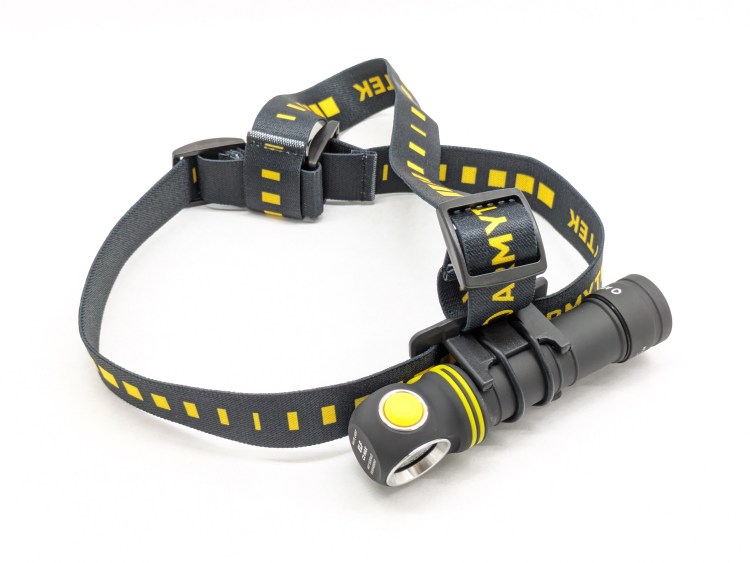
- What comes in the box?
- Design & Construction
- Size & Measurements
- User Interface
- Emitter & Beam
- Mode Chart
- Runtime
- Driver & Regulation
- Switch
- Carry & Ergonomics
- Batteries & Charging
- Competition
- Conclusion
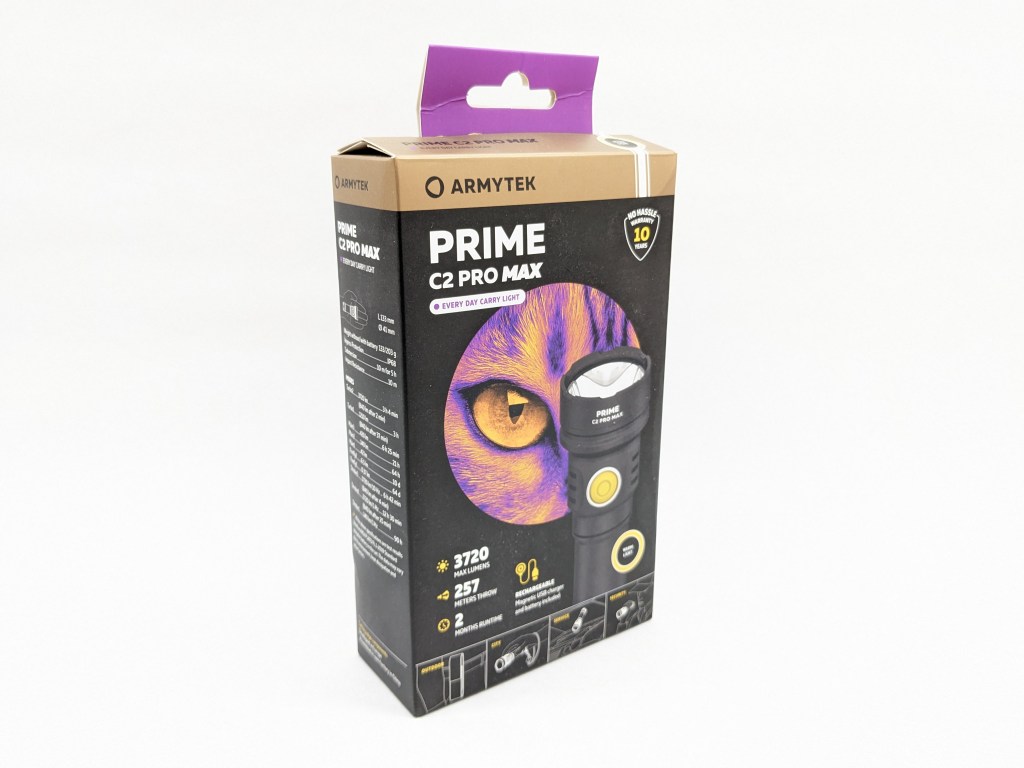
Pricing & Availability
Armytek sent me this light in exchange for an honest review. Here is the official product page where you can see current pricing.
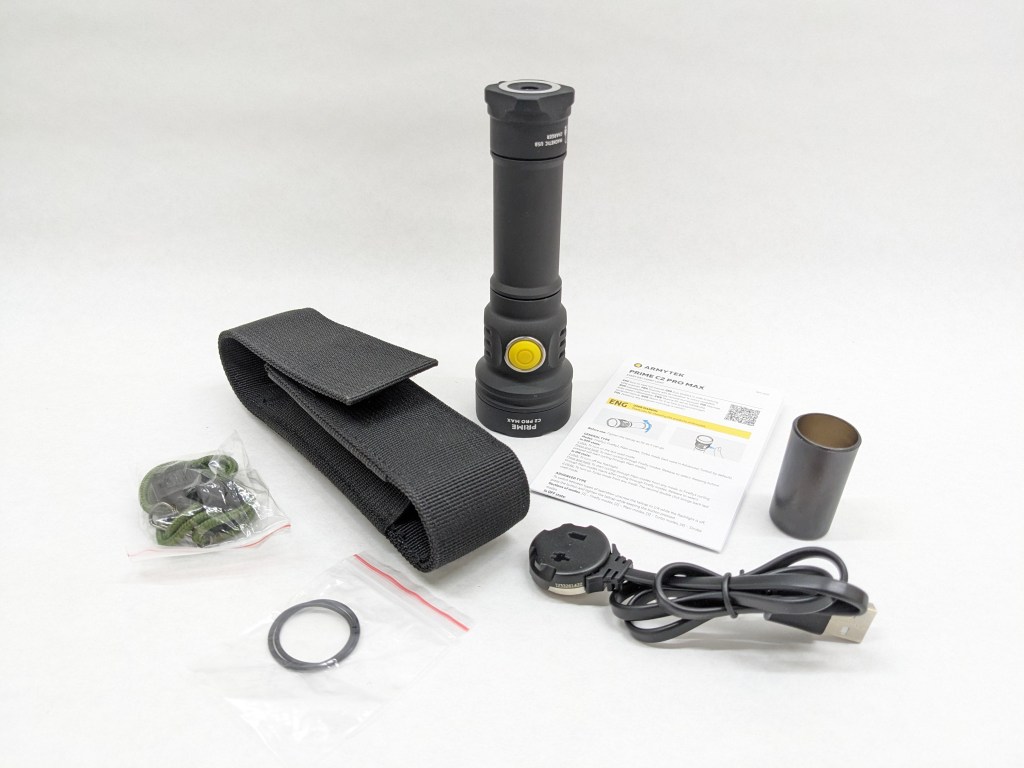
What comes in the box?
The box is designed for retail with nice printing and a pegboard hangar. The contents are supported by a vacuum-formed insesirt. Inside is:
- The light itself
- Battery (inside the light)
- User manual
- USB magnetic charging cable
- Wrist lanyard
- Spare o-rings
- 18650 battery adapter
- Holster
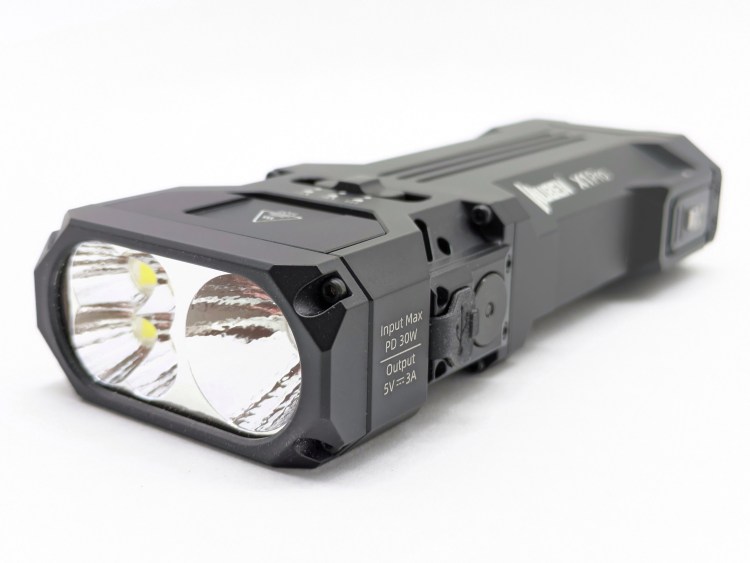
Design & Construction
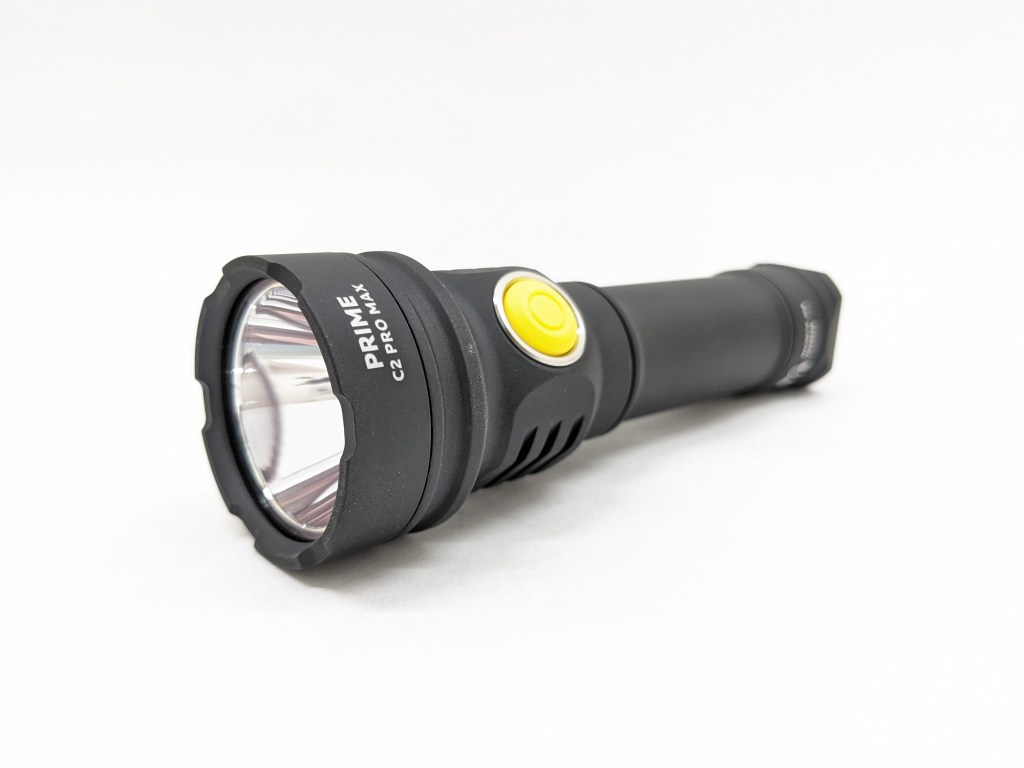
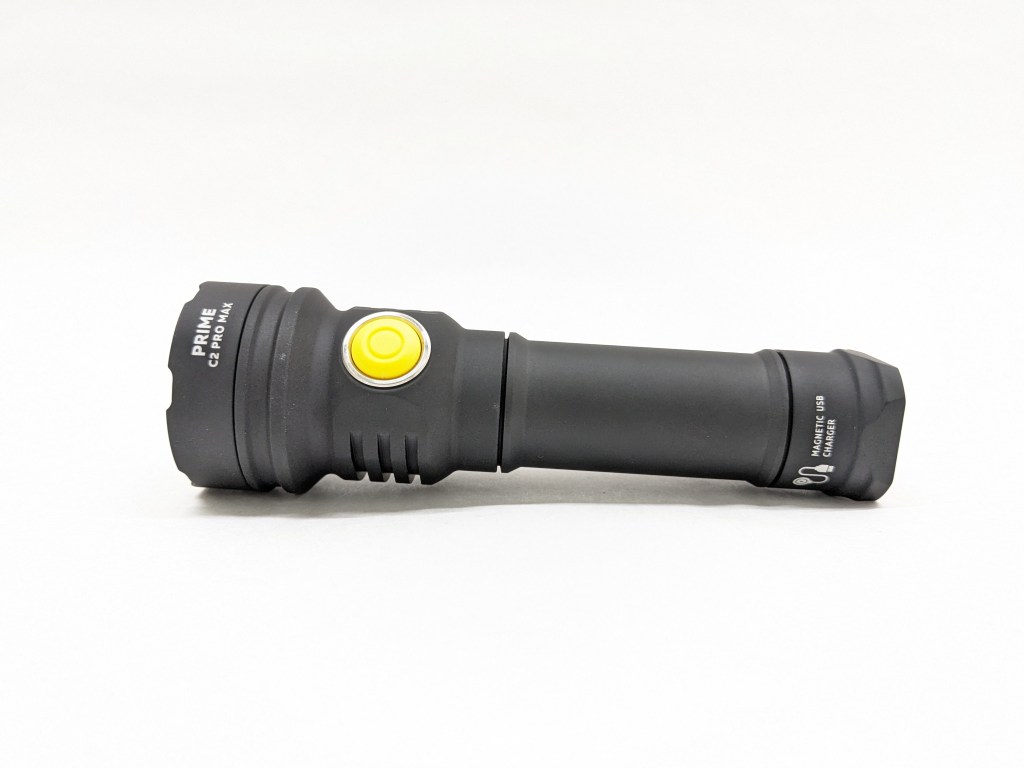
This light looks very Armytek with no knurling on the body tube, the matte/chalky anodizing, and a bright yellow switch.
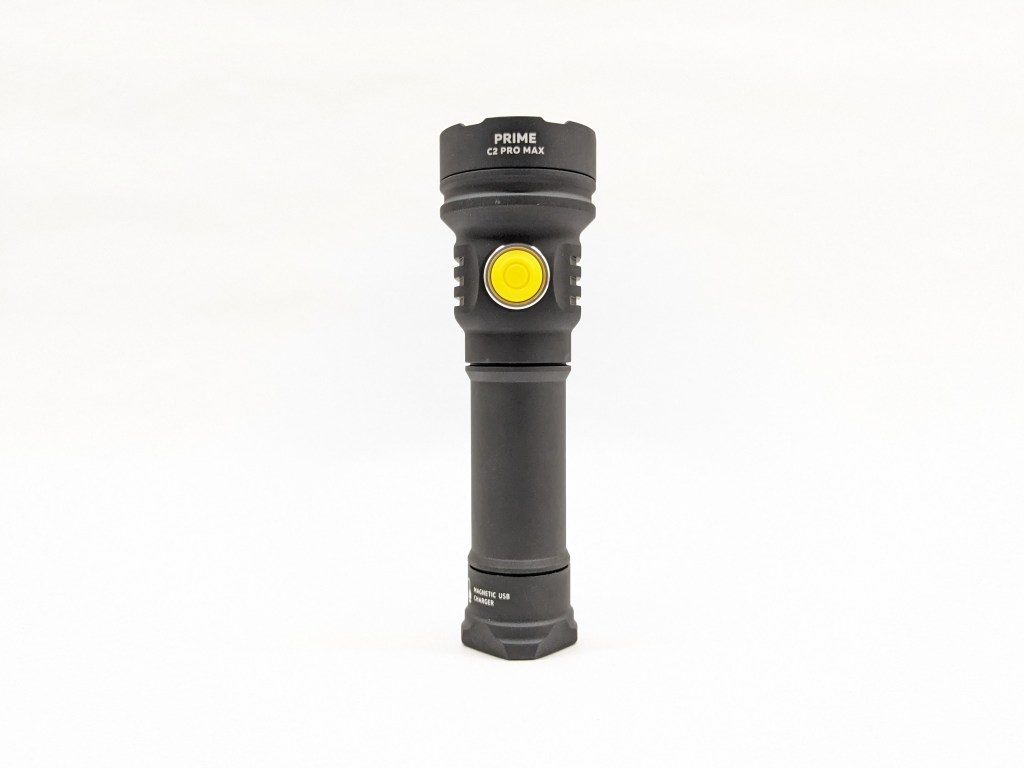
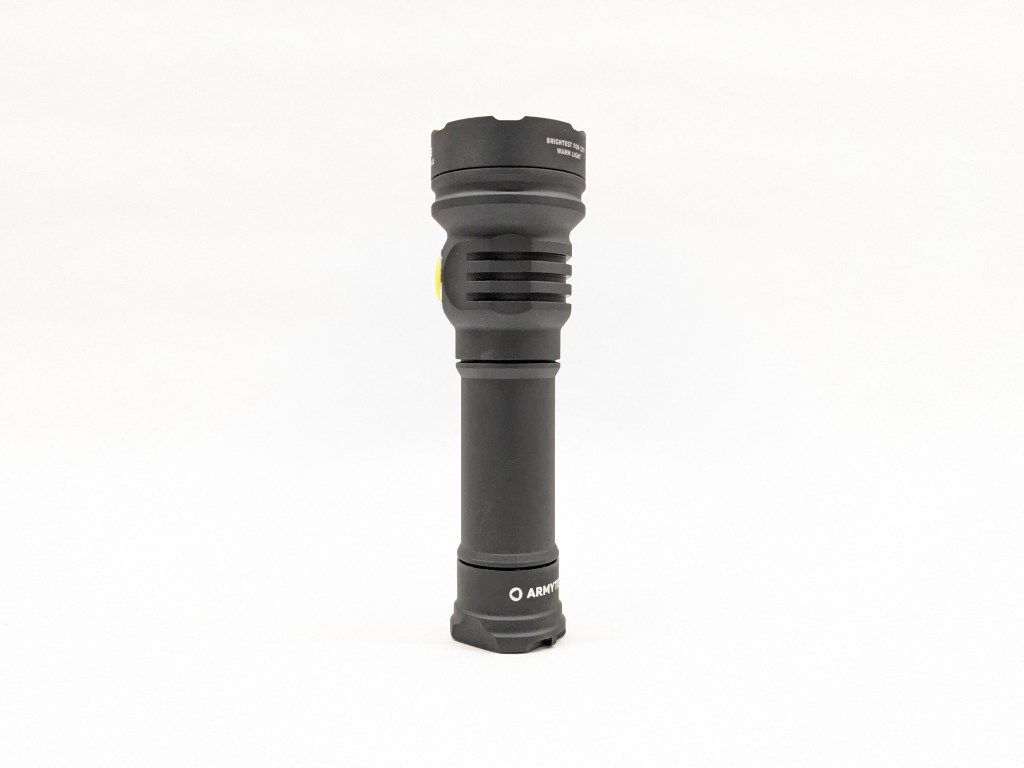

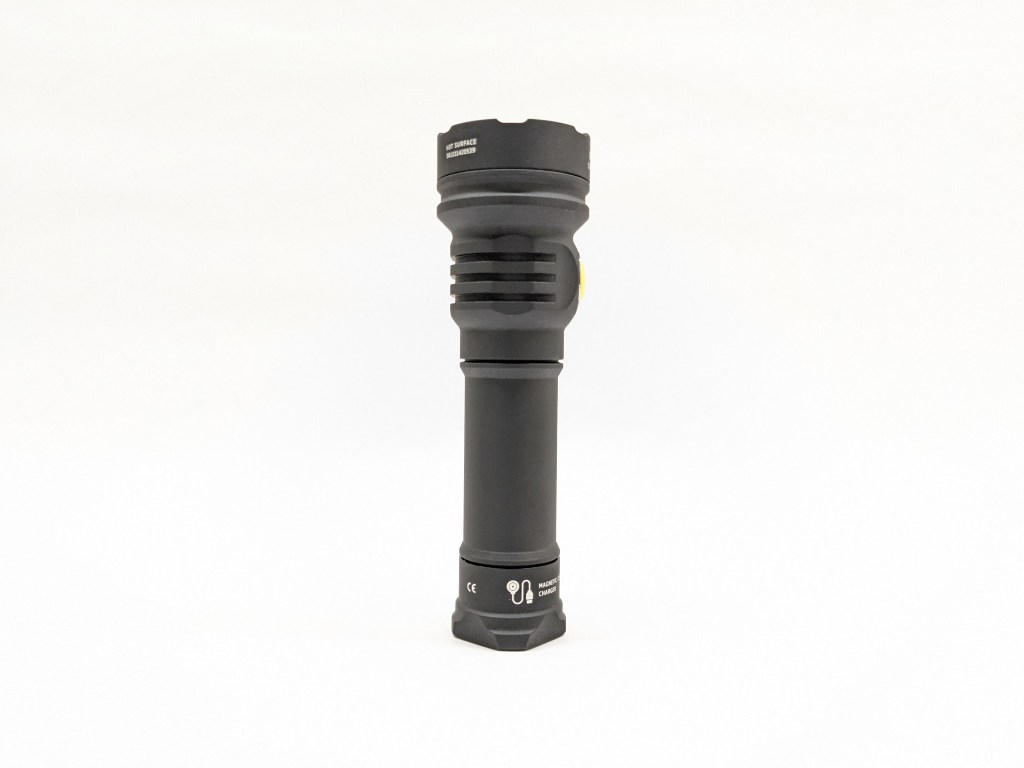
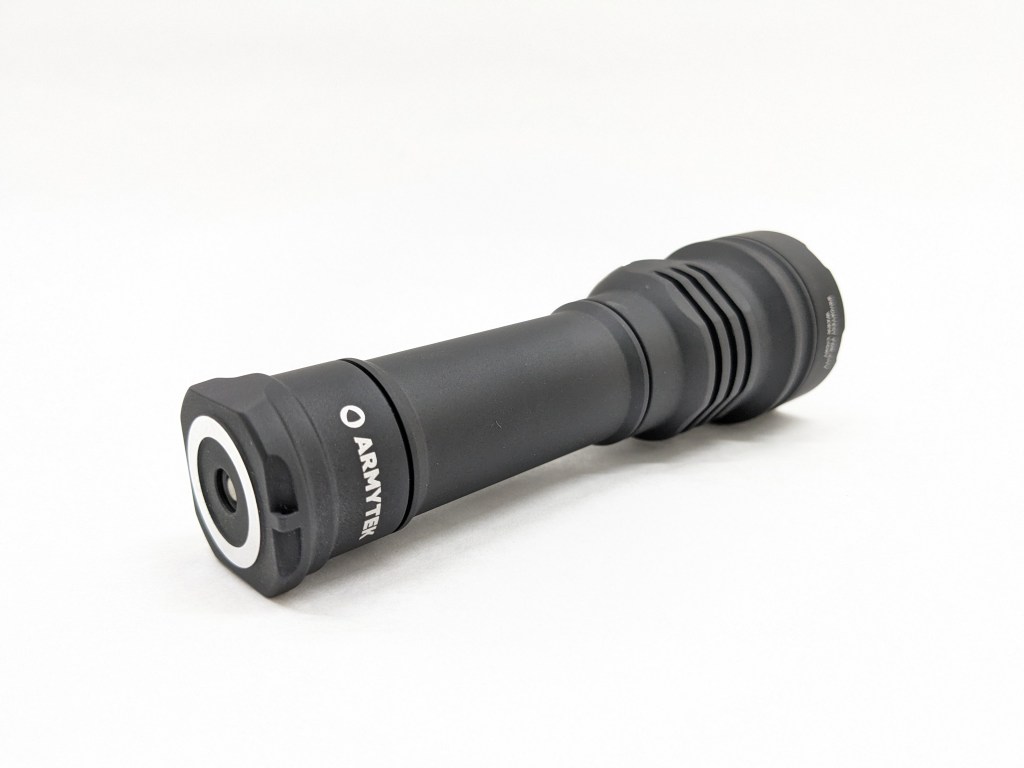
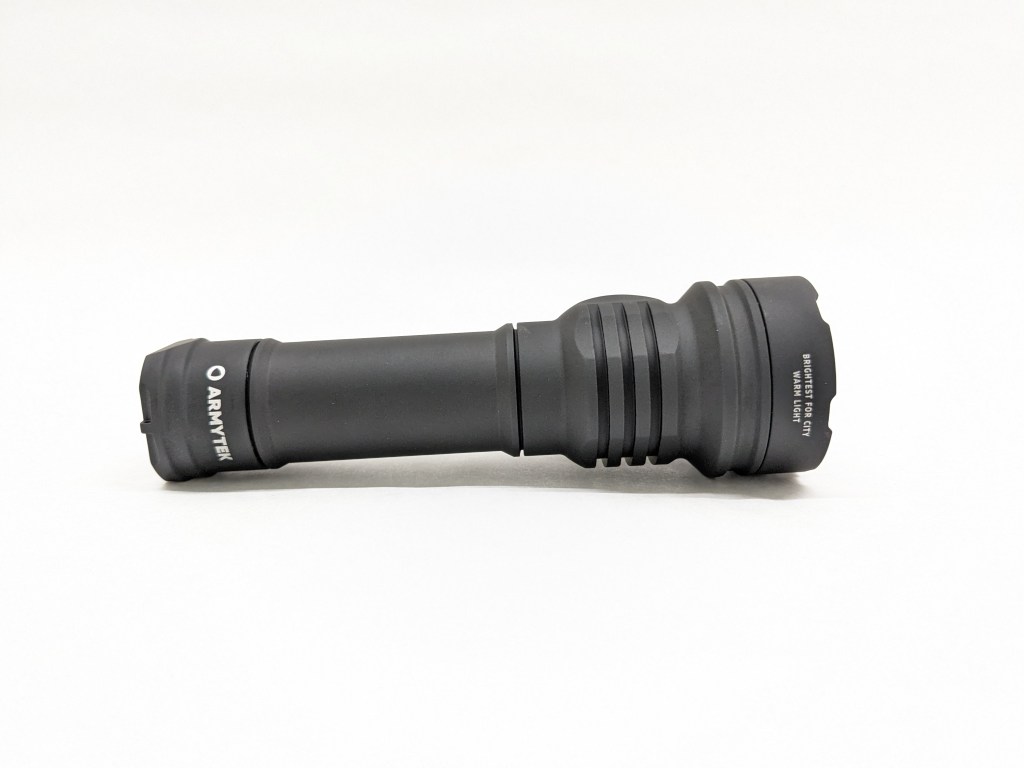
Build quality is top-notch. The whole thing is overbuilt for strength, durability, and a 10-meter drop rating. There are double O-ring seals for best-in-class 10-meter 5-hour water resistance. The anodizing is very chalky and rough, providing excellent grip, but scratching other objects easily. I don’t care for this style of anodizing and I strongly prefer the smooth satin anodizing found on most other premium flashlights.
Size & Measurements
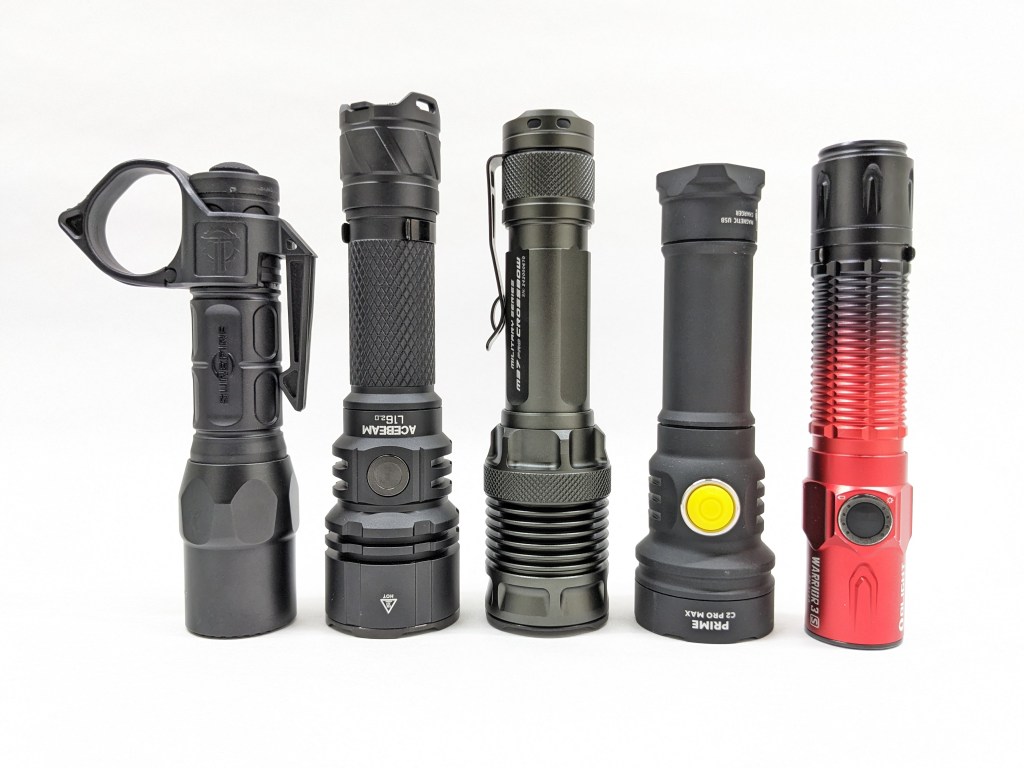
Surefire G2X Pro + Switchback | Acebeam L16 2.0 | Jetbeam M37 Pro | Armytek C2 Pro Max | Olight Warrior 3S
| Measurement | Measured (mm) |
|---|---|
| Bezel Diameter | 40.9 |
| Maximum Head Diameter | 40.9 |
| Length | 133.1 |
| Switch Diameter | 13 |
| Lens Thickness | 1.9 |
| Lens Diameter | 37.9 |
| Reflector Hole Diameter | 12.1 |
| Reflector Diameter | 35.8 |
| Reflector Height | 24.1 |
| MCPCB Size | ~25 |
| LED Footprint | 7070 |
| Body Tube Diameter | 25.4 |
| Tailcap Diameter | 31.2 |
| Tailcap Length | 21.0 |
| Driver Diameter | U/A |
| Included Battery Length | 70.9 |
| Weight with included battery (g) | 200 |
User Interface (done)
There are two different UIs available and both are pretty quirky, but they’re usable with some practice. To switch between them, loosen the tailcap, hold the switch, tighten the tailcap, and release the switch.
The actions are # of presses followed by a hold (H) or a release (C). So, “1C” is one click and release. “2H” is two clicks but you hold down the last one.
| State | Action | Result |
|---|---|---|
| Off | 1H | Firefly 1 |
| Off | 1C | On (last used mode) |
| Off | 2C | On and back off (not Turbo) |
| On | 1C | Off |
| On | 1H | Cycle brightness level (increasing) |
| On | 2C | Turbo (memorized) |
| Turbo | 2C | Last used mode |
The “general” UI is close to a Typical E-switch UI like Olight, Sofirn, Thrunite, etc use. My biggest gripe is that Turbo is only accessible from on. If you double-click from off, it just turns on and back off again. I don’t like how Firefly and Turbo modes are memorized either. There are no strobes in this UI. Only one of the two Turbo modes is accessible here, but you can set it to either Turbo 1 or Turbo 2 by switching to the advanced UI, activating that mode, and then switching back to the general UI.
| State | Action | Result |
|---|---|---|
| Off | 1H | Firefly group (last used) |
| Off | 1C | On (last used mode) |
| Any | 2C | Main group (last used) |
| Any | 3C | Turbo group (last used) |
| Any | 4C | Strobe group (last used) |
| On | 1H | Cycle mode (within that group) |
| On | 1C | Off |
The “advanced” UI has a bit of a learning curve but works well. There are four mode groups (Firefly, Main, Turbo, and Strobes), and each group has a direct shortcut from off. The last-used mode is memorized too, so you don’t always have to use the shortcut. I wish there were no mode memory, 1C activated the main group, 2C activated the Turbo group, and 3C activated the strobe group. I think that would be more intuitive.
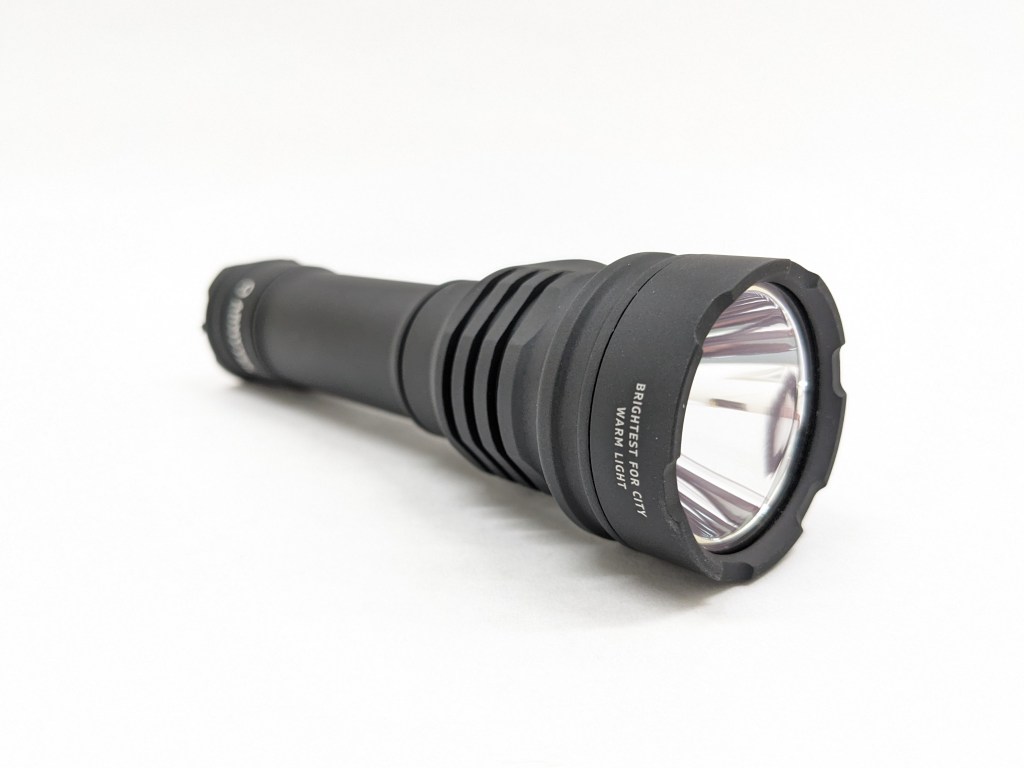
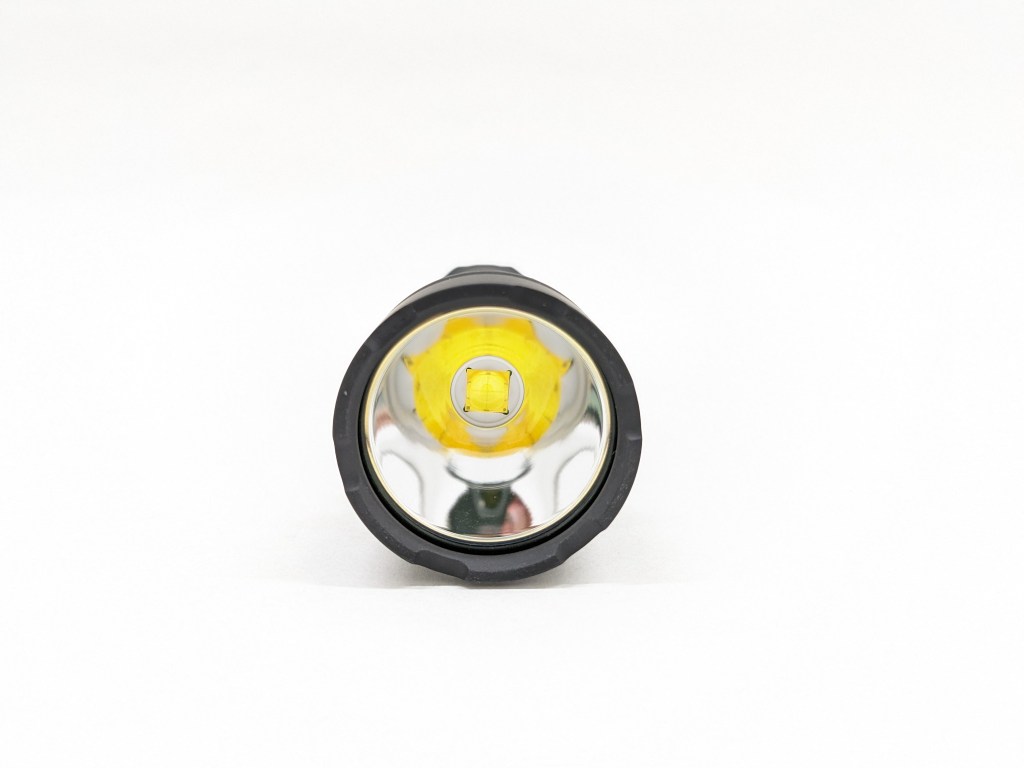
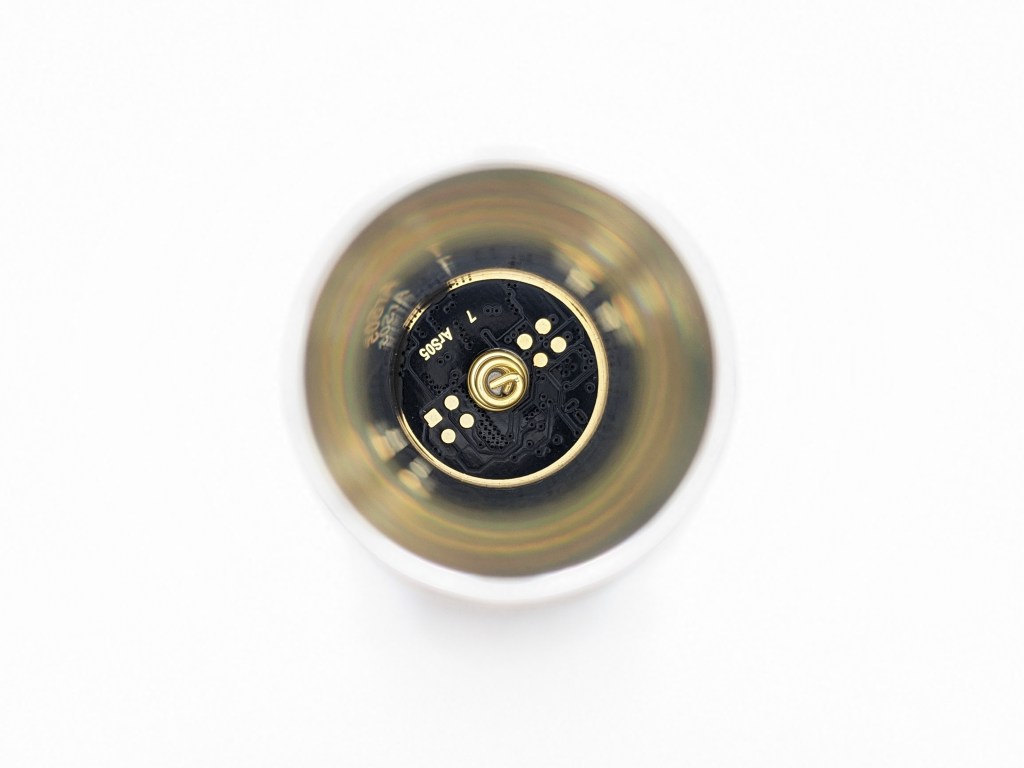
Emitter & Beam


This model uses a Cree XHP70.2 LED in cool white or warm white color temperatures. I have the warm white version. The LED sits at the bottom of a large, smooth reflector. I’m curious how well an XHP70.3-HI LED would fare in this host, especially with that large smooth reflector.
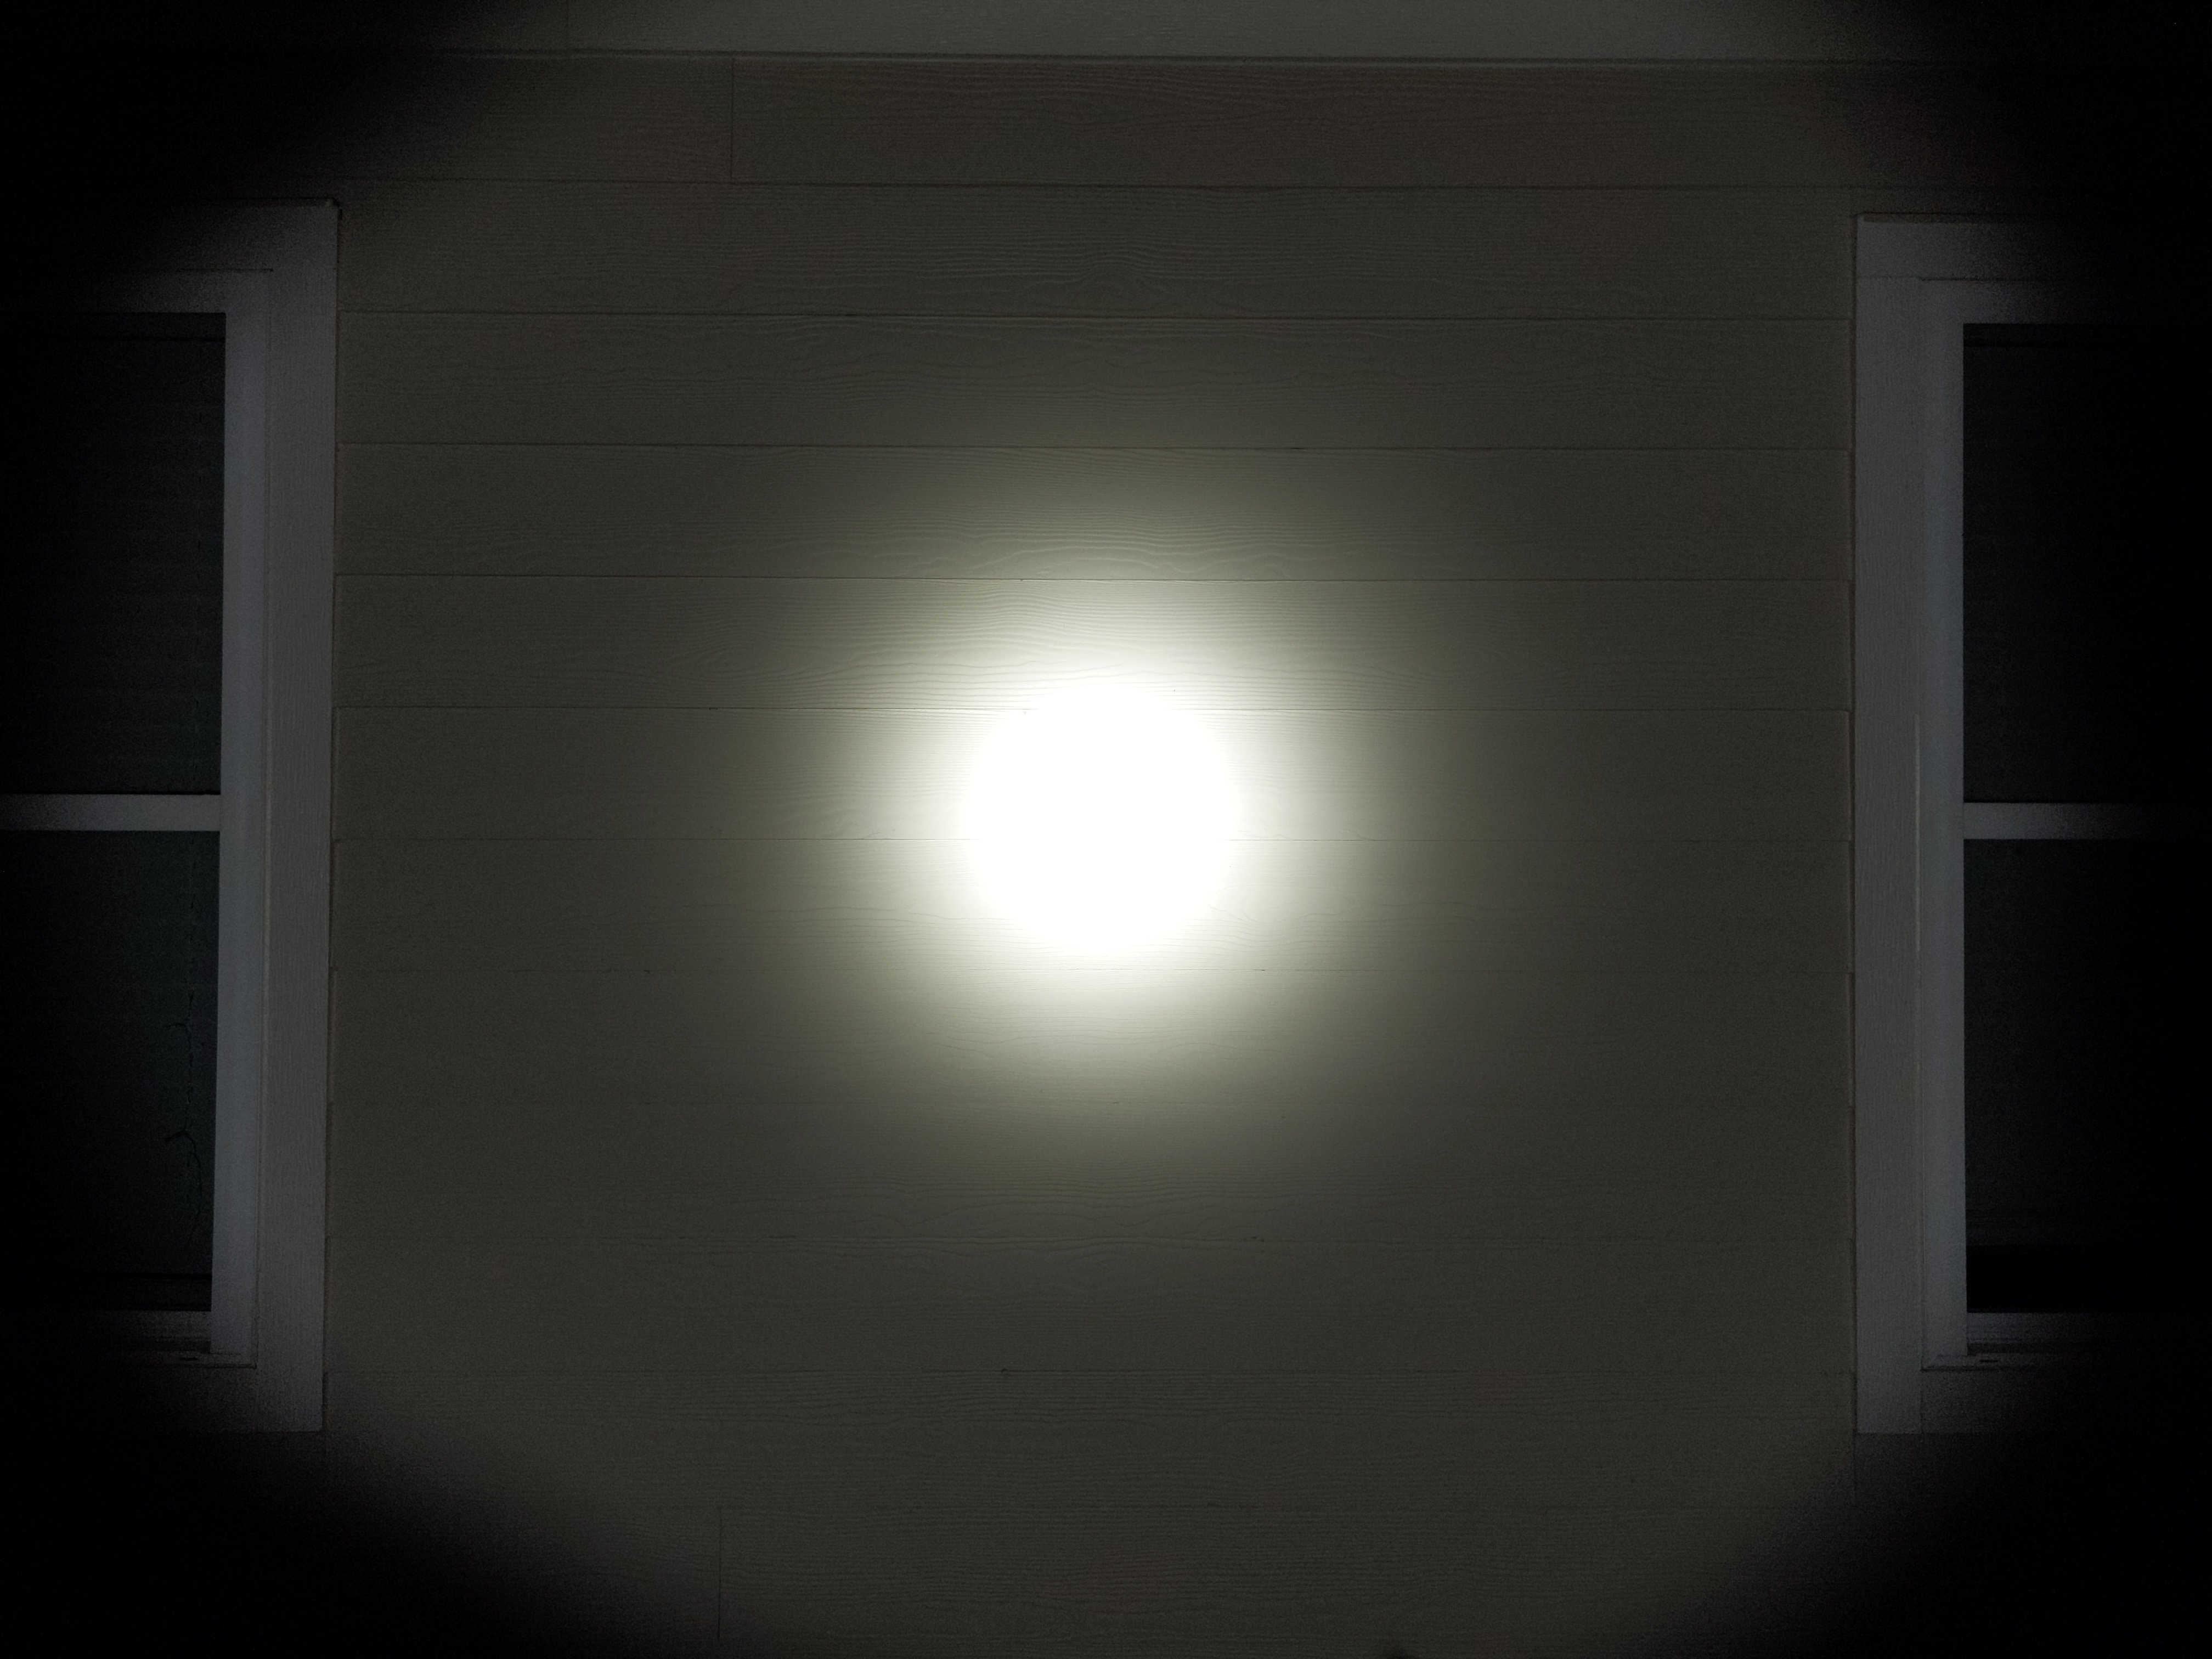
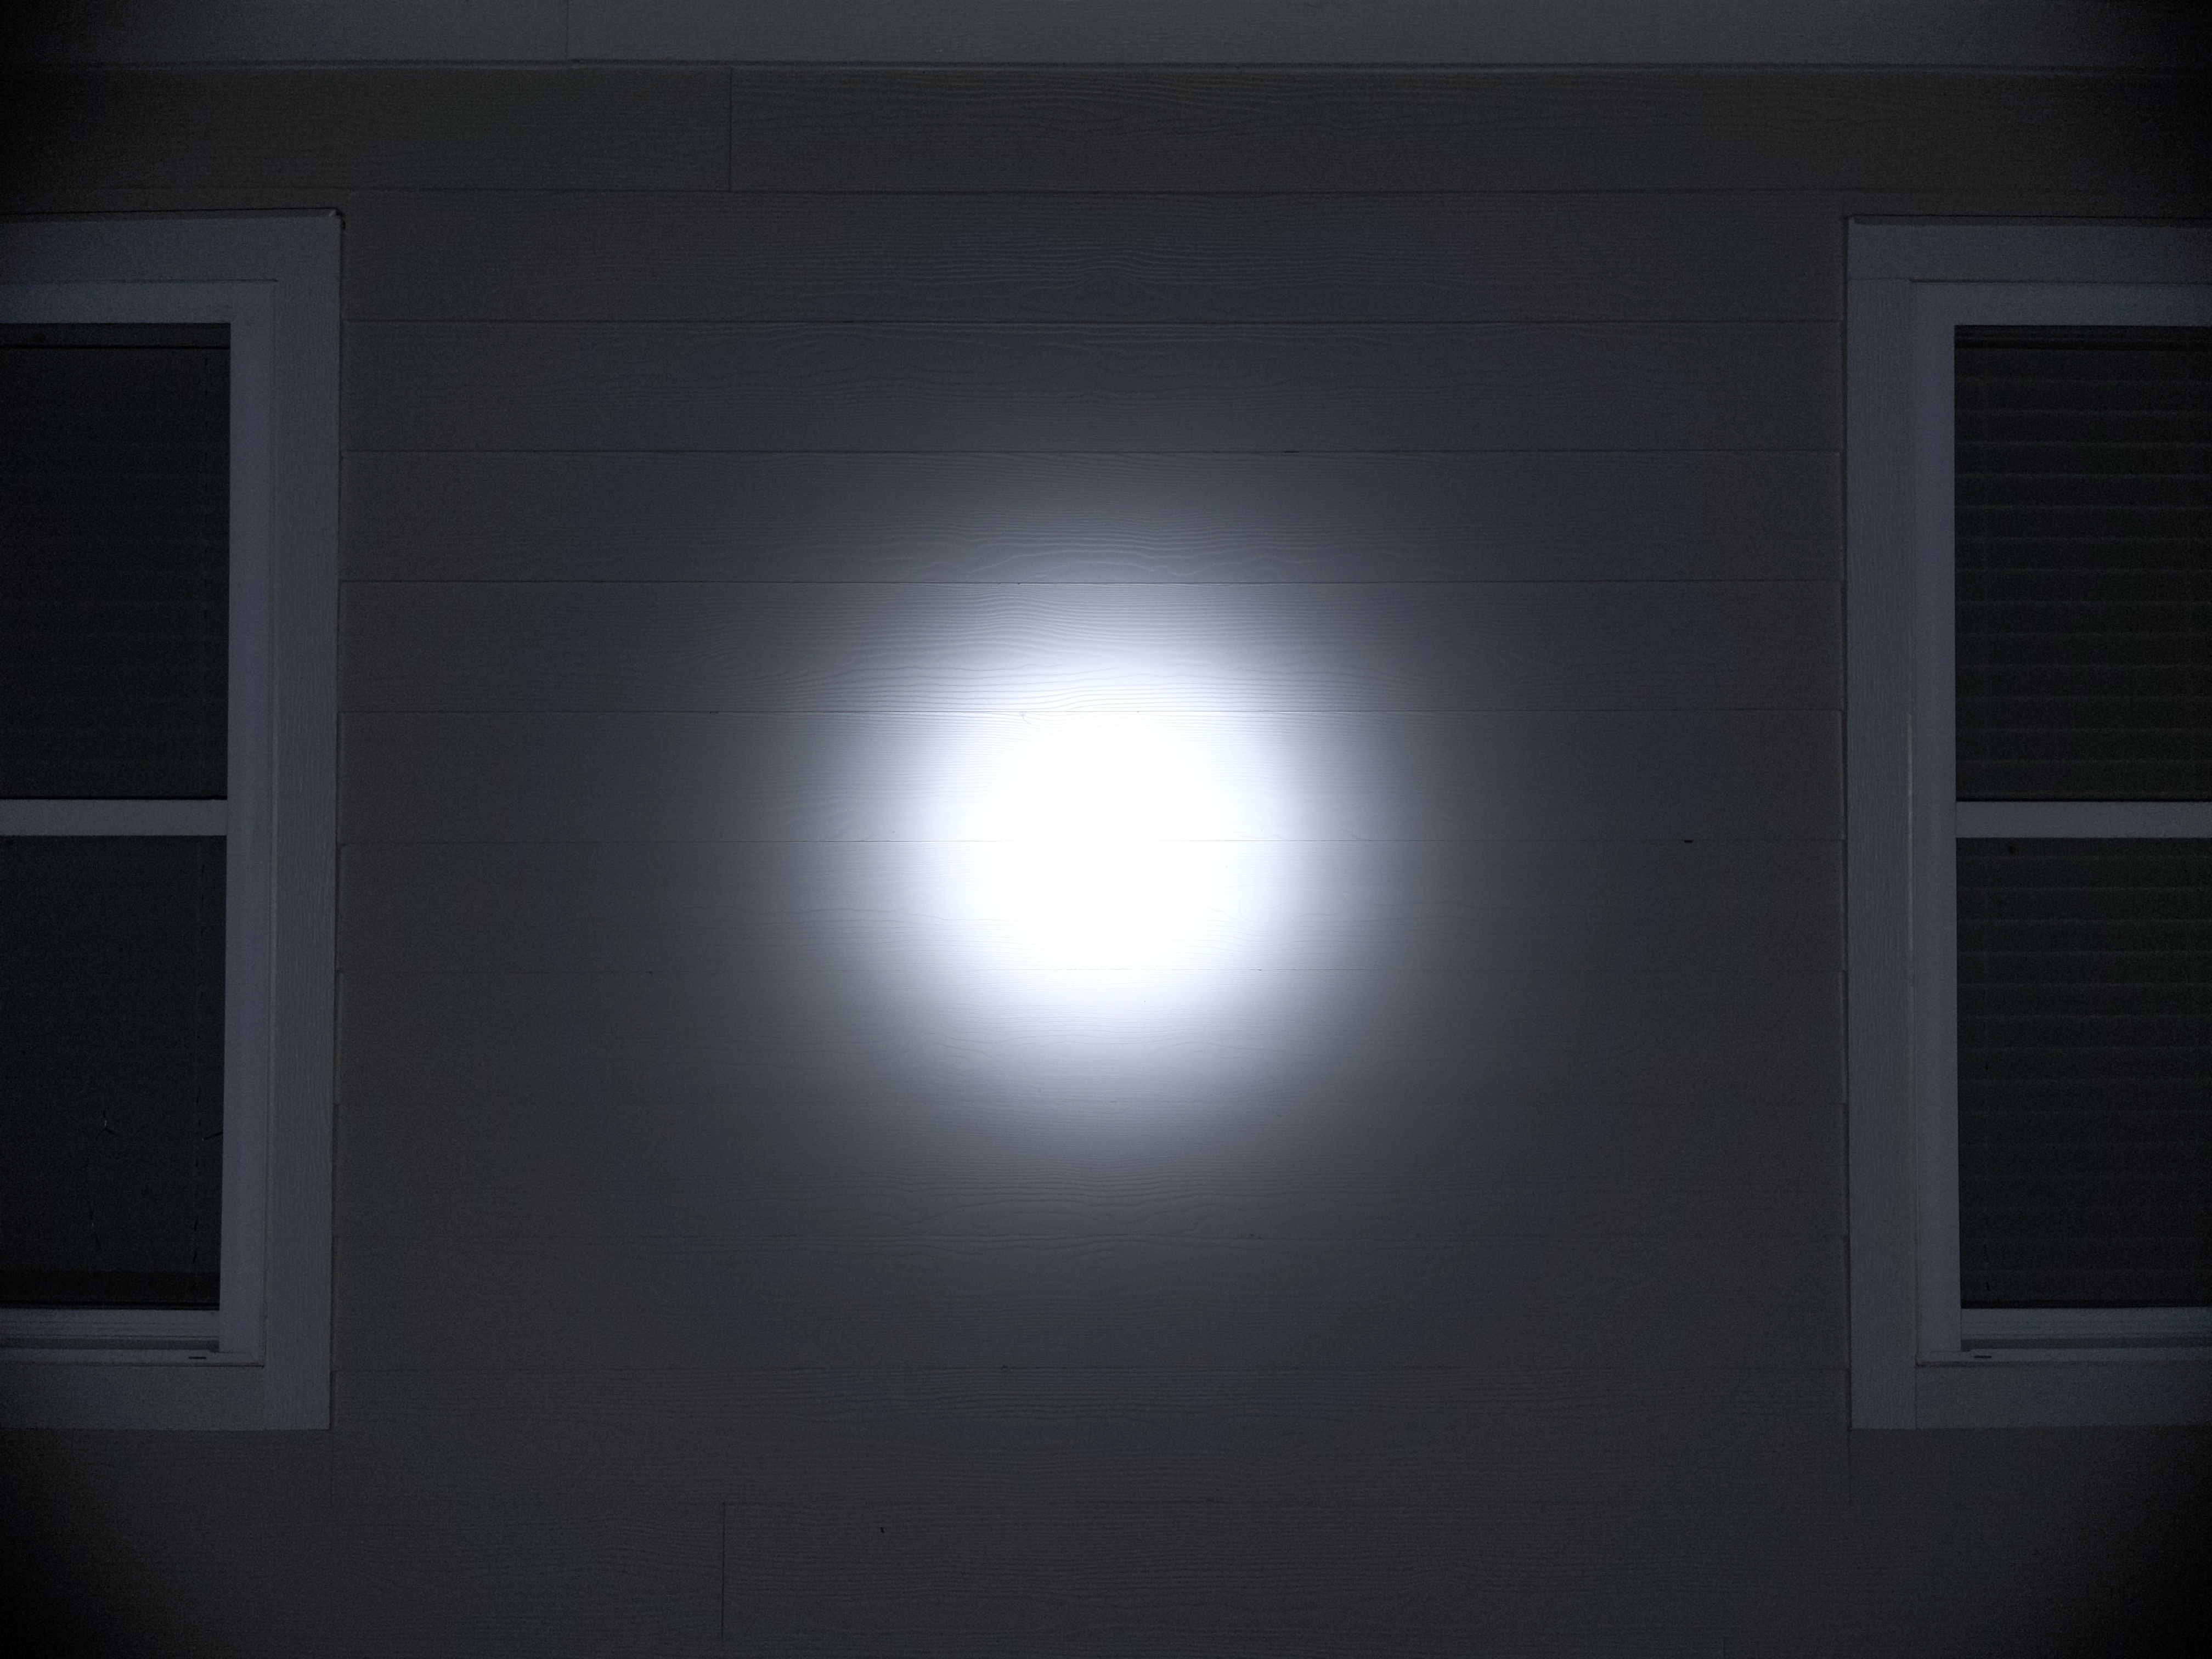
The beam is functional but it’s not clean. It’s on the floody side at 6.7 candela per lumen, but it’s got enough brightness to punch out and see a decent distance. There’s a lot of tint shift, which is common for this LED, including a somewhat distracting cool spot in the center of the hotspot. An orange peel reflector would have been a better choice to help mitigate some of the tint shift and artifacts.
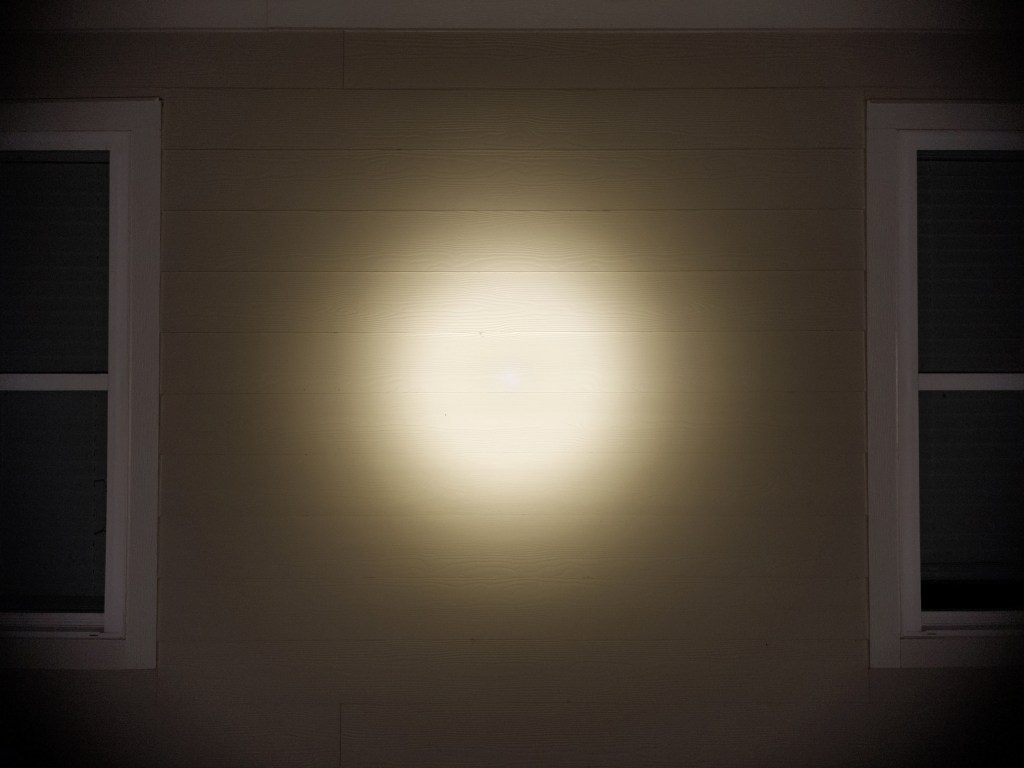
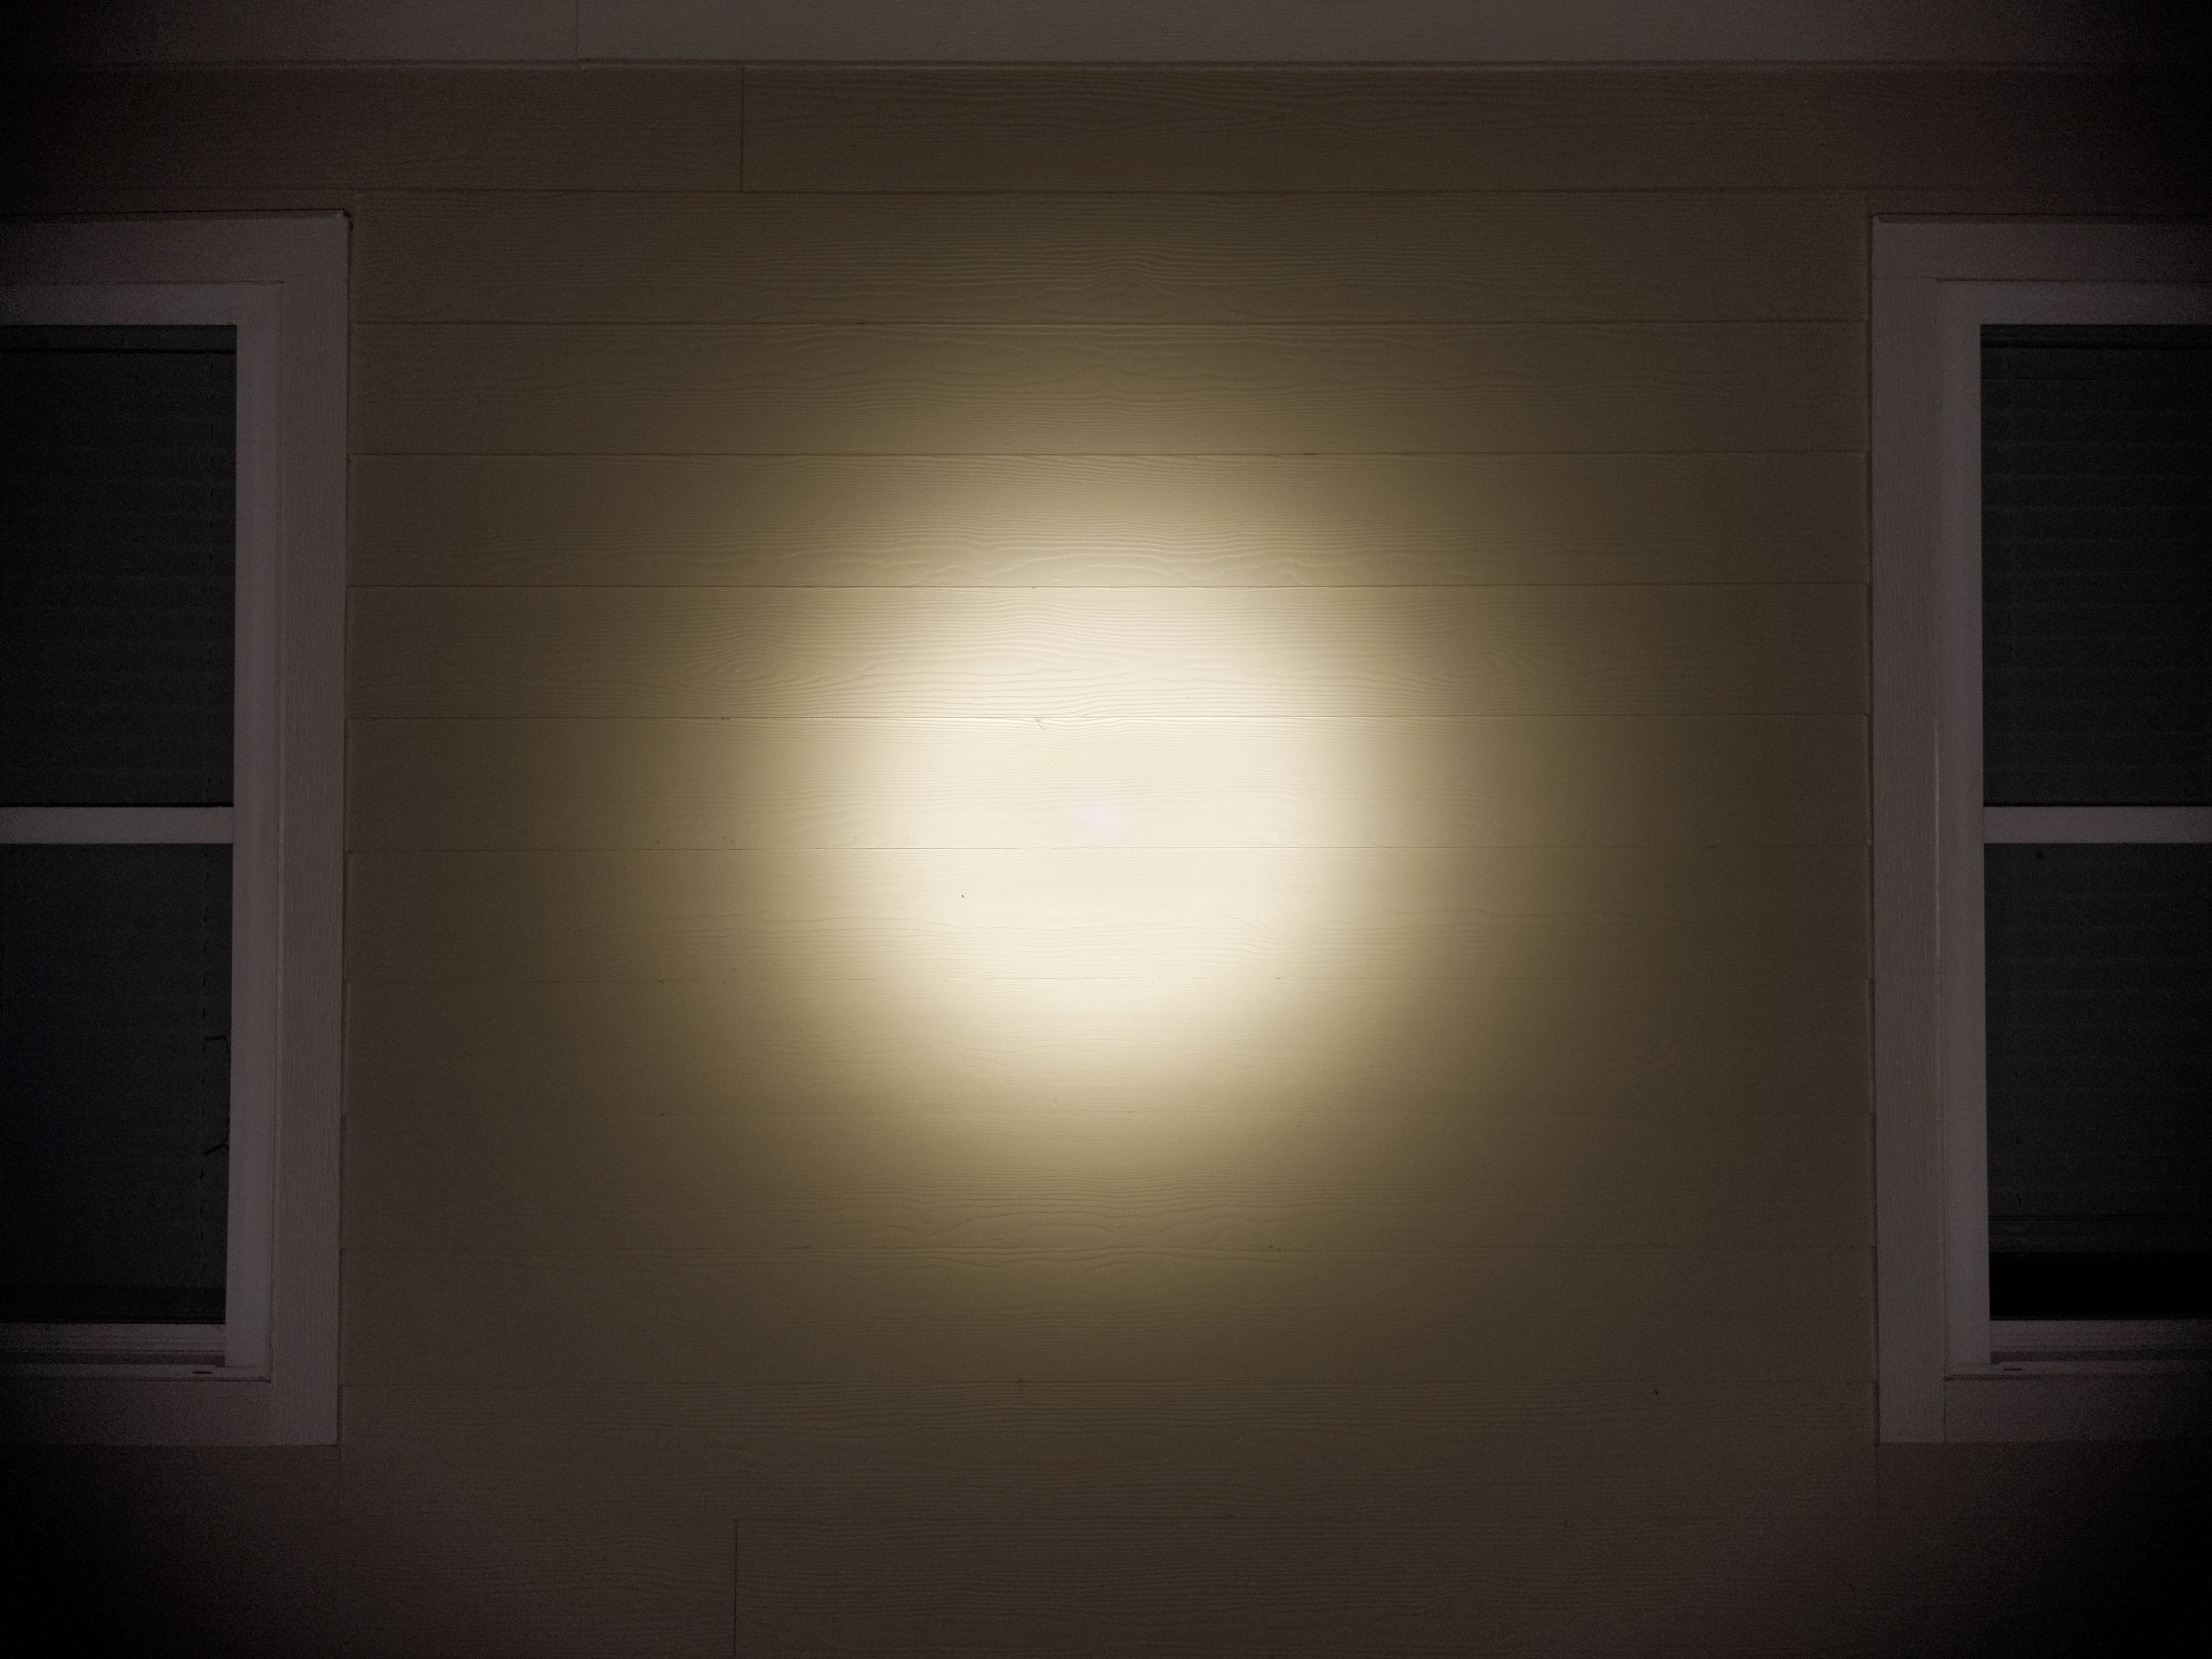
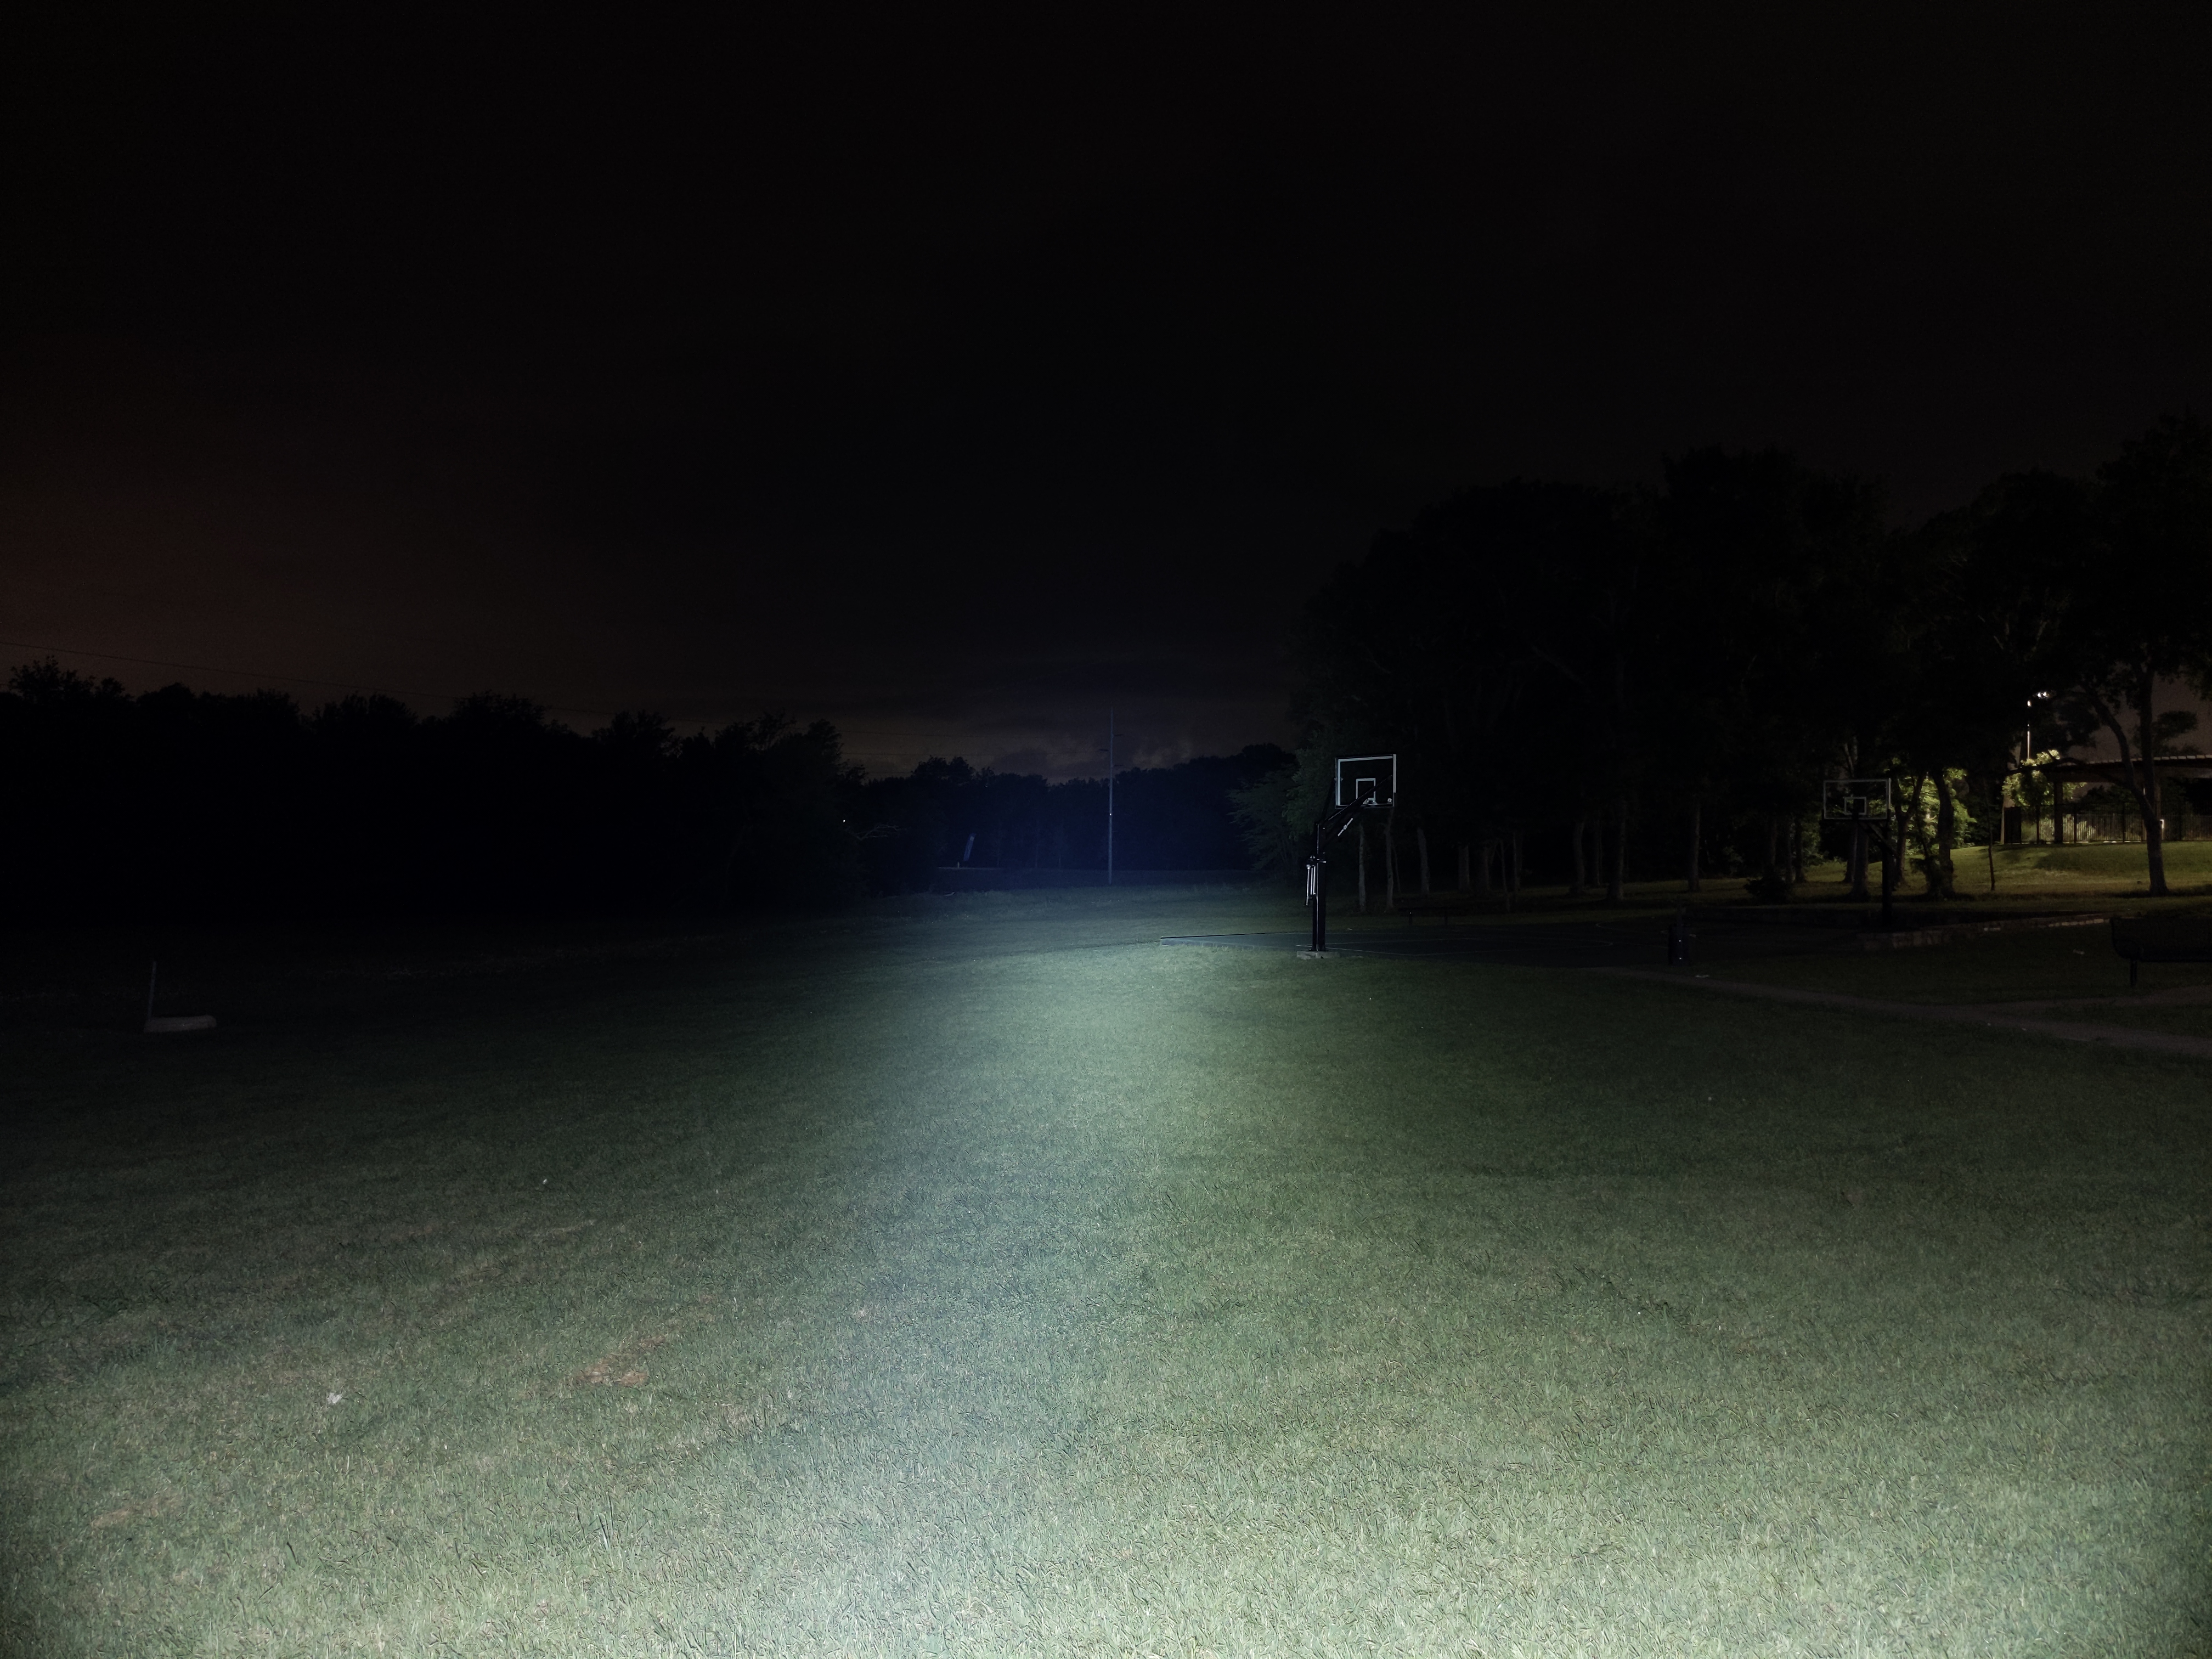
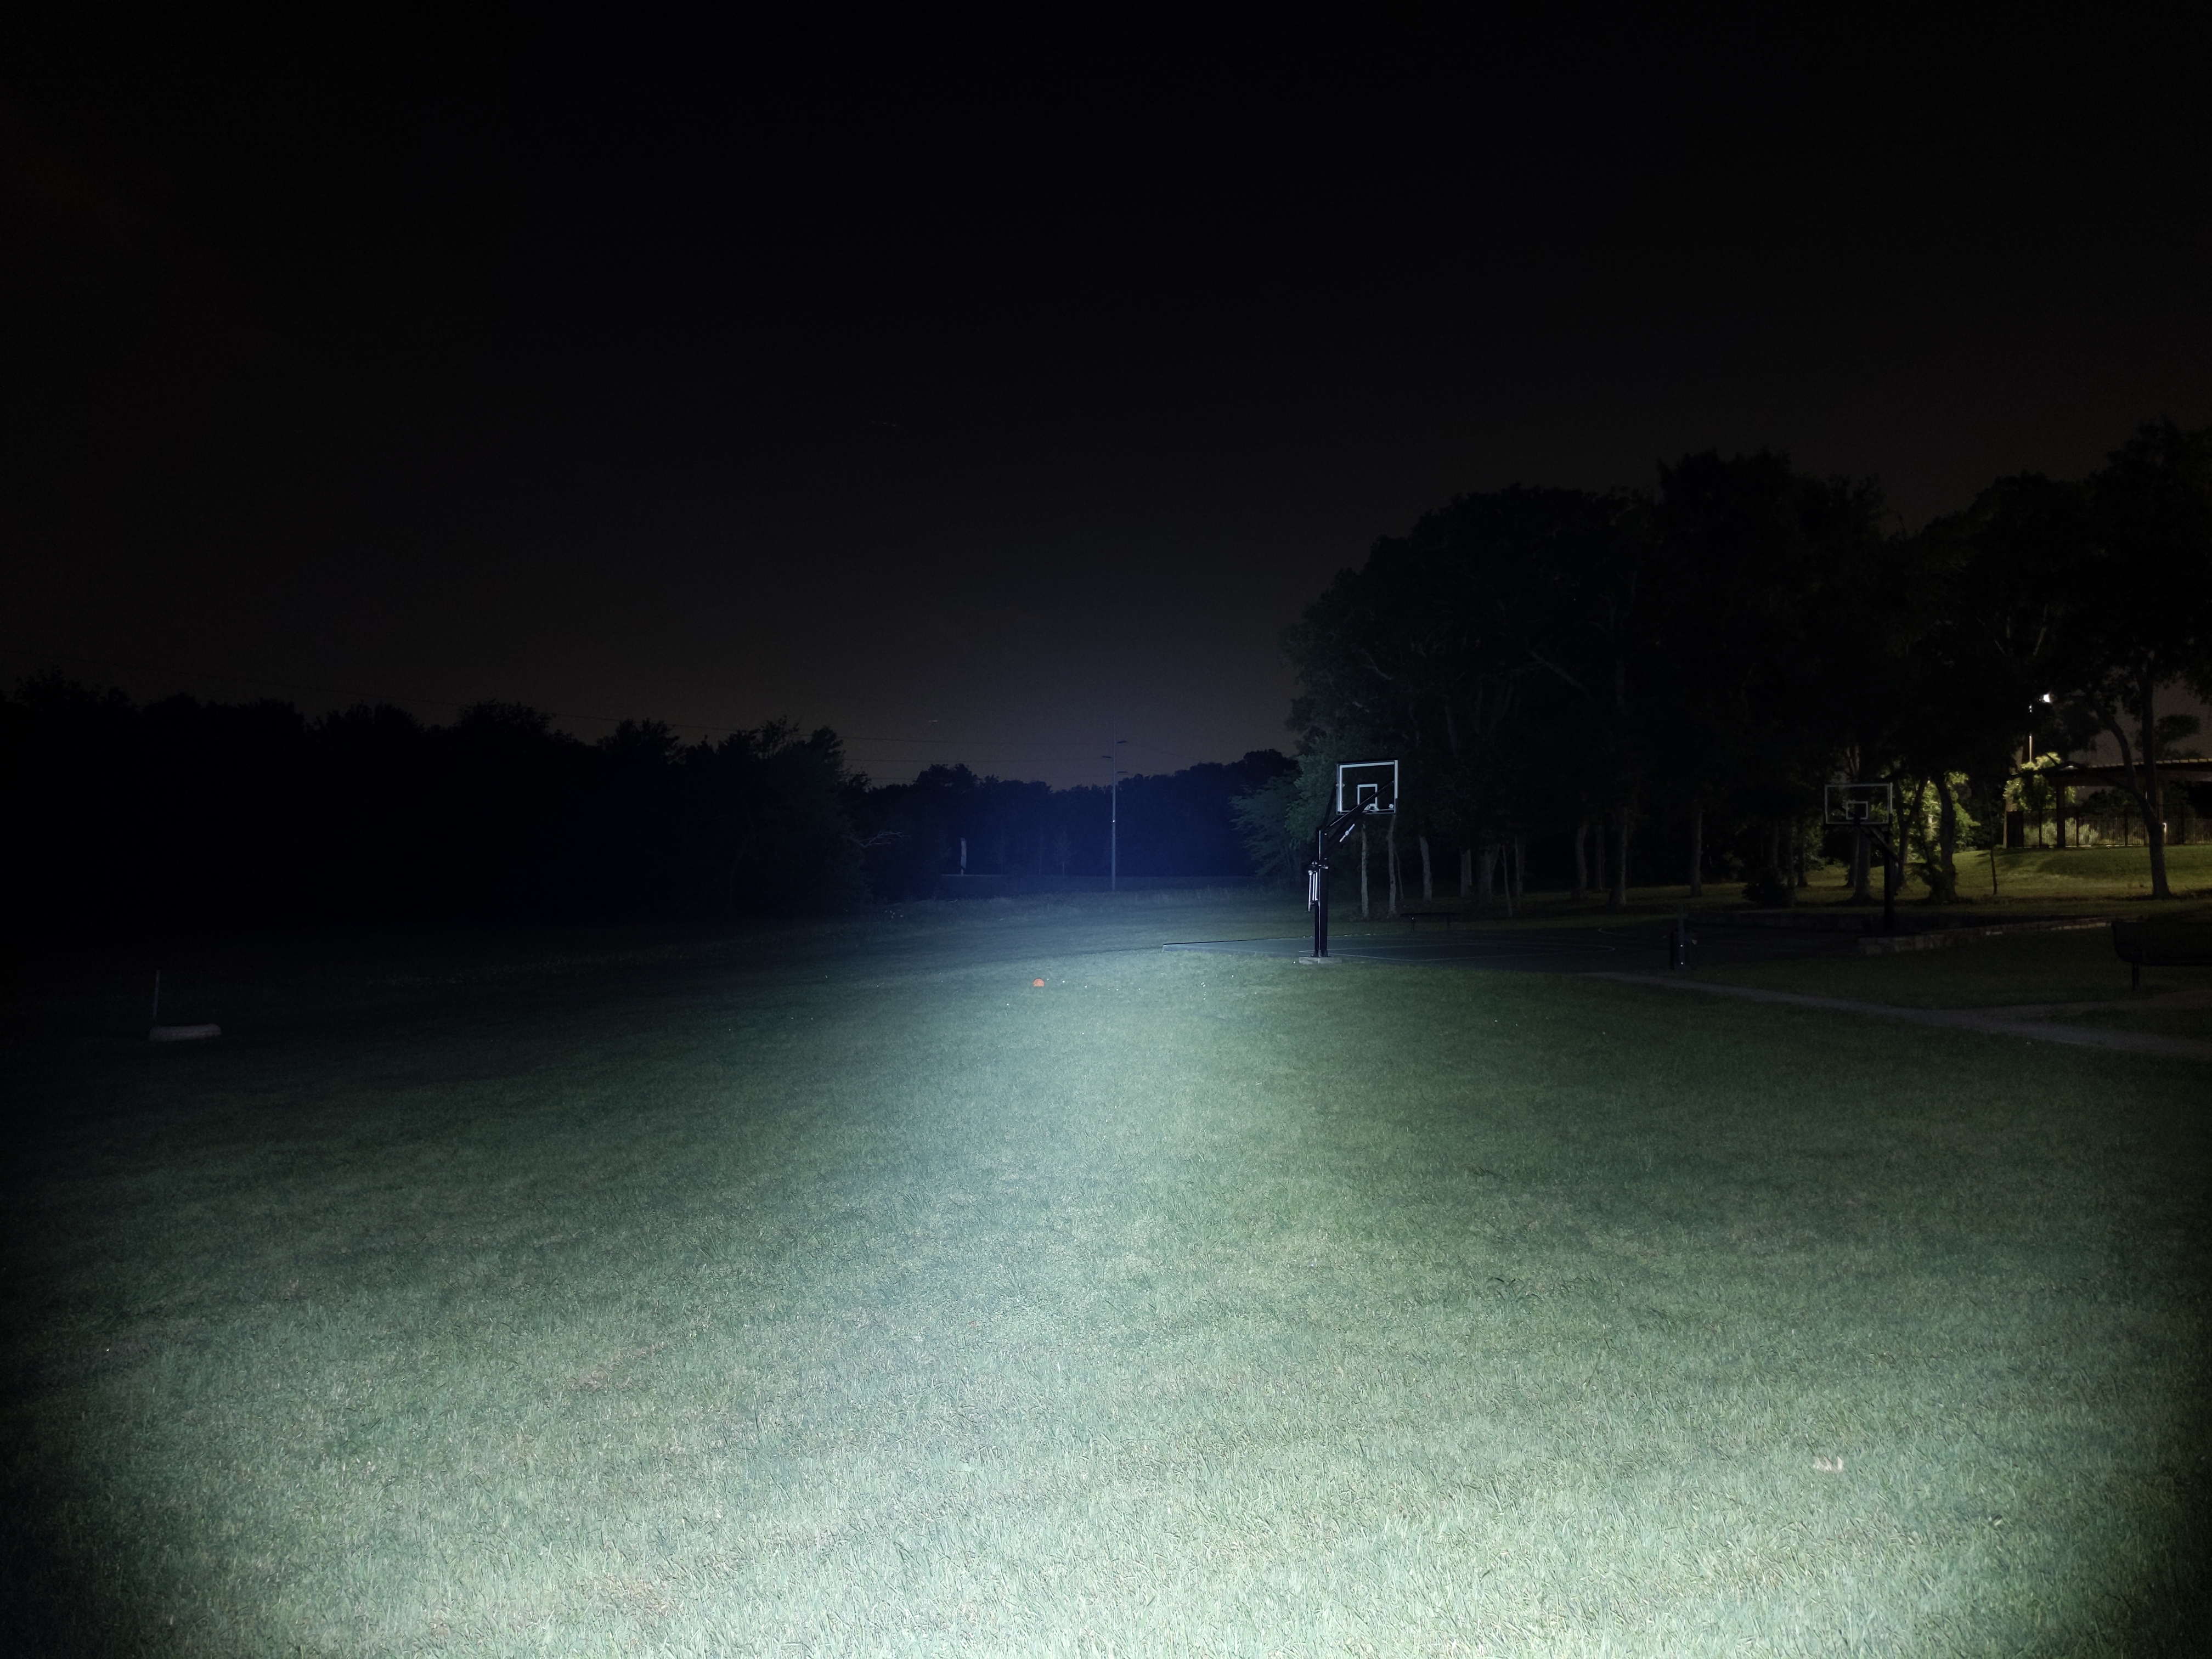
In the beamshots below, camera settings are fixed and the wall is 2.8M away.

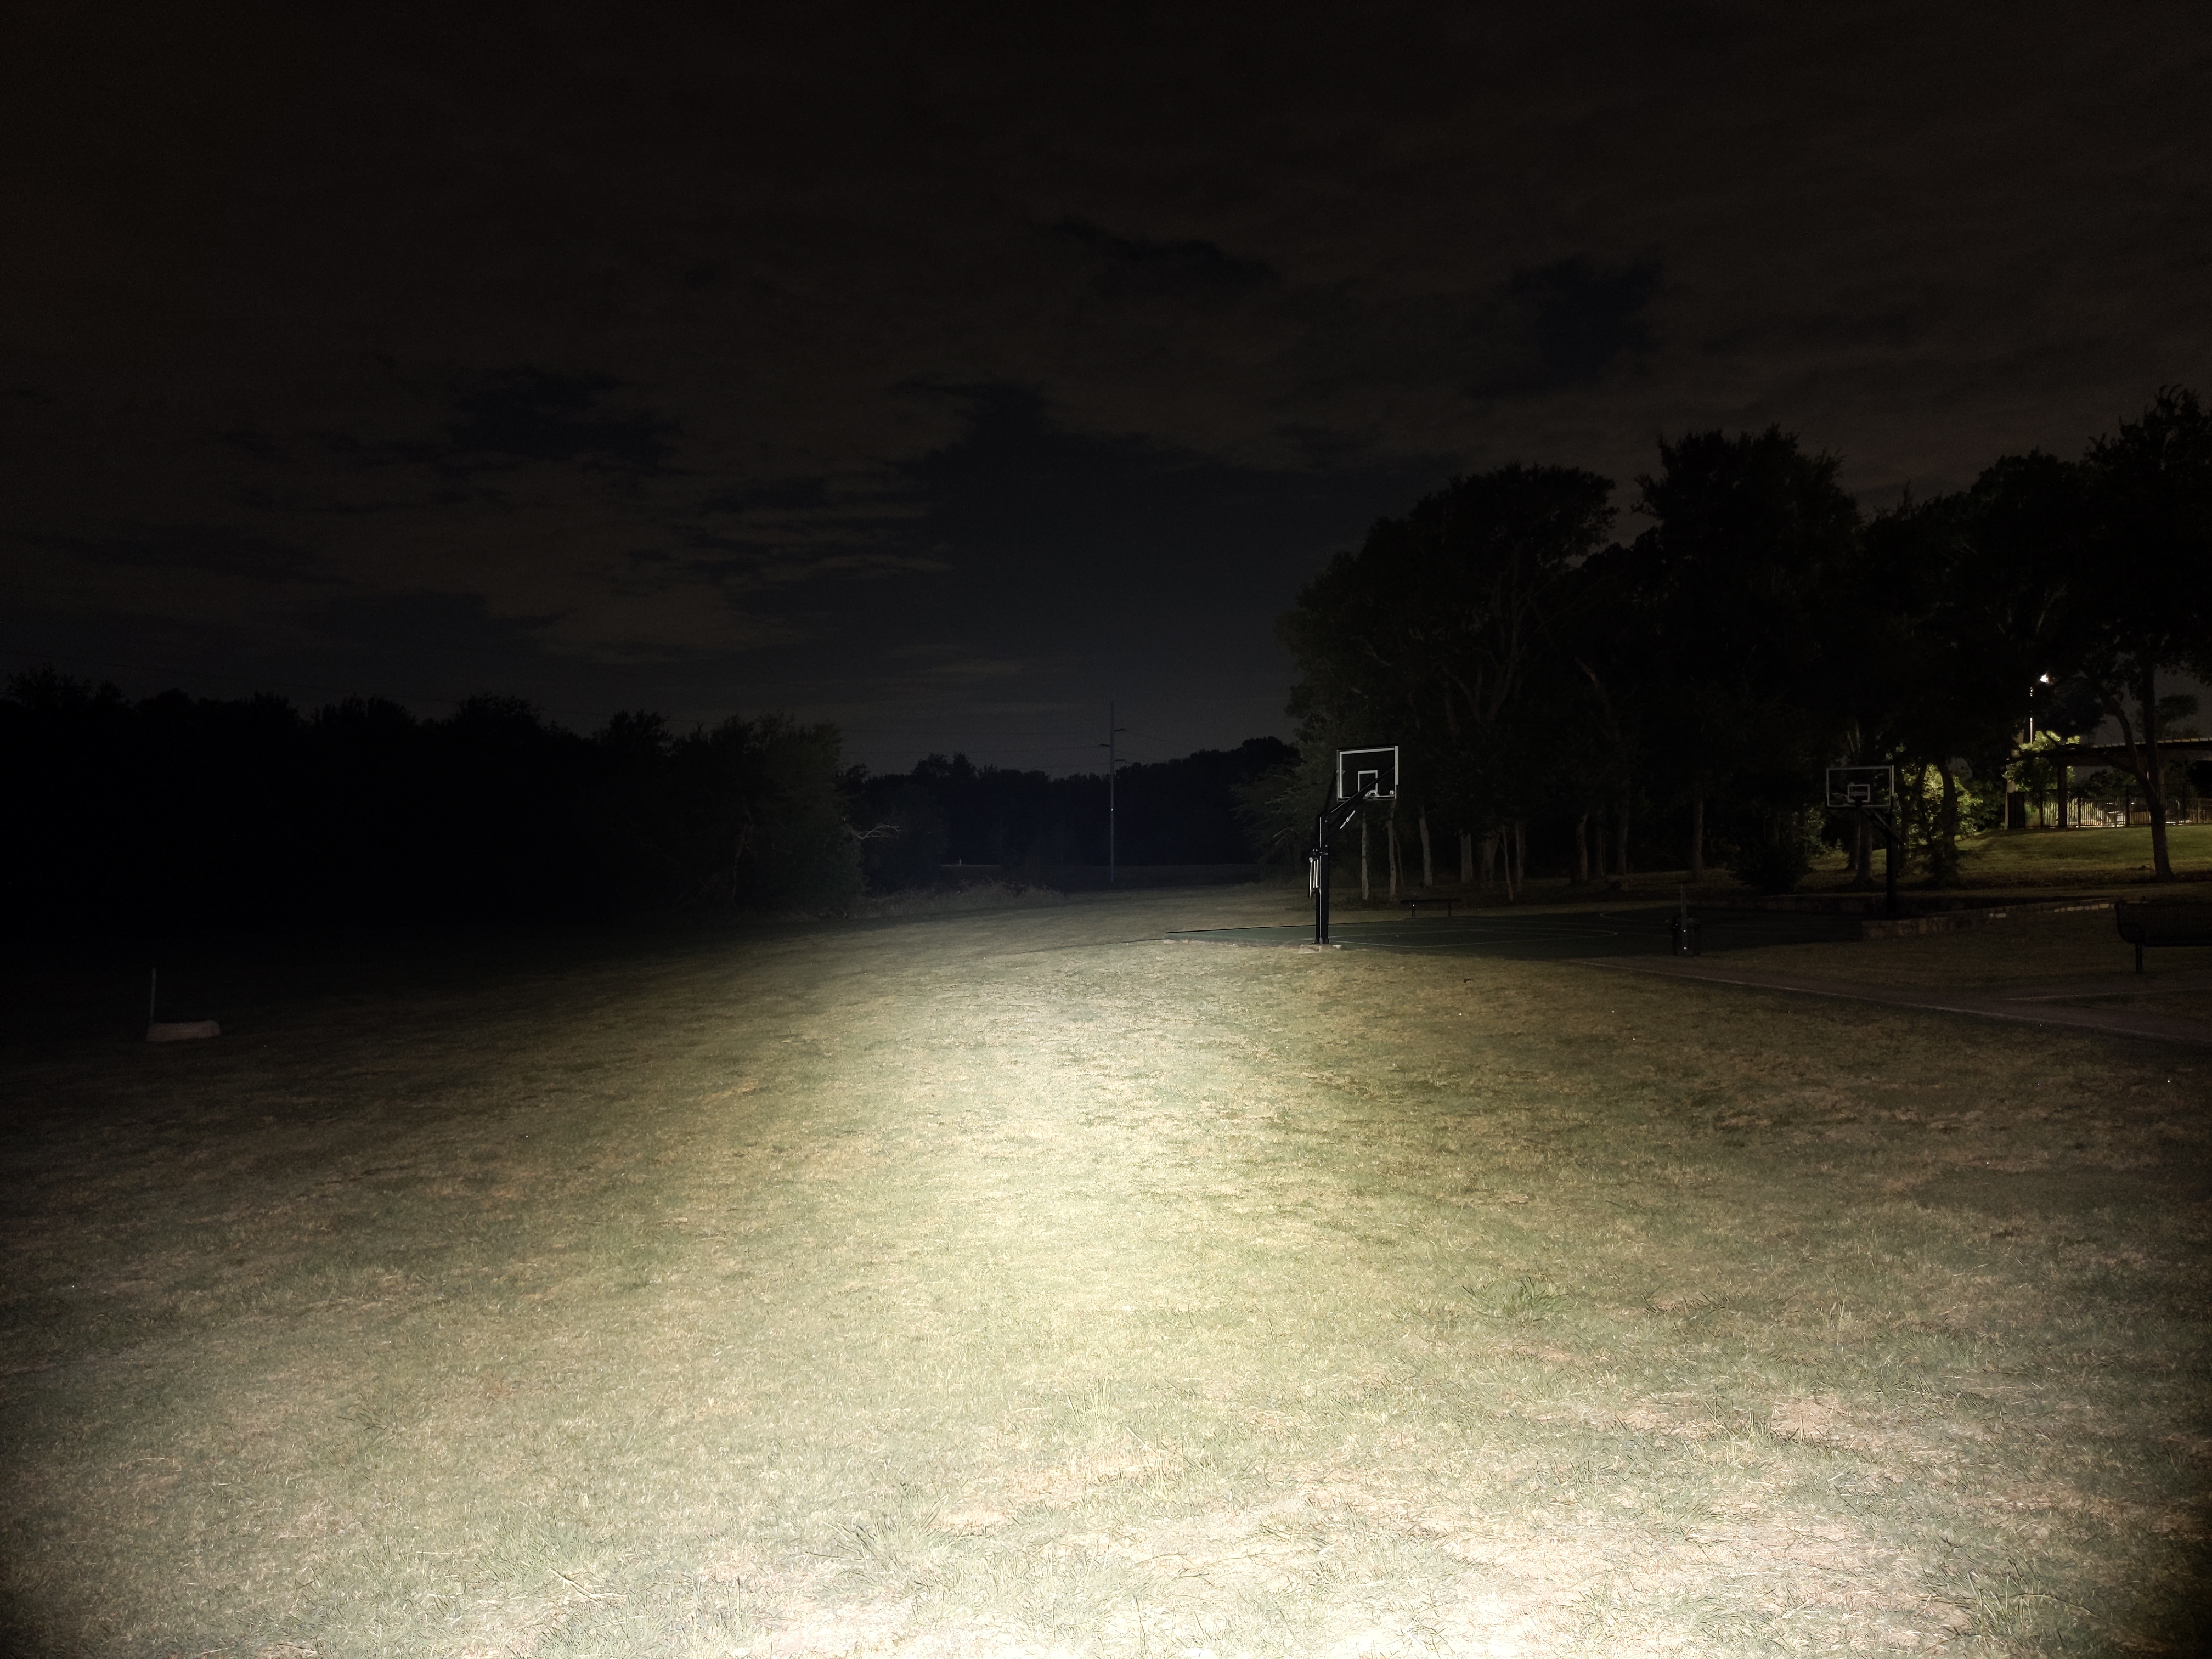
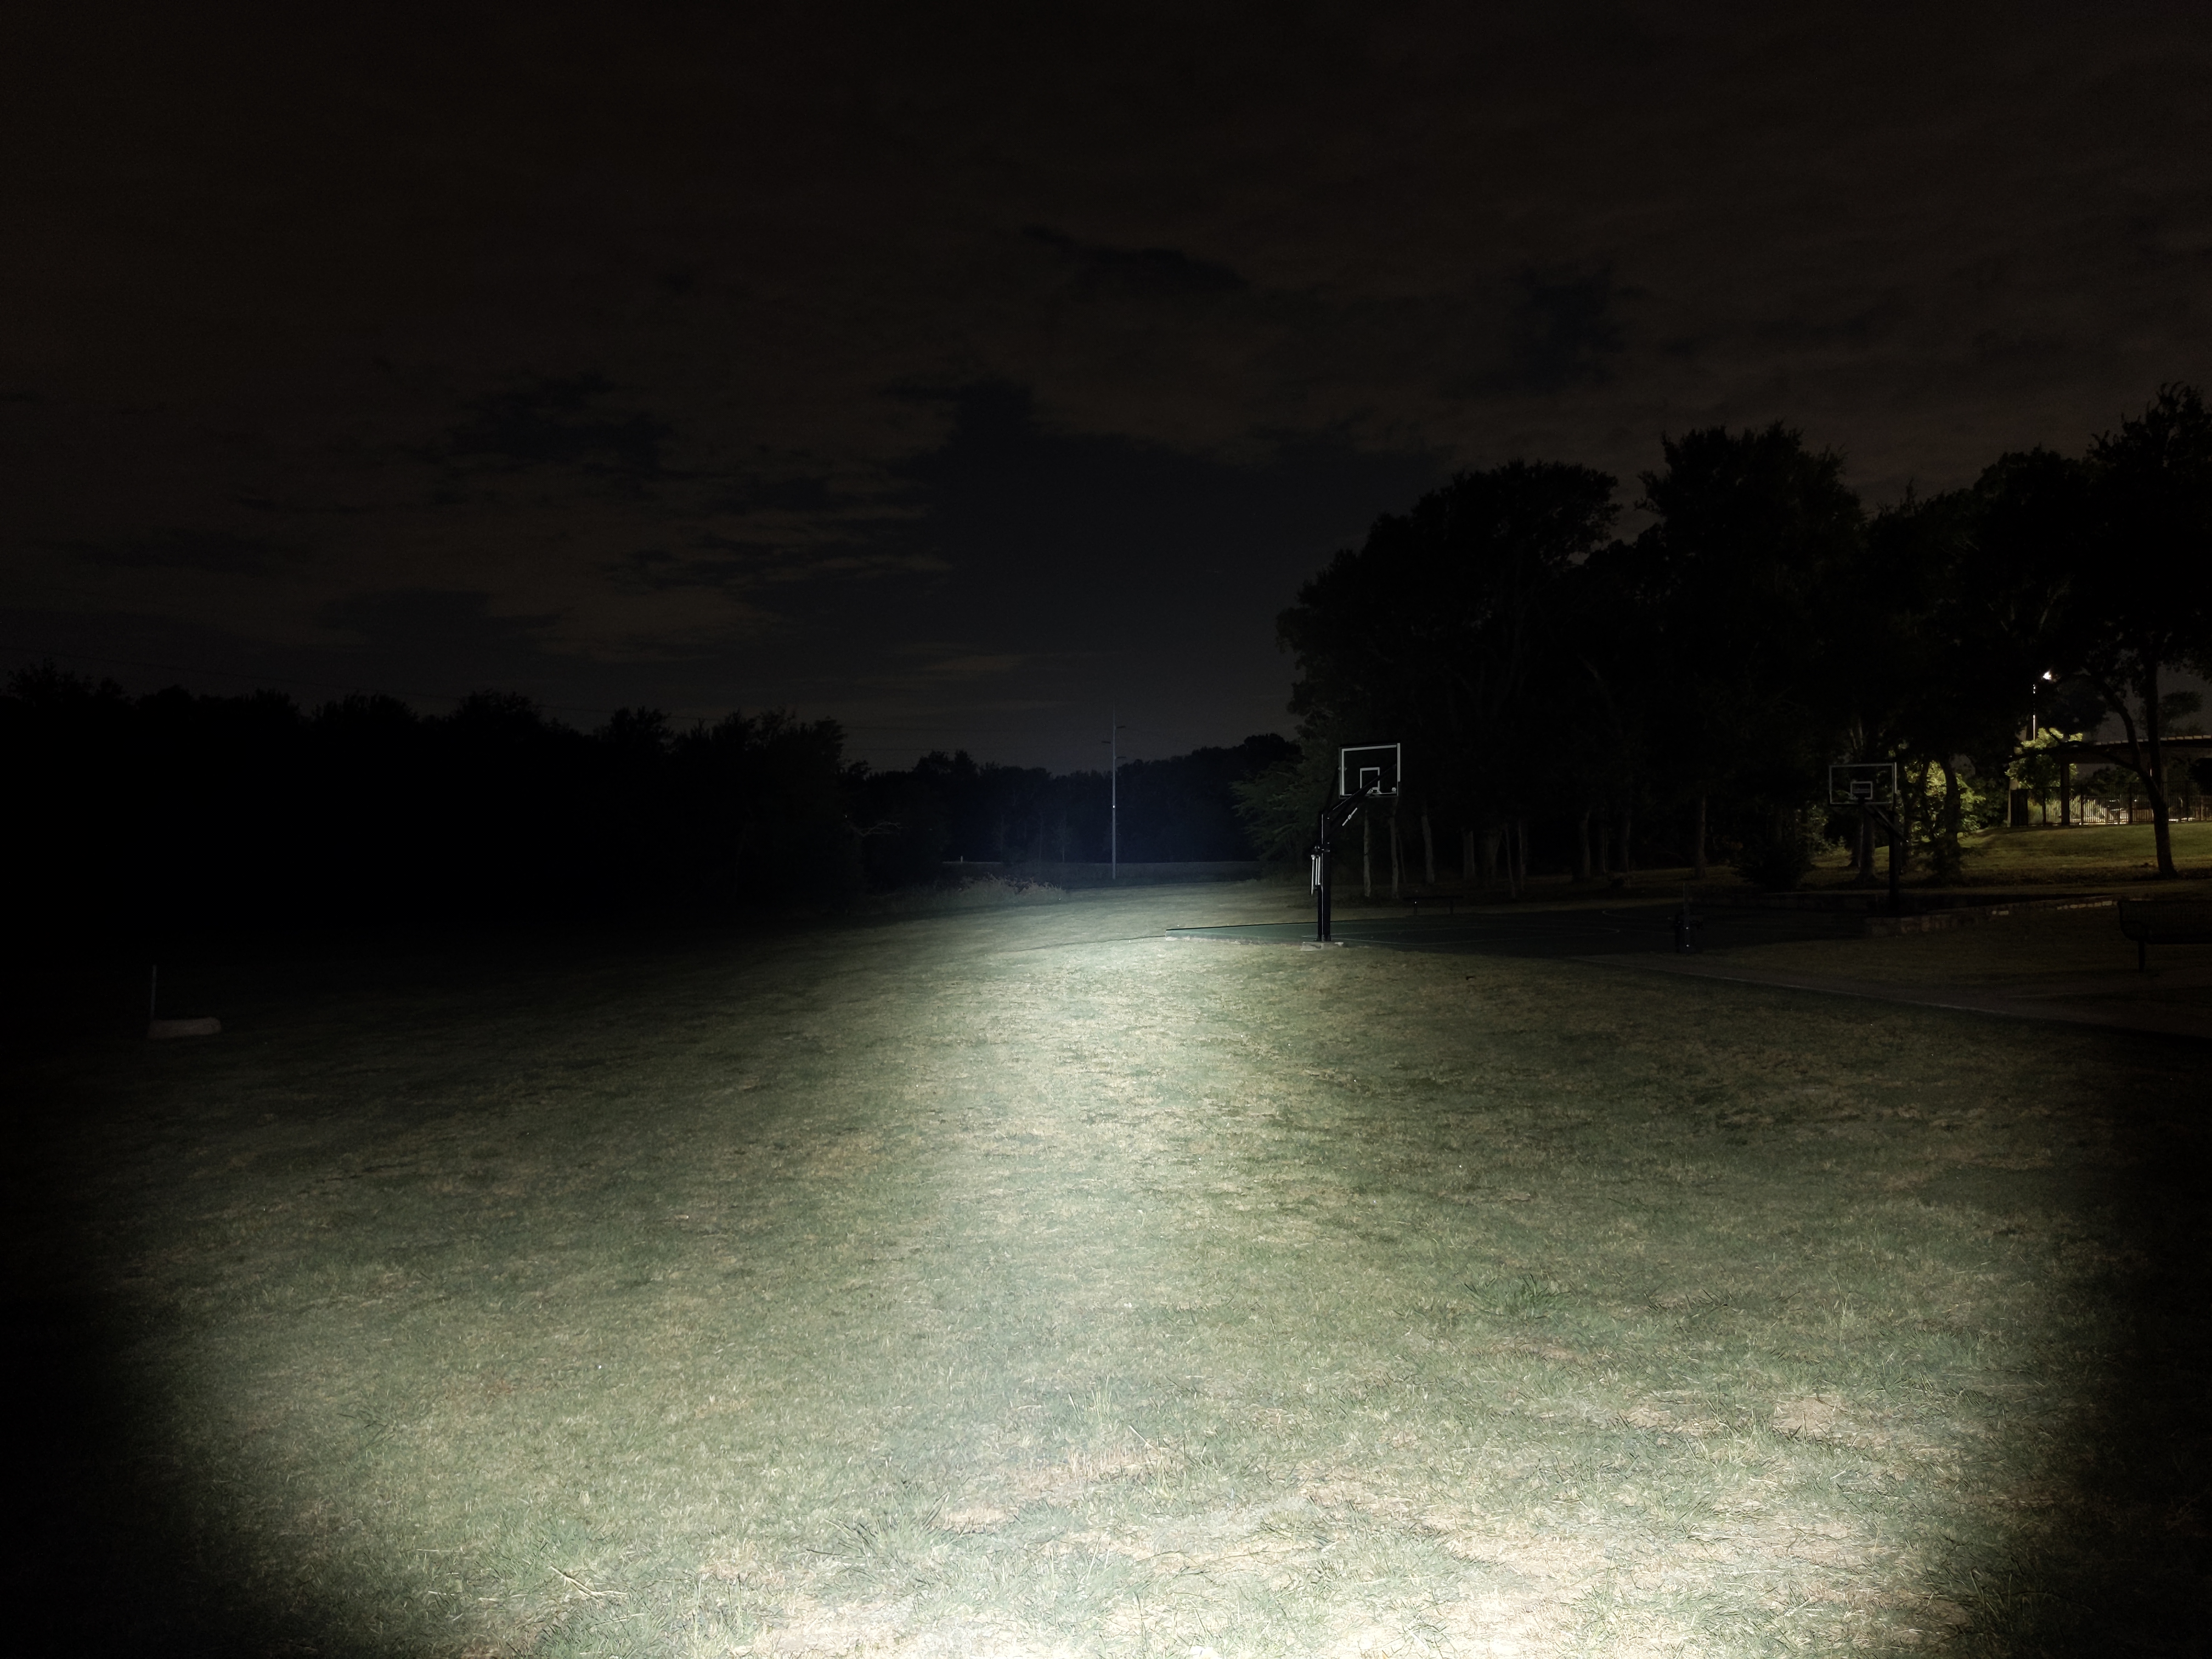
In the beamshots below, camera settings are fixed, the basketball goal to the right of the hotspot is 39M away, and the power pole in the center is 185M away.
Mode Chart
Disclaimer: All of my measurements are taken at turn-on. Lumen measurements were taken on a Texas Ace 3.5″ Lumen Tube. A candela measurement was taken at 10 meters with an Opple Light Master III on the highest brightness, and other candela figures were calculated relative to that. CRI, CCT, & DUV data were taken for each mode from a few feet away the Opple Light Master and Waveform DUV Calculator. Runtime tests were performed with the Ceilingbounce app on my smartphone. These tests were performed with a fully charged included battery unless otherwise specified. I cannot measure moonlight directly, so moonlight readings are calculated based on the brightness relative to the next-lowest mode. None of this is professional equipment, so take these measurements with a grain of salt.
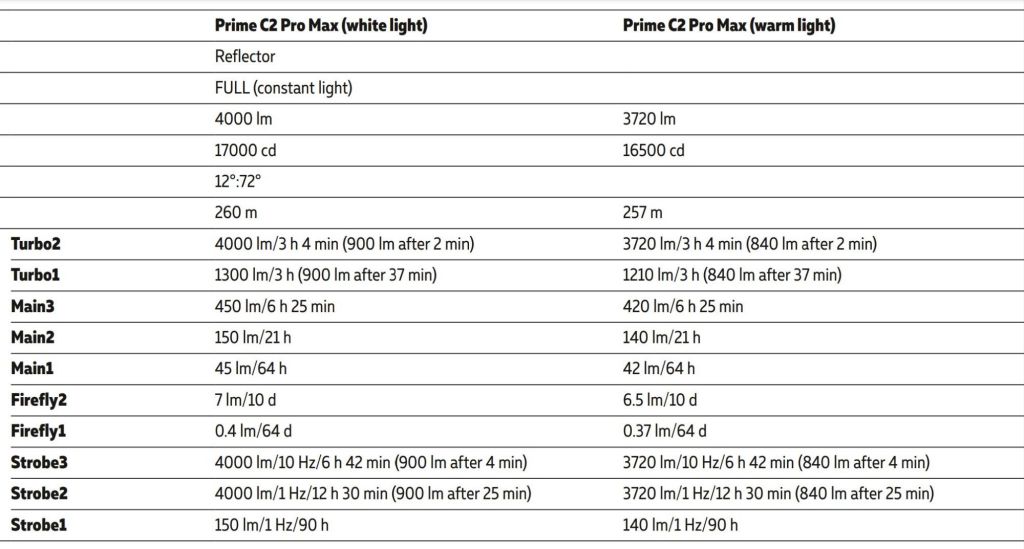
The official specs are above on the right side, followed by my measurements below.
| Level | Lumens | Candela | Throw (Meters) | CRI (Ra) | Color Temp. (K) | DUV (Tint) |
| Turbo 2 | 3600 | 24000 | 310 | 71 | 4170 | 0.0015 |
| Turbo 1 | 1200 | 8000 | 179 | 71 | 4120 | 0.0031 |
| Main 3 | 390 | 2600 | 102 | 70 | 4140 | 0.0047 |
| Main 2 | 130 | 867 | 59 | 69 | 4110 | 0.0058 |
| Main 1 | 41 | 273 | 33 | 68 | 4070 | 0.0070 |
| Firefly 2 | 3 | 20 | 9 | 68 | 4080 | 0.0069 |
| Firefly 1 | 0.2 | N/A | N/A | 69 | 4080 | 0.0062 |
Normally I take these measurements from the center of the hotspot, but for this light I took the color measurements off-center. I wanted to better represent the overall color of the beam, not just the weird cool spot in the middle.
Runtime
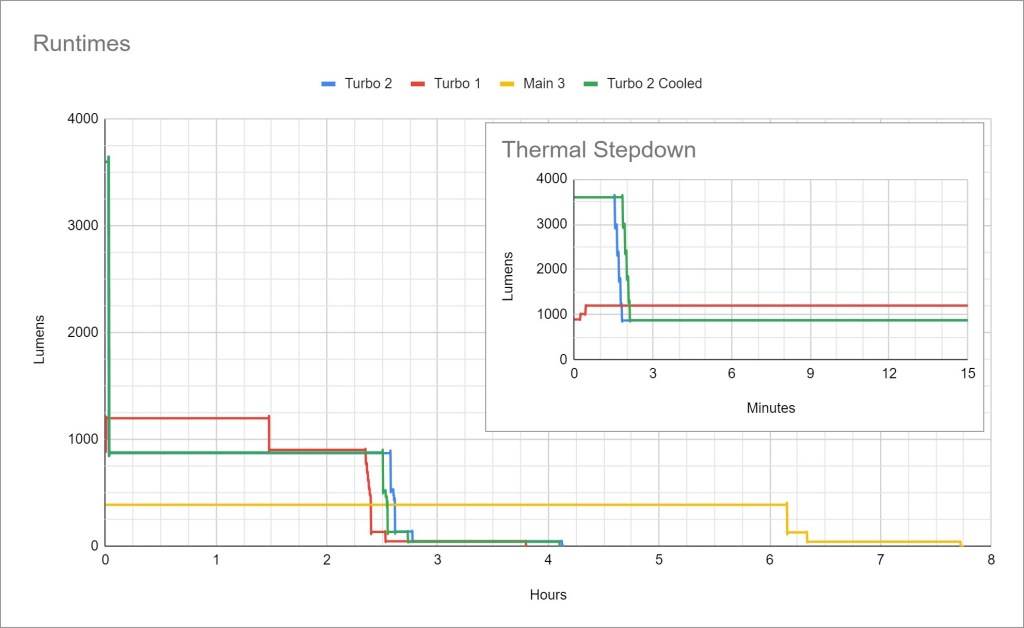
Main 2 ran at turn-on brightness for 19.5hrs and then dropped to 1/3 brightness for another 1.5hrs. I didn’t include it in the graph to save space.
Performance is great! Sustained output is around 1000 lumens for around 2.5hrs. Turbo 2 lasts over a minute before stepping down, and Turbo 1 doesn’t have to thermal throttle at all as far as I can tell.
Thermal regulation appears to be a timed stepdown only. My Turbo Cooled test (desk fan blowing directly on the light for the entire test) made it last an extra ~15 seconds before Turbo stepdown, but that’s the only difference and might be within the margin of error. The user manual clearly states it has active thermal regulation (ATR), but I don’t see it. I expect a light with ATR to maintain a noticeably higher brightness when actively cooled.
LVP (Low Voltage Protection) is present and works well. When the battery is effectively empty, the light will shut itself off. It doesn’t rely on the battery’s protection circuit and the light can be re-activated in an emergency.
Driver & Regulation
This light uses a boost driver, the best kind of driver. Boost drivers provide great efficiency and typically great regulation performance too. A Boost circuit takes the ~3.7V from the battery and boosts it up to the ~6V or ~12V that the LED needs, so the voltage is always regulated.

Regulation performance is exactly what I like to see. Super consistent down to ~25% charge. That means it’s using high-quality electronics and those electronics are being driven hard for maximum performance.
PWM: No PWM is visible to my eyes or camera, nor audible to my ears.
Parasitic Drain: 14 microamps. That will take ~40 years to drain the included battery. Mechanical lockout is possible by loosening the tailcap to completely eliminate parasitic drain or prevent accidental activation.
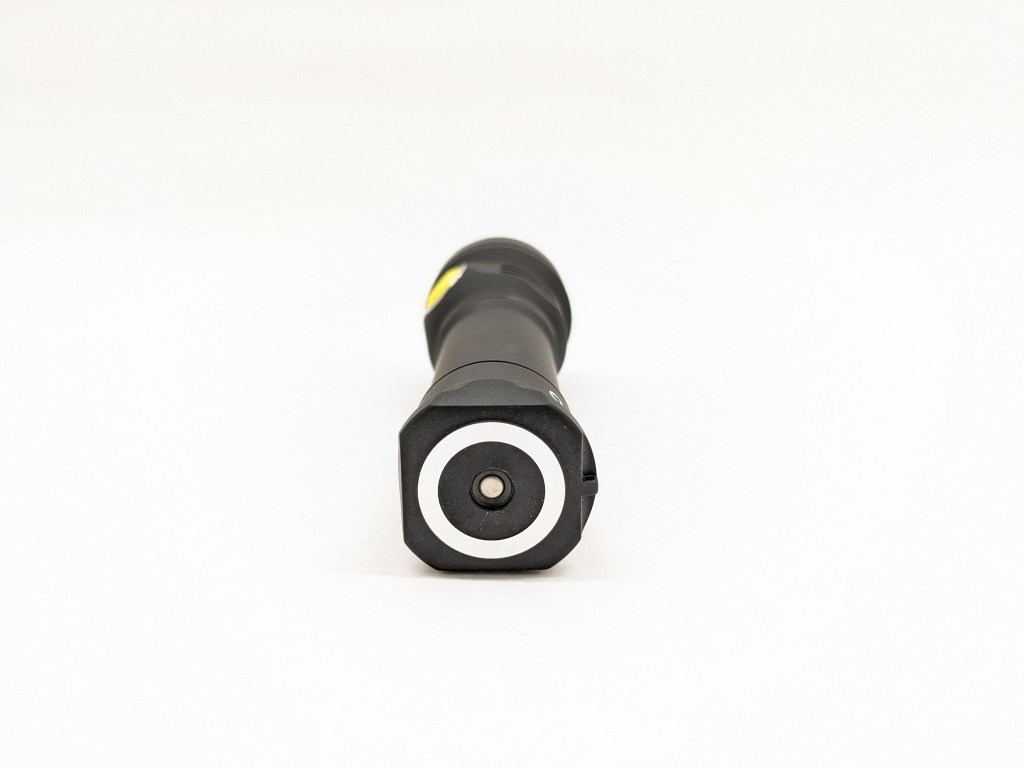
Switch
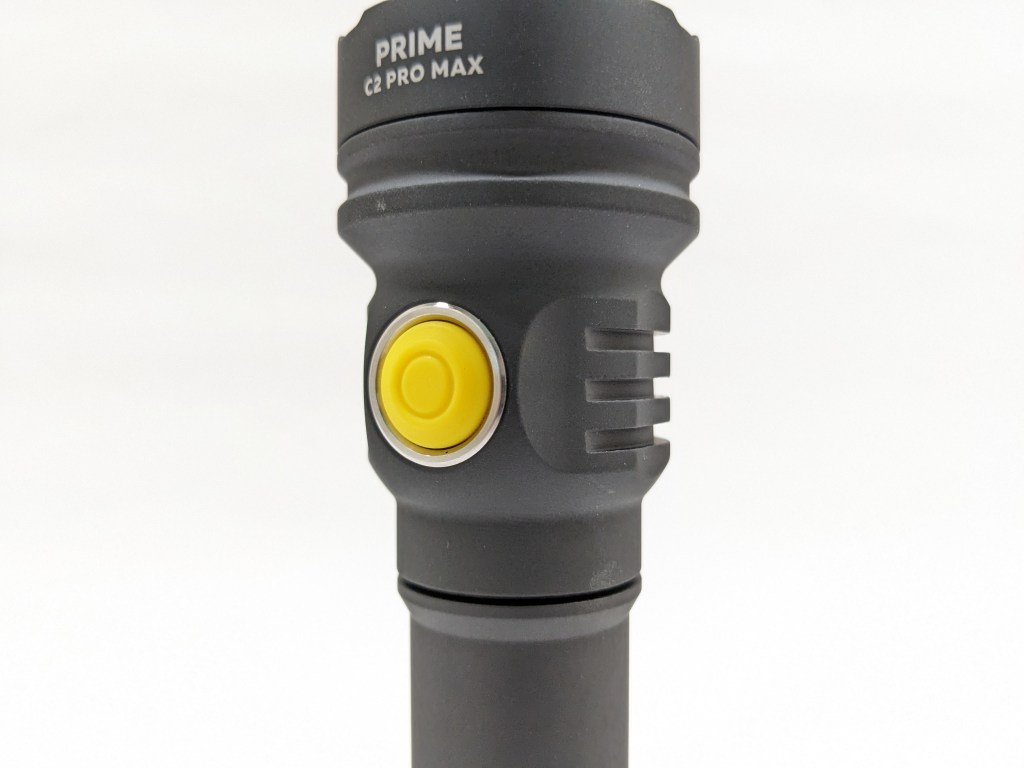
The switch is electronic and located on the side of the head. It’s covered by a bright yellow rubber boot that makes it easy to find. It’s got a great action with a satisfying click and minimal pre-travel. It’s not shrouded or protected at all, so it may be prone to accidental activation. Best practice is to loosen the tailcap a bit for mechanical lockout before putting it in a bag or the included holster.
Indicator LEDs sit behind the switch here’s what they mean when the light is on:
- Green blink every 4 seconds: battery >25% charged
- Orange blink every 2 seconds: battery 10-25% charged
- Red blink every second: battery <10% charged
- Three orange blinks every 2 seconds: the light is hot
- Three red blinks every 2 seconds: the light is very hot and will automatically lower brightness to avoid overheating
According to the user manual, the indicator should also flash every 4 seconds whenever the light is off, but my sample doesn’t do that.
Carry & Ergonomics
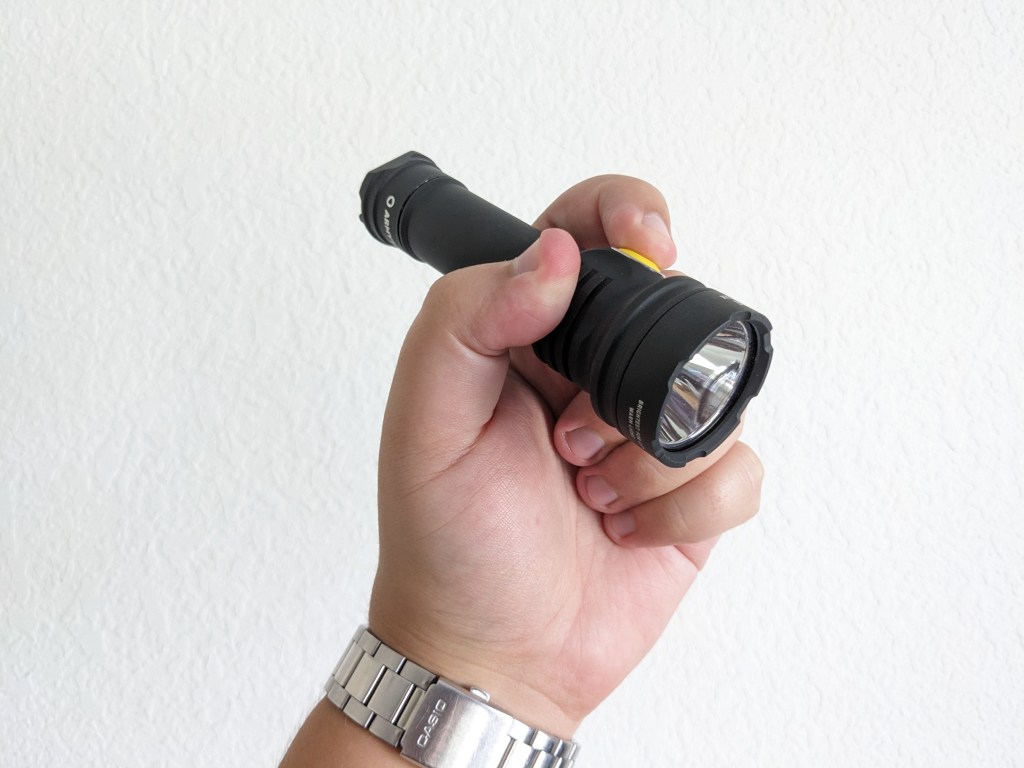
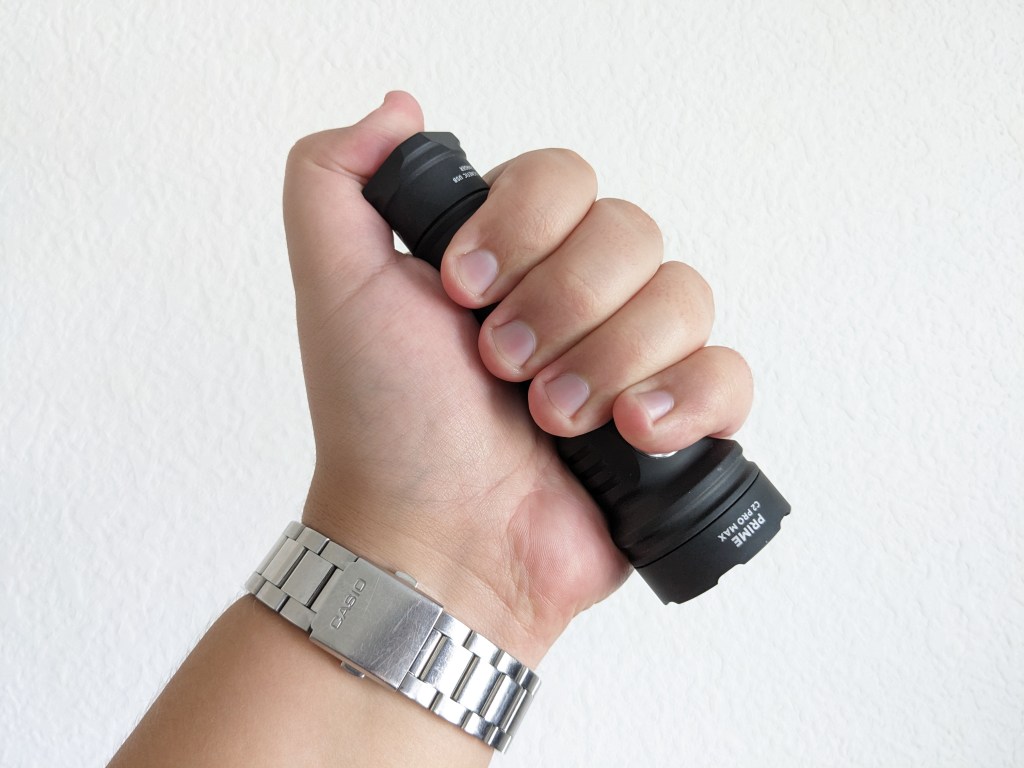
Ergonomics are great. It fits nicely in the hand and the anodizing provides plenty of grip if you don’t mind the chalkboard texture. A forward grip works best but pencil and reverse grips can work too.
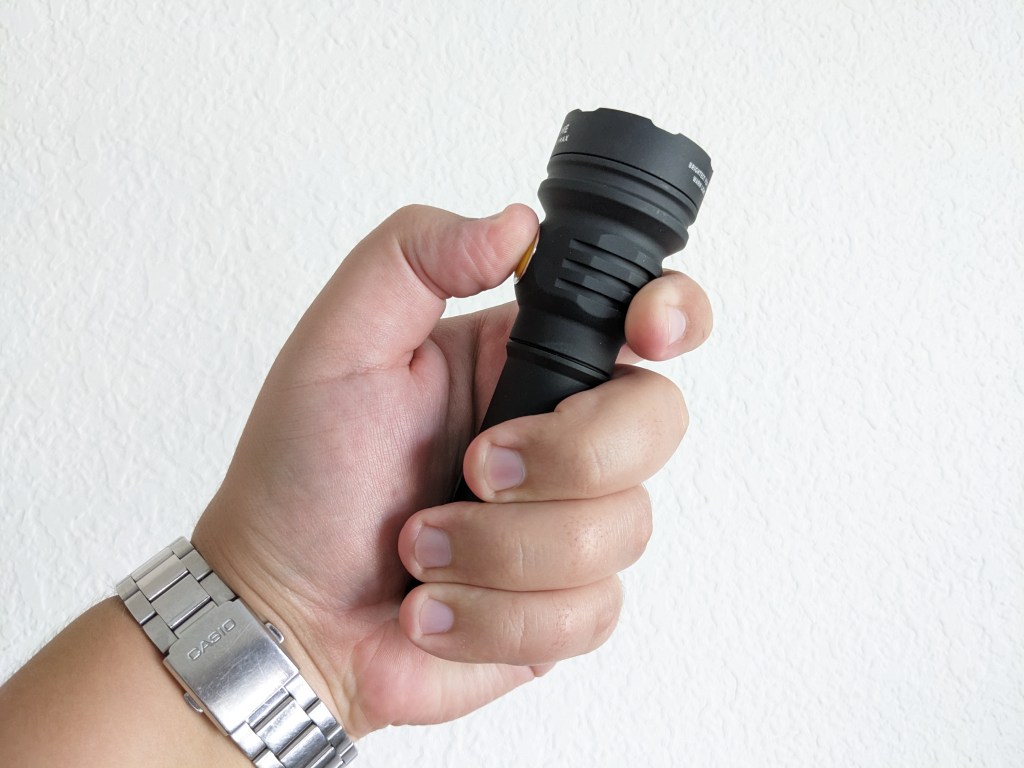
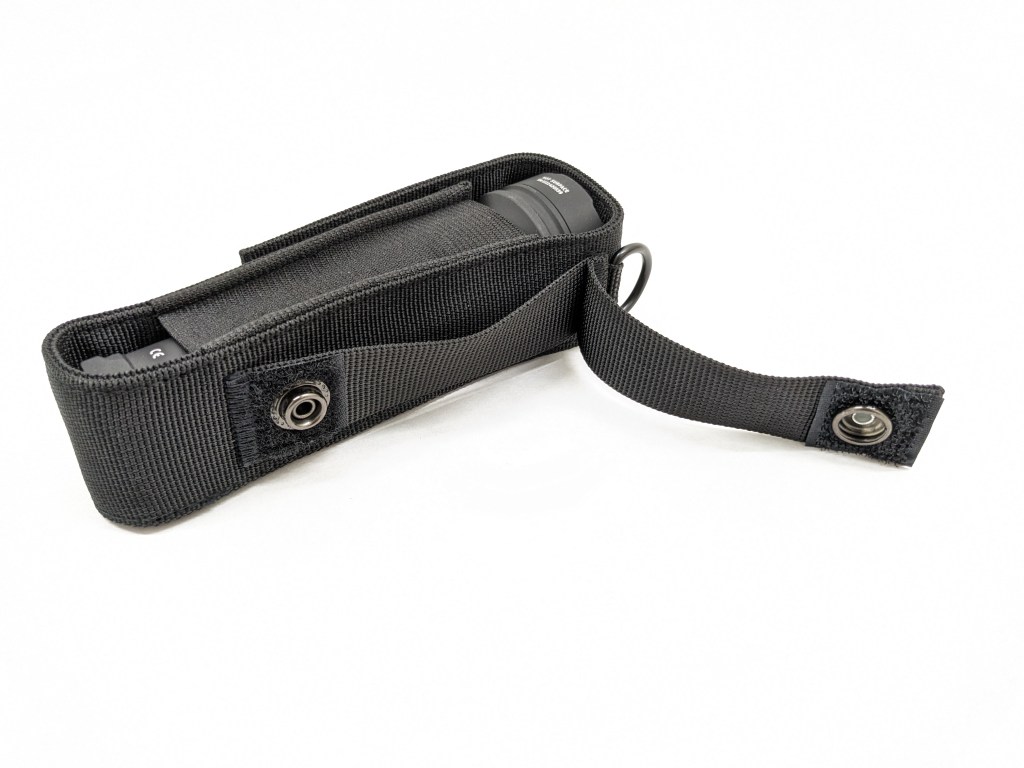
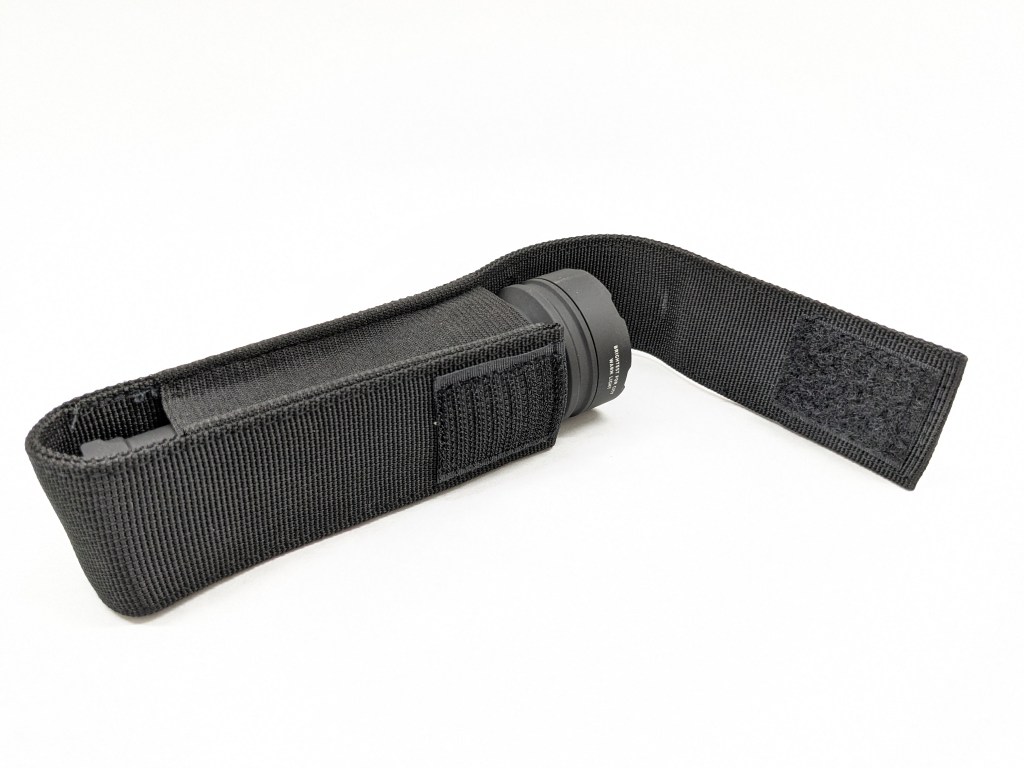
Holster: A nylon belt holster is included in the box. It’s basic, but it works well and it’s not bulky. The closure is Velcro and there are two loops on the back. One is fixed and the other can be opened with velcro and a button. A pocket clip is not included, and there are no spots to attach one.


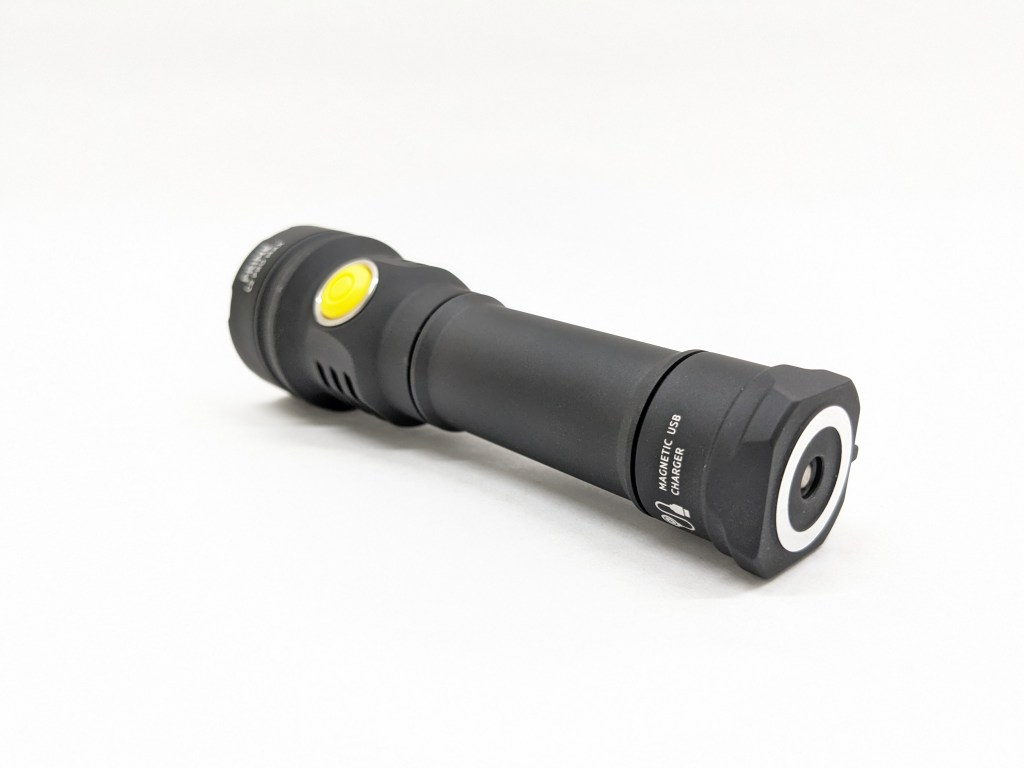
A magnet is built into the tailcap to facilitate the magnetic charging. It’s strong enough to hold this light up even on a vertical surface. I recommend avoiding metal shavings though, as they will get stuck to the tailcap and possibly hinder/damage the charging circuitry.
Batteries & Charging
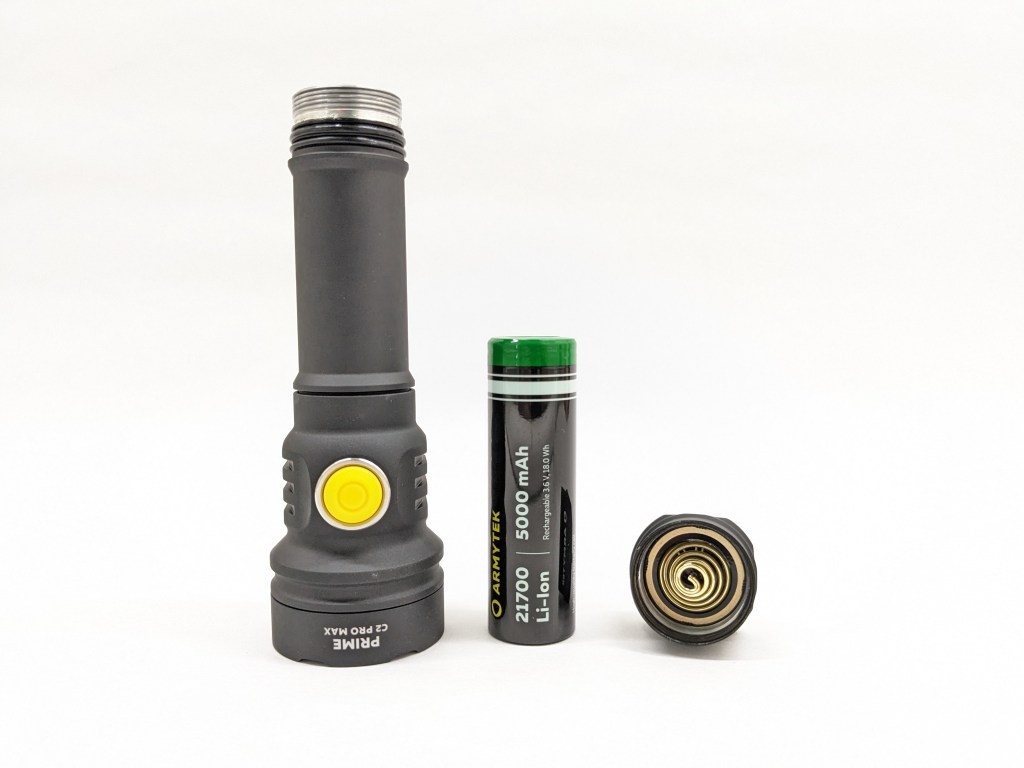
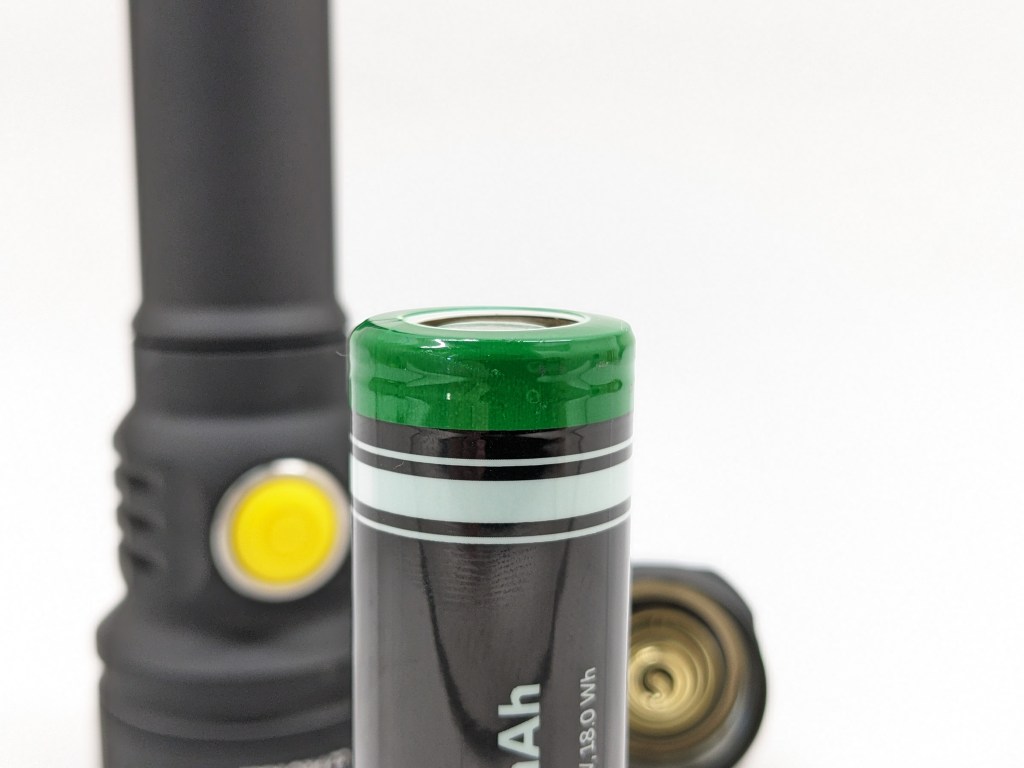
The battery included is a 5000mAh, unprotected, flat top, 21700 cell that does the job. An 18650 adapter is also included in the box. The user manual specifies the battery must have a discharge current of 15A or more. Protected 21700 cells don’t work. Protected 18650s will fit if you don’t use the 18650 adapter.
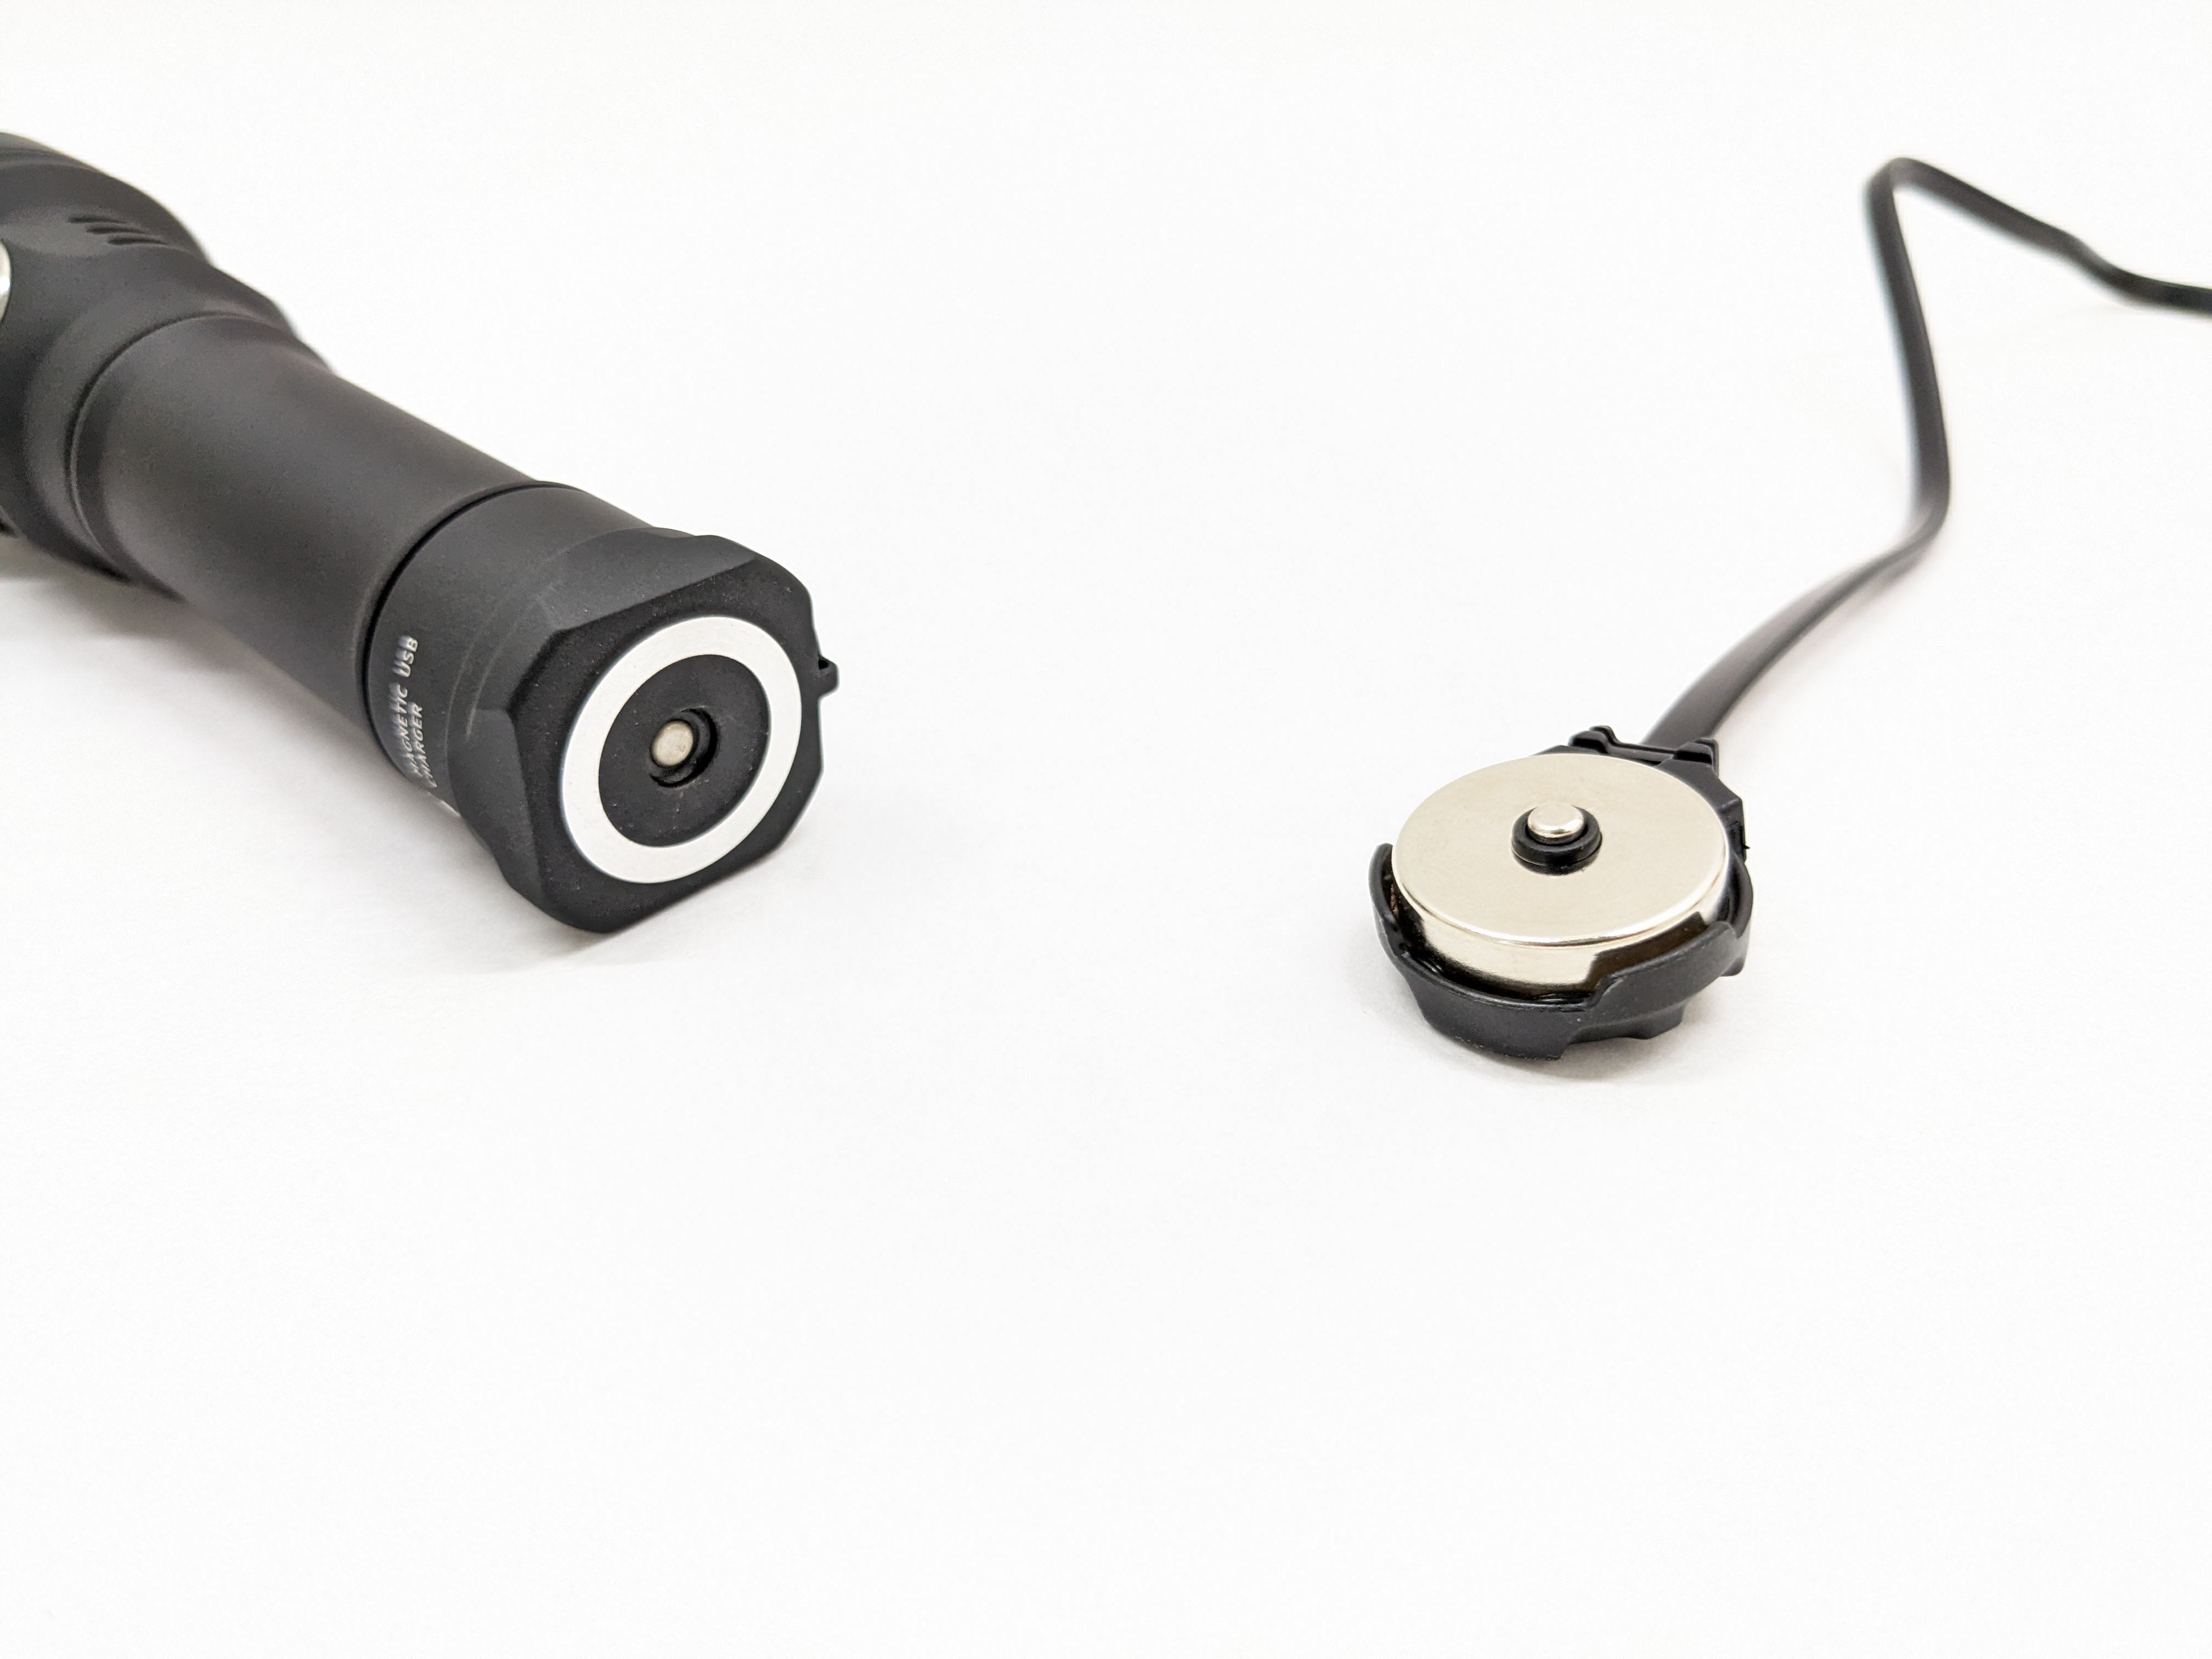

Charging is facilitated by magnetic contacts on the tailcap and a mating magnetic puck. Unlike the other brands with tailcap magnetic charging (Olight), Armytek has engineered a solution that does not require proprietary batteries! All you have to do is loosen the tailcap before connecting the magnetic charging puck. Charging is very slow and takes over five hours from an empty battery.
Competition
Here are some lights in the same class and how they compare.
Olight Seeker 4 Pro: more polished alternative
- more expensive
- similar lumens, similar throw
- four LEDs under TIR optic
- no warm option
- better holster with charging dock
- wall mount included
- similar magnetic charging (built into holster with USB-C port)
- deep, smooth, satin anodizing with rubberized grip
- better brightness and battery indicators
- rotary switch
- annoying auto lockout
- optional pocket clip
Acebeam E75: high-CRI option with clip
- a bit less expensive
- marginally less lumens & throw
- USB-C charging built-in
- pocket clip included, but no holster
- four LEDs
- High-CRI LED option
Wurkkos TS23: tailswitch budget alternative
- less than half the price
- XHP70.3-HI cool white LED in OP reflector
- glass breakers in bezel
- similar lumens, more throw
- electronic tail switch
- USB-C charging built-in
- pocket clip included, but no holster
This section is not comprehensive. If I didn’t include a particular light here, it doesn’t mean it’s bad or doesn’t deserve to be here. I simply cannot list every possible competitor.
Conclusion
I love the brightness, runtime, regulation performance, magnet, and switch. I like the charging solution, standard battery, shape, and durability. I don’t like the UI, anodizing texture, smooth reflector, or tint-shift in the beam. Overall, this is a tank of a light that’s a great choice if you need something bright, floody, and rugged.
Thanks to Armytek for sending me this light for review!


What happens if you forgot to loosen the tailcap before connecting the magnetic charging puck,?
LikeLike