- Pricing & Availability
- What comes in the box?
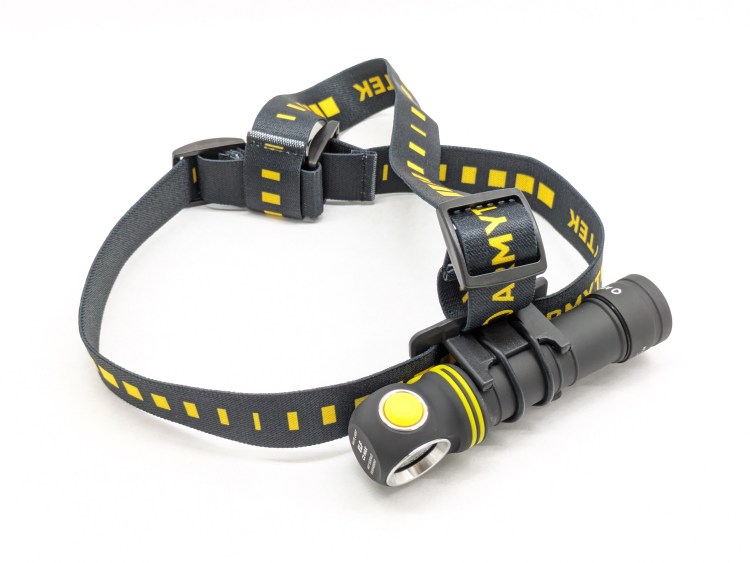
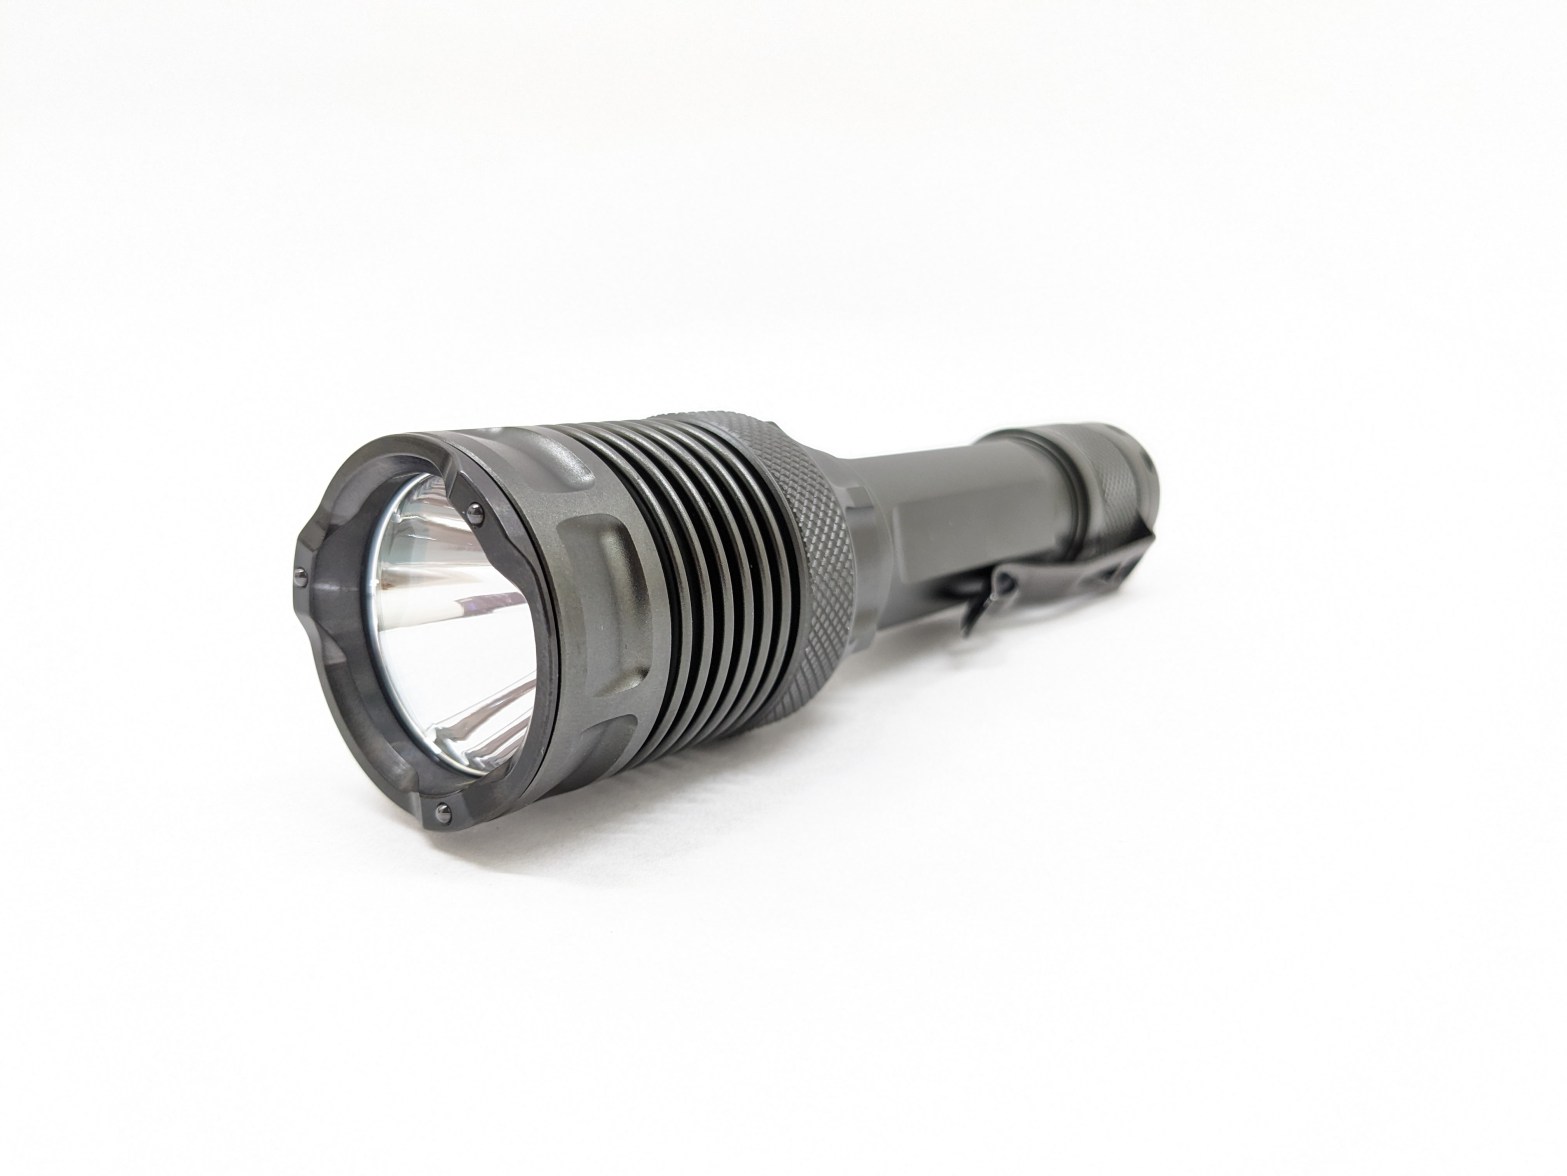
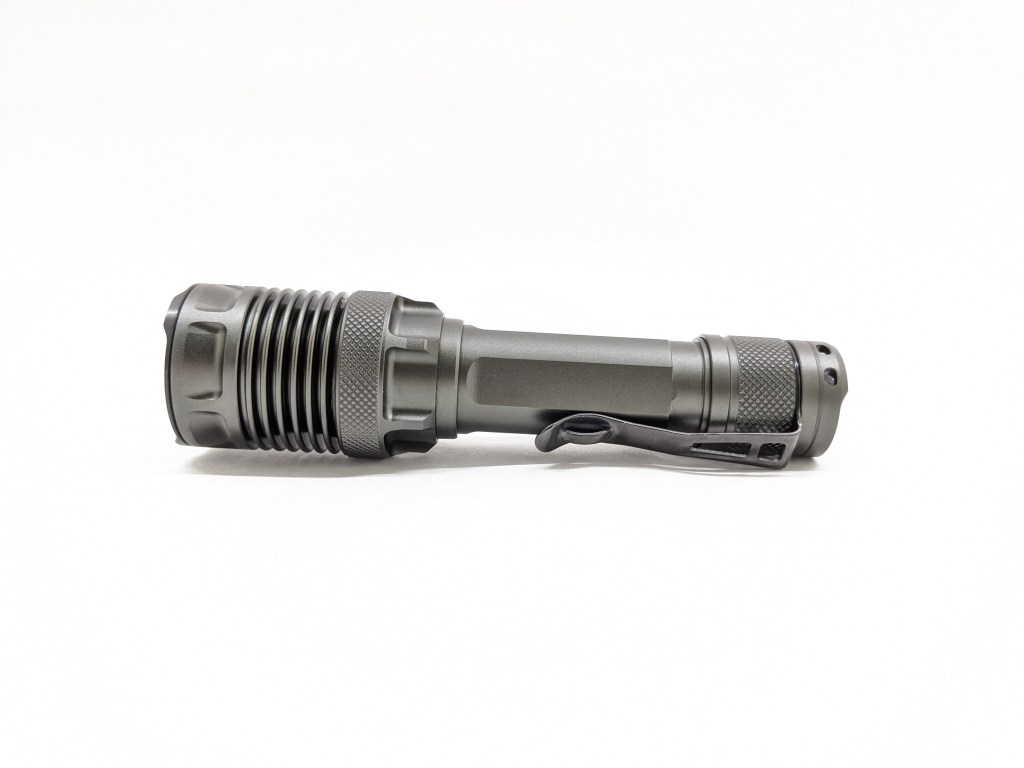
- Design & Construction
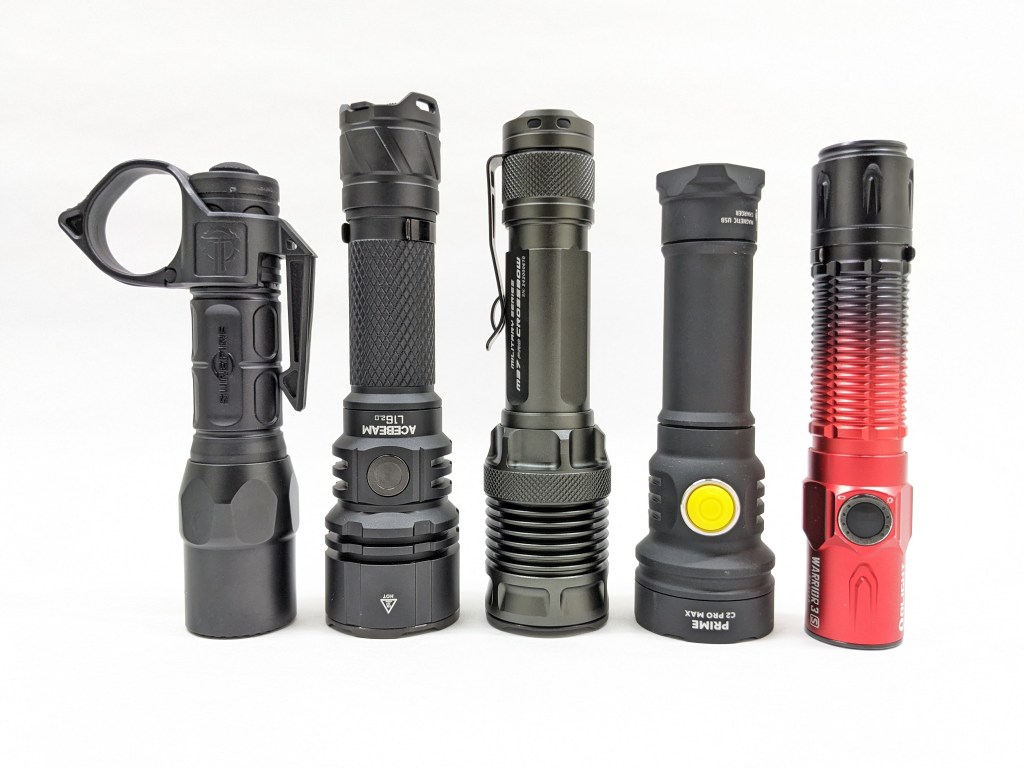
- Size & Measurements
- User Interface
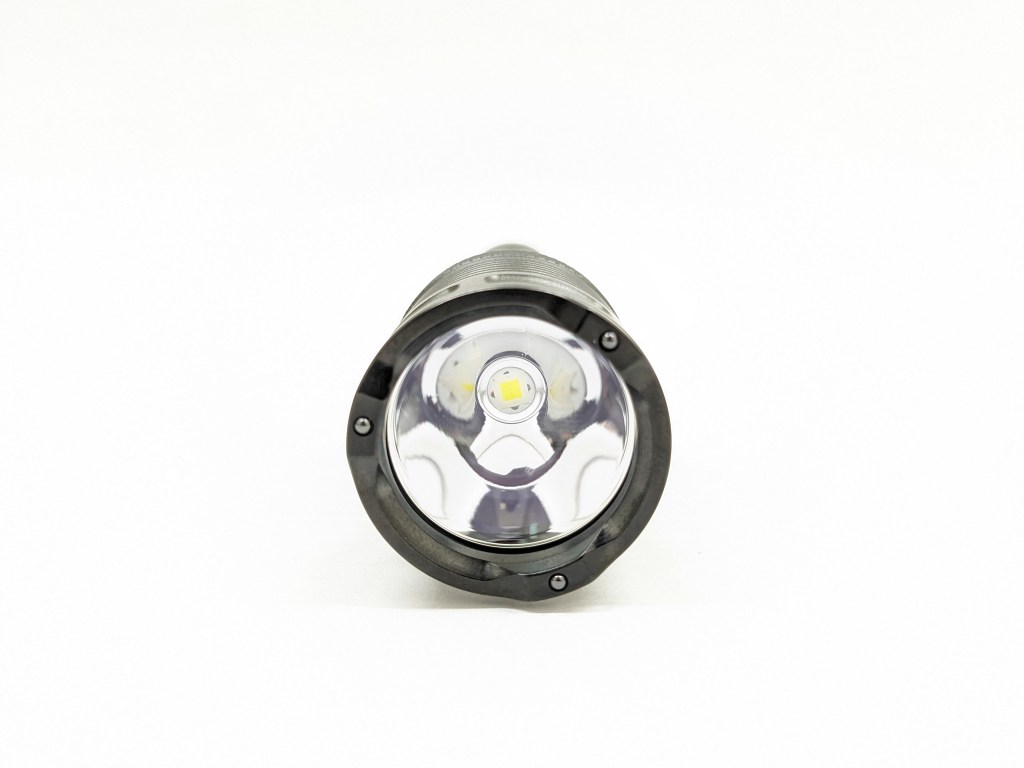
- Emitter & Beam
- Mode Chart
- Runtime
- Driver & Regulation
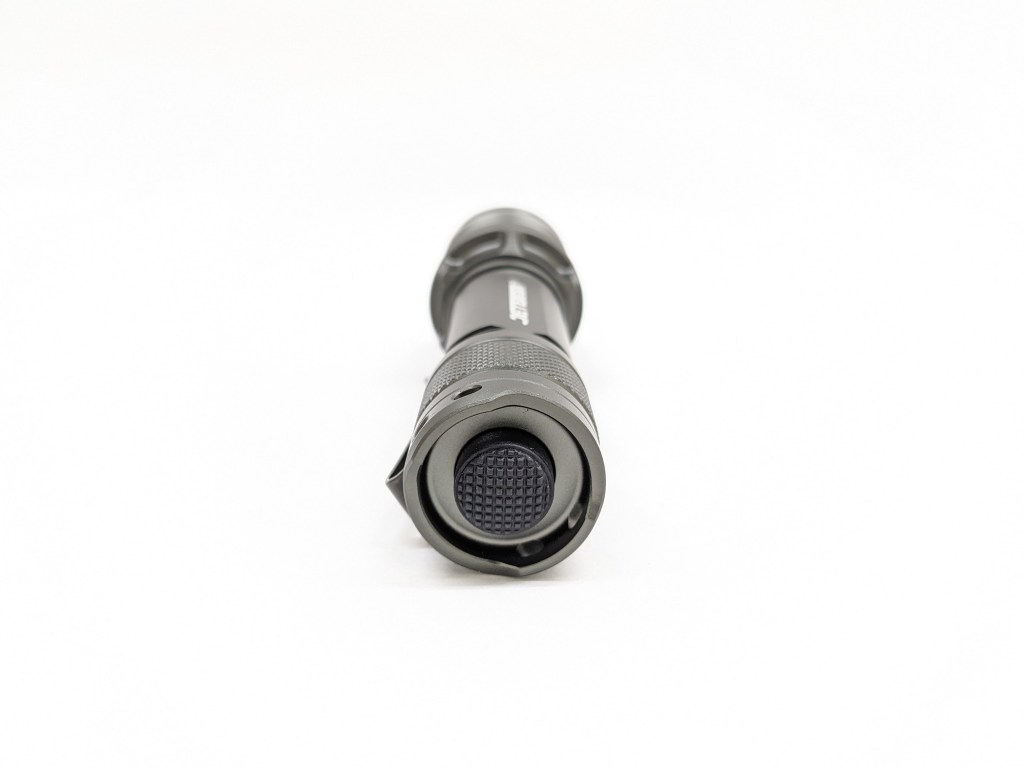
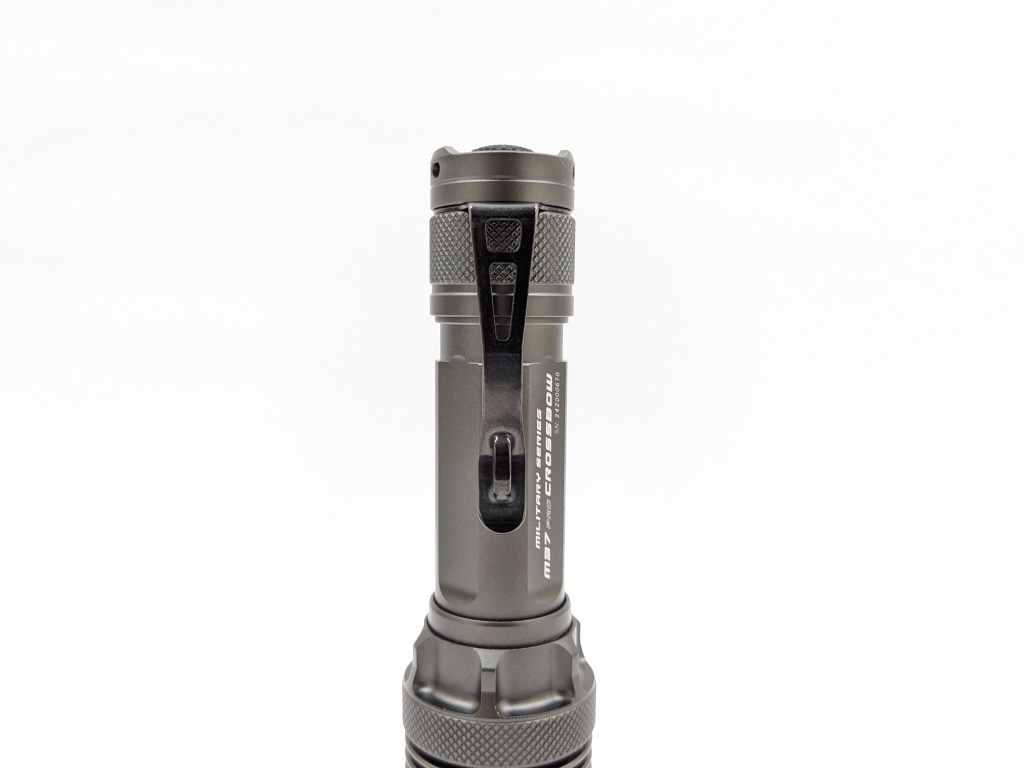
- Switch
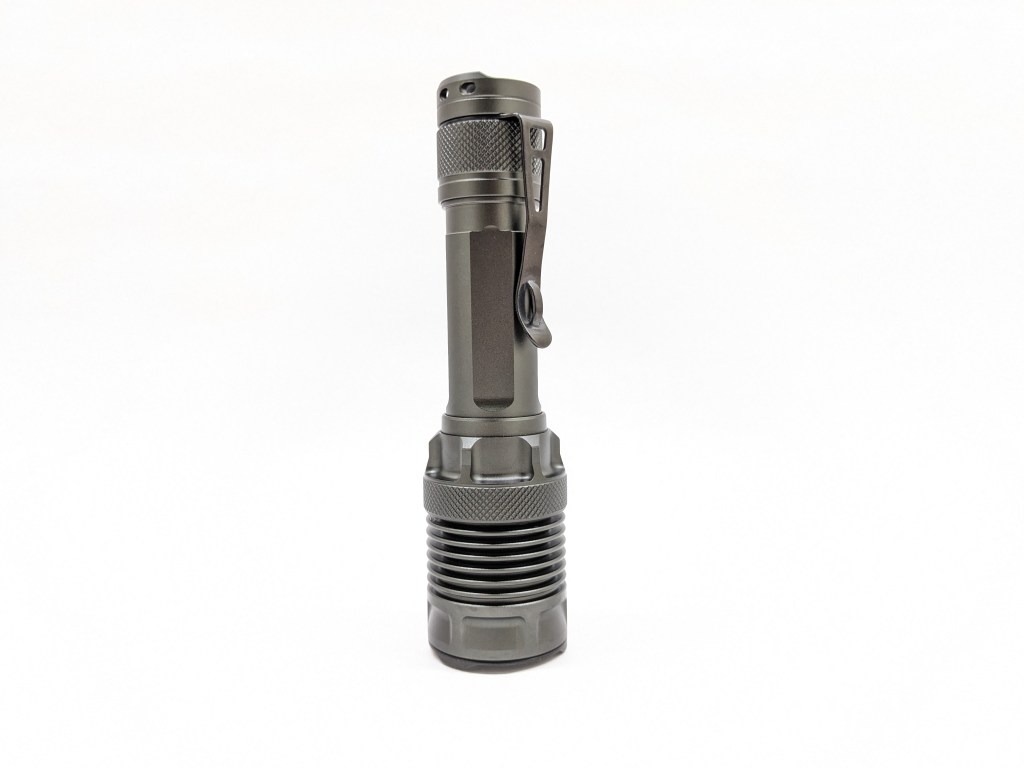
- Carry & Ergonomics
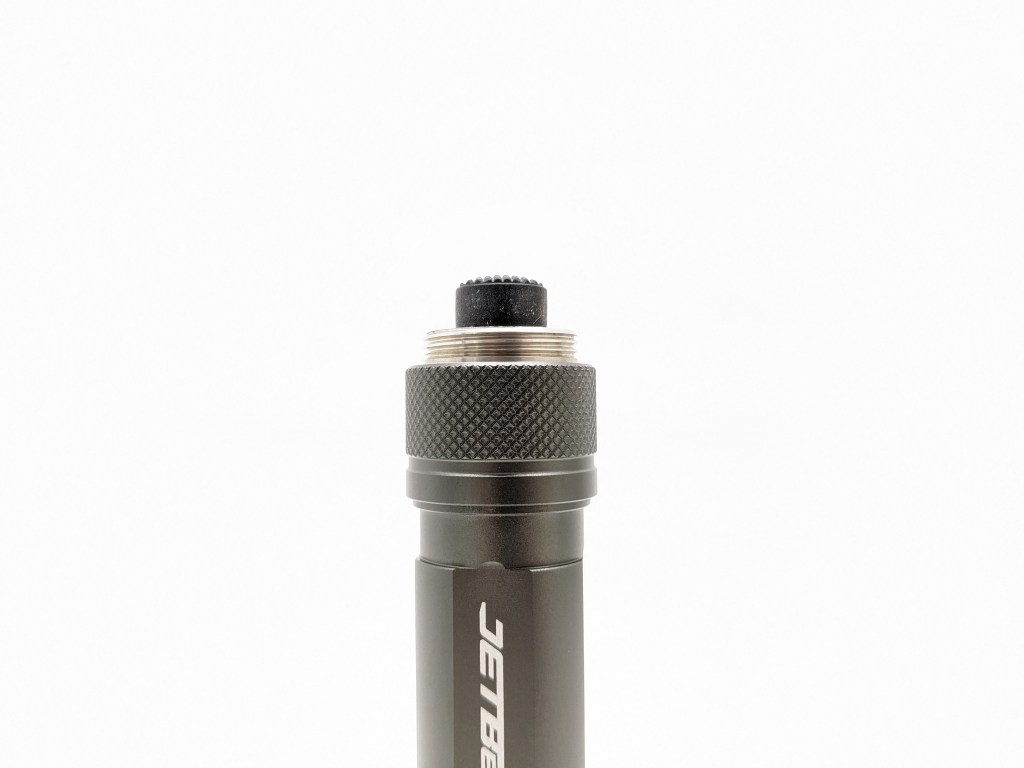
- Batteries & Charging
- Competition
- Conclusion
Pricing & Availability
FlashlightGo sent me this light in exchange for an honest review. Here is the product page on their site where you can see current pricing. If you want to support my work, consider buying from them to show you appreciate the samples they provide.
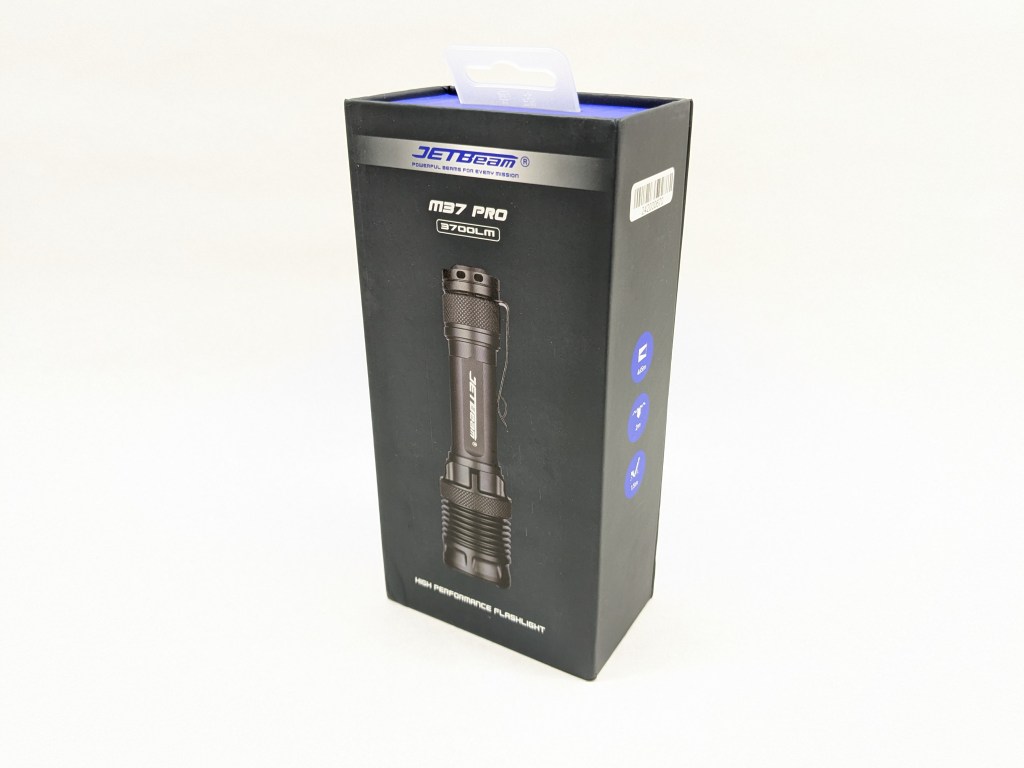
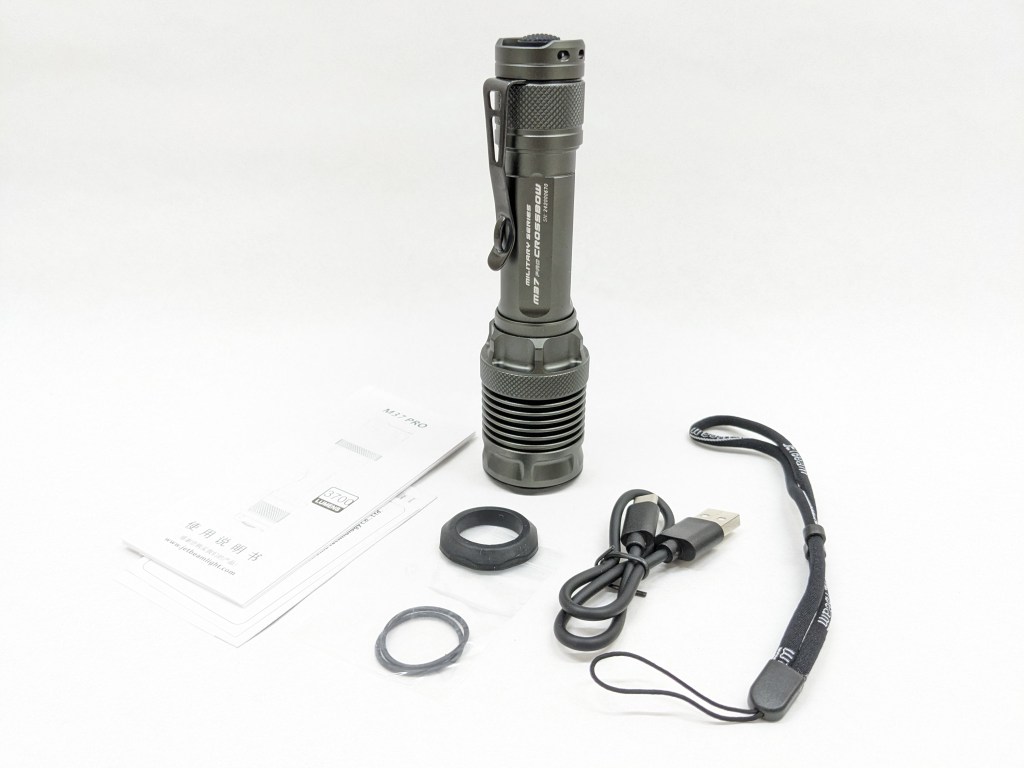
What comes in the box?
The box is very nice. It’s made of cardboard with a printed paper veneer and a magnetic closure. I like the grey and Spyderco Blurple color scheme. There’s a soft foam cutout inside to hold everything securely, and that foam even has a layer of felt on top. Inside is:
- The light itself
- Battery (inside the light)
- Paperwork
- USB A-to-C charging cable
- Wrist lanyard
- Spare O-rings
- Grip ring

Design & Construction
M37 Pro has a striking design with a stack of large cooling fins on the head, a captured clip, and glass breakers embedded into the bezel. It looks great.
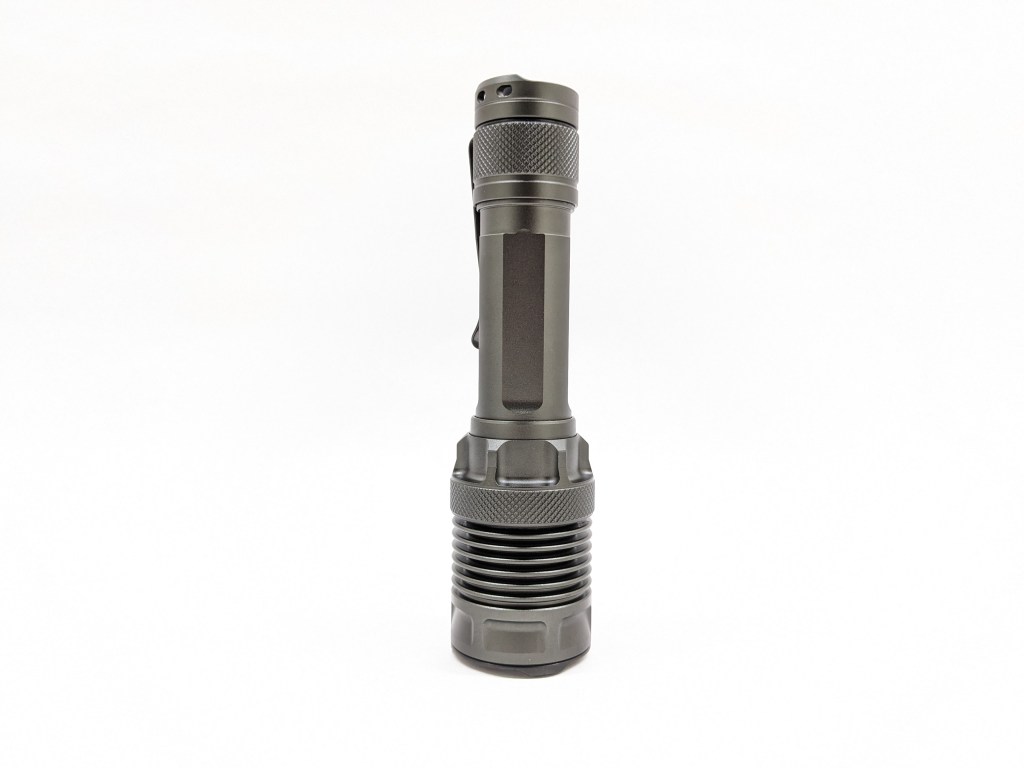
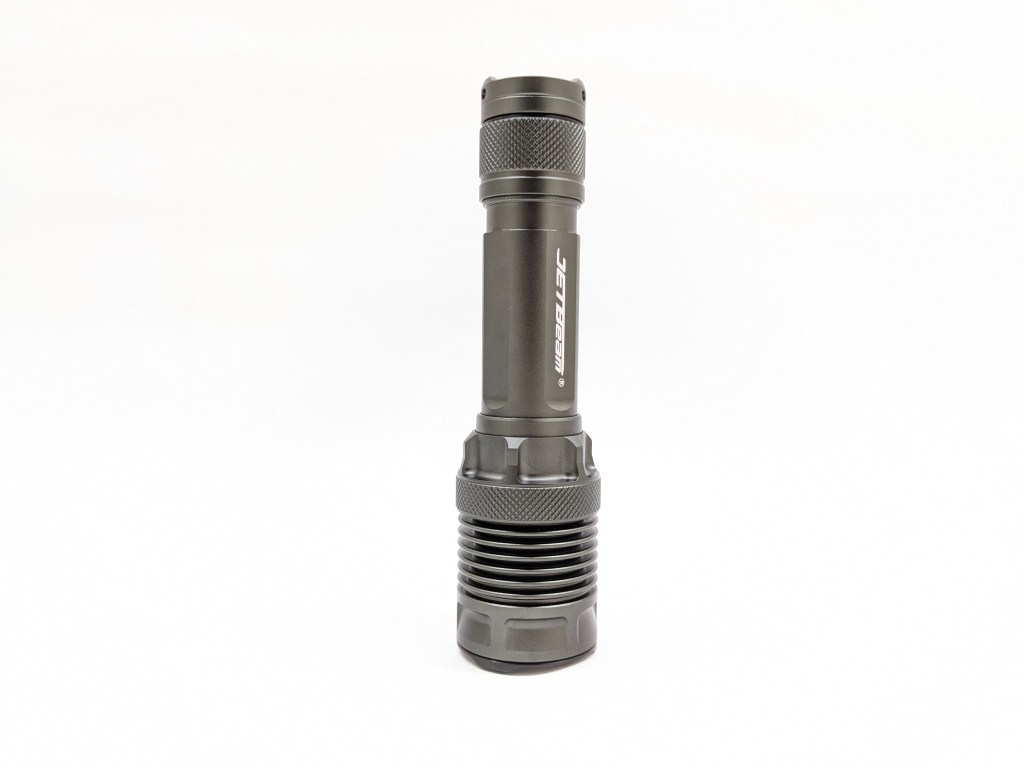
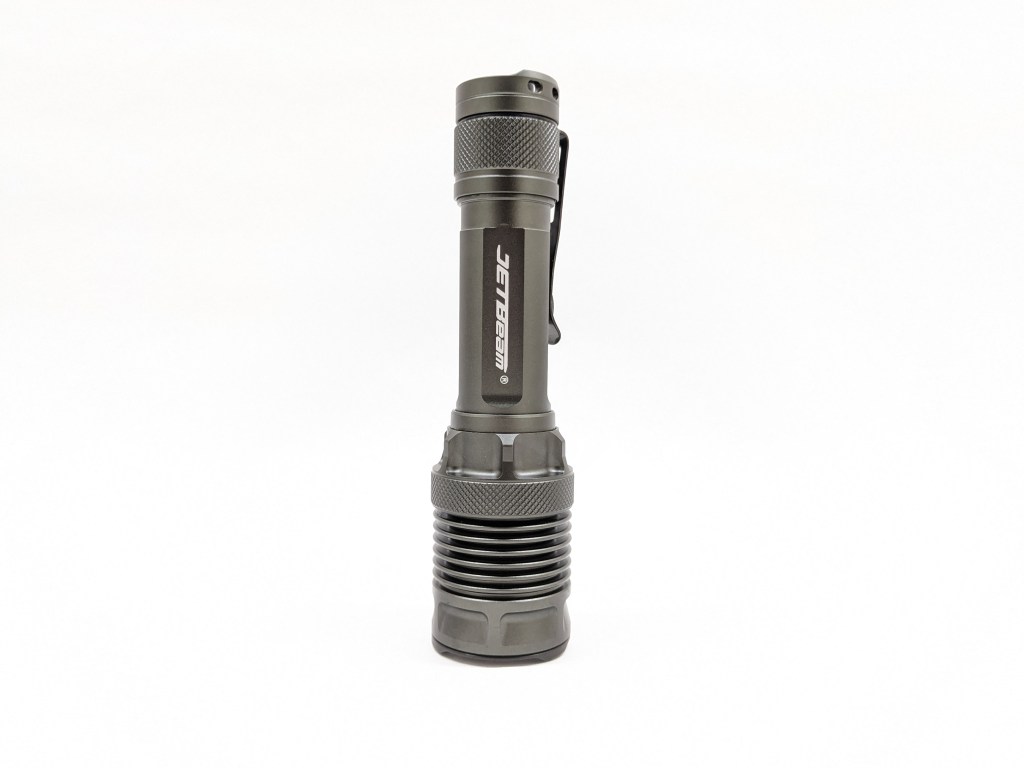
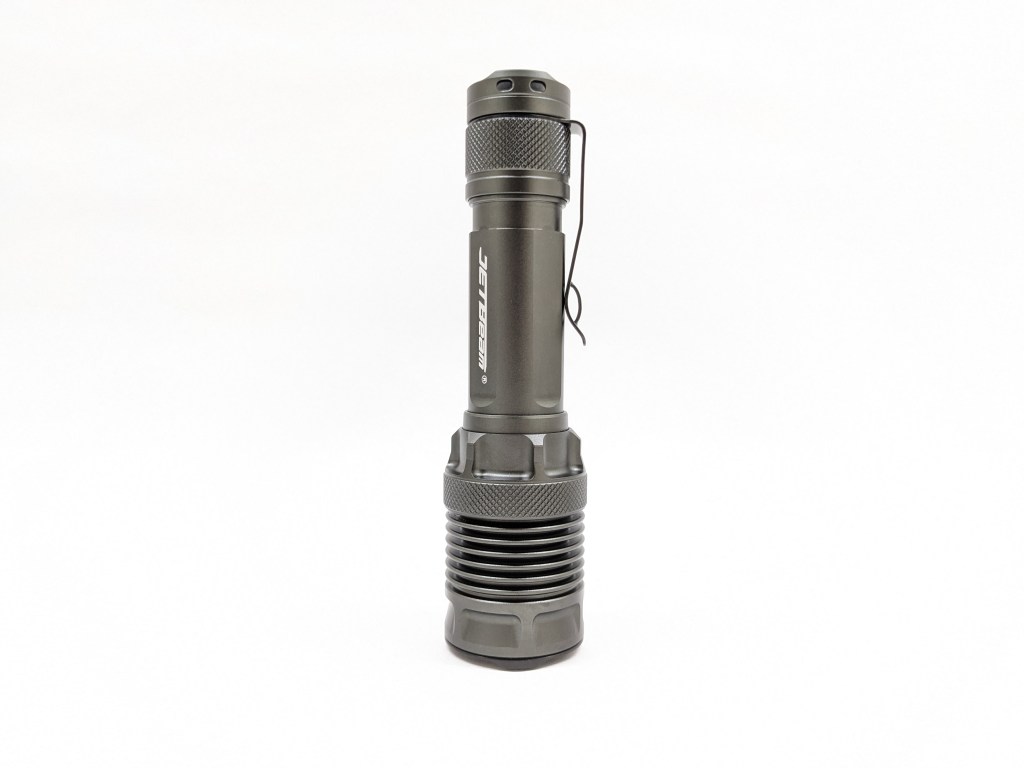

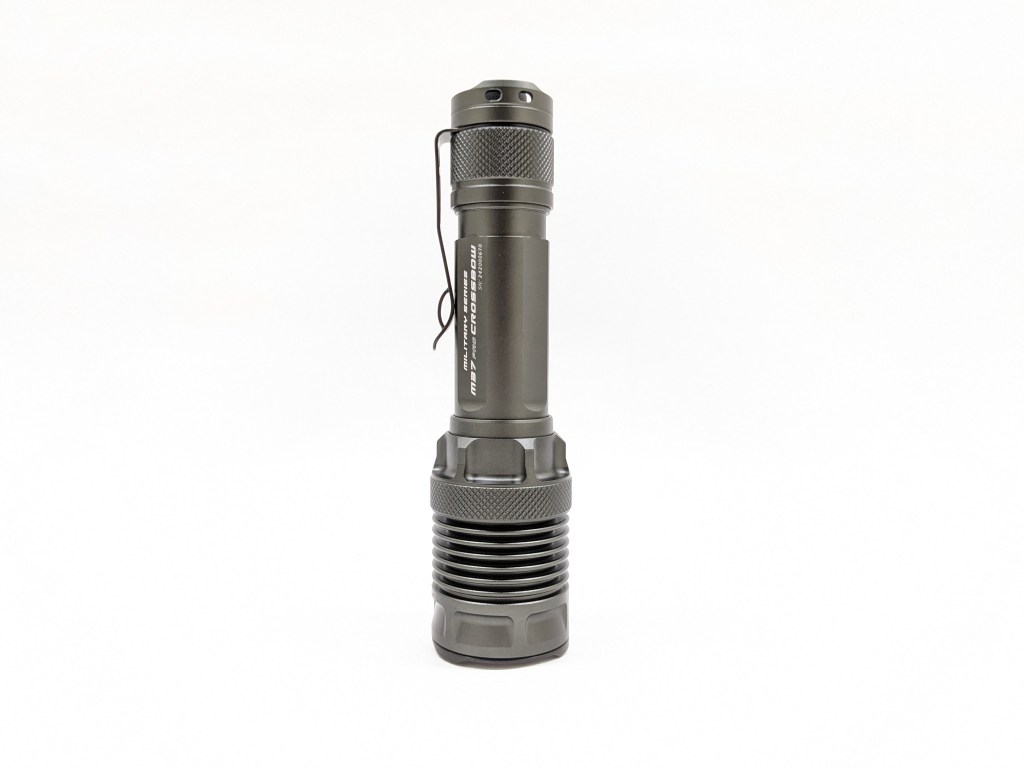

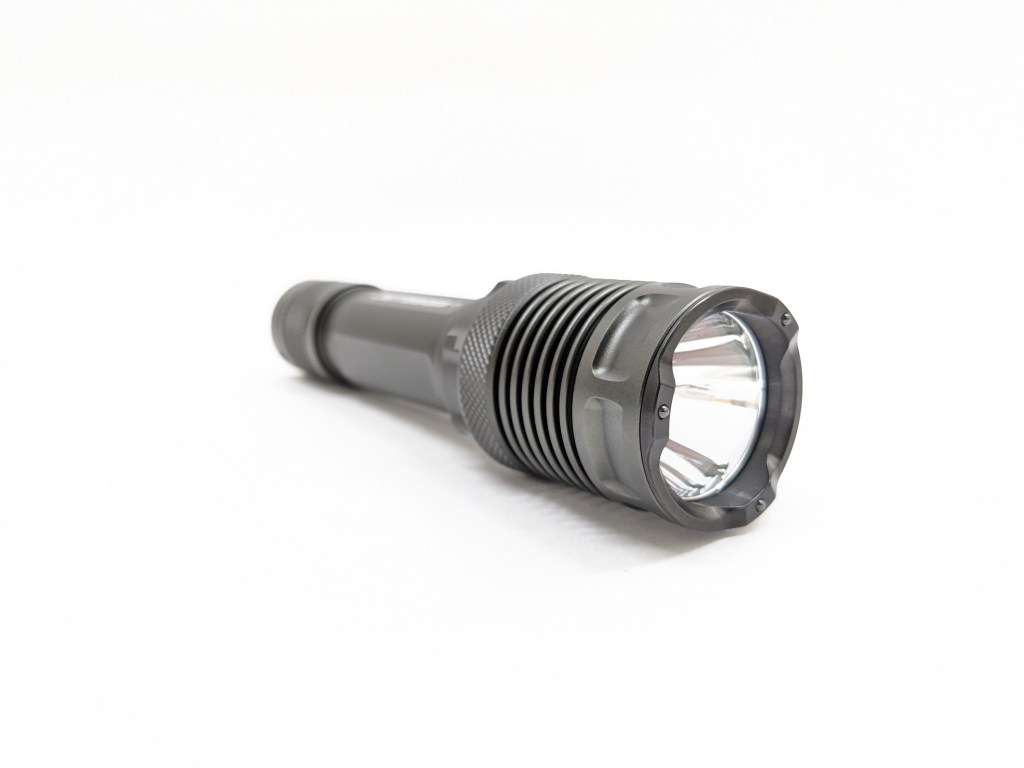


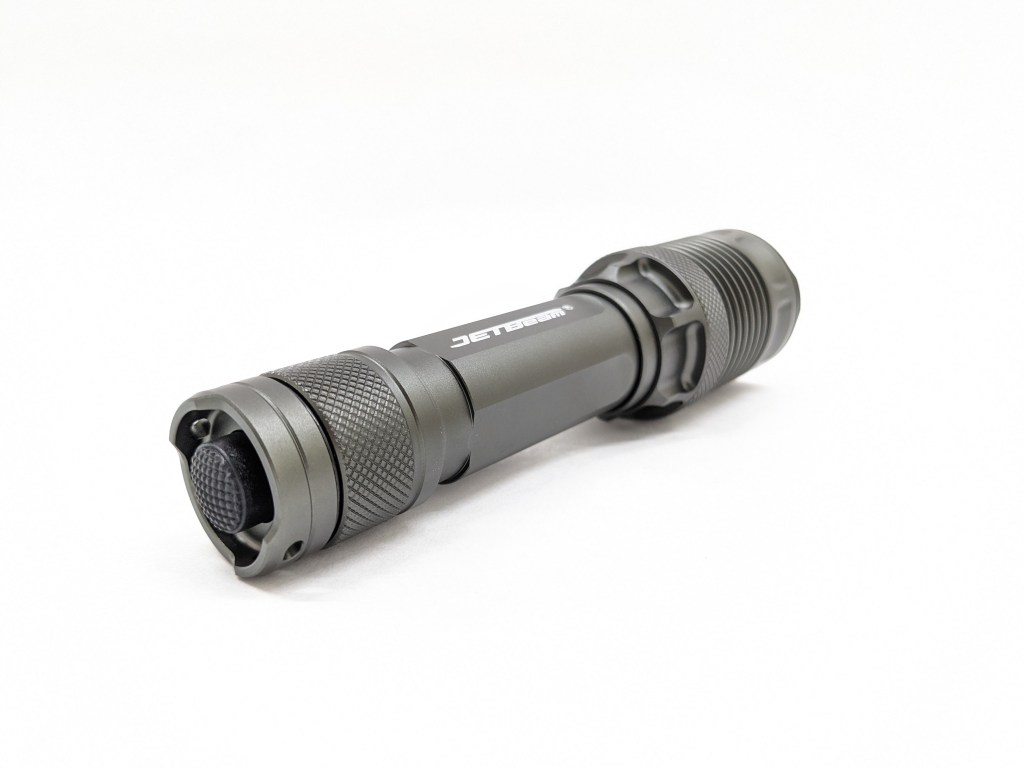
Build quality is excellent. It has a feeling of quality that you just can’t get from budget brands. The anodizing is rich and satin. All the threads are super smooth. It’s a well-built light.
Size & Measurements
Surefire G2X Pro + Switchback | Acebeam L16 2.0 | Jetbeam M37 Pro | Armytek C2 Pro Max | Olight Warrior 3S
| Measurement | Measured (mm) |
|---|---|
| Bezel Diameter | 37.5 |
| Maximum Head Diameter | 37.5 |
| Length | 149.4 |
| Switch Diameter | 13.3 |
| Lens Thickness | 2.0 |
| Lens Diameter | 33.5 |
| Reflector Hole Diameter | 7.1 |
| Reflector Diameter | 33.0 |
| Reflector Height | 22.1 |
| MCPCB Size | ~24 |
| LED Footprint | 5050 |
| Body Tube Diameter | 25.5 |
| Pocket Clip OD | 25.8 |
| Pocket Clip ID | 22.5 |
| Tailcap Diameter | 27.5 |
| Tailcap Length | 29.9 |
| Driver Diameter | Inaccessible |
| Included Battery Length | 76.2 |
| Weight with included battery (g) | 220 |
User Interface
This is a simple UI, well suited for a duty light like this.
How it works:
- On/off: click the switch to turn the light on/off. For momentary on, half-press the switch to turn it on and then release to turn it off.
- Mode selection: It always starts on High or Low (depending on the mode order you choose). To cycle the mode up or down, turn it off and back on again quickly. Double-tap the switch from off to activate Strobe mode. To change the mode order (High-Med-Low or Low-Med-High), tap the switch 5+ times and hold it.
What they got right:
- There are only 3 levels. That’s enough to be versatile but not so much that they’re cumbersome to click through.
- You can choose the mode order. You can make it always start on High for tactical/duty use, or always start on Low for utility. That’s great, and there’s no way you’ll change it by accident.
What they got wrong:
- The only thing I’d change is disabling Strobe in the Low-Med-High group and replacing it with a shortcut to High. Then you’d have direct access to both Low and High from off.
Emitter & Beam
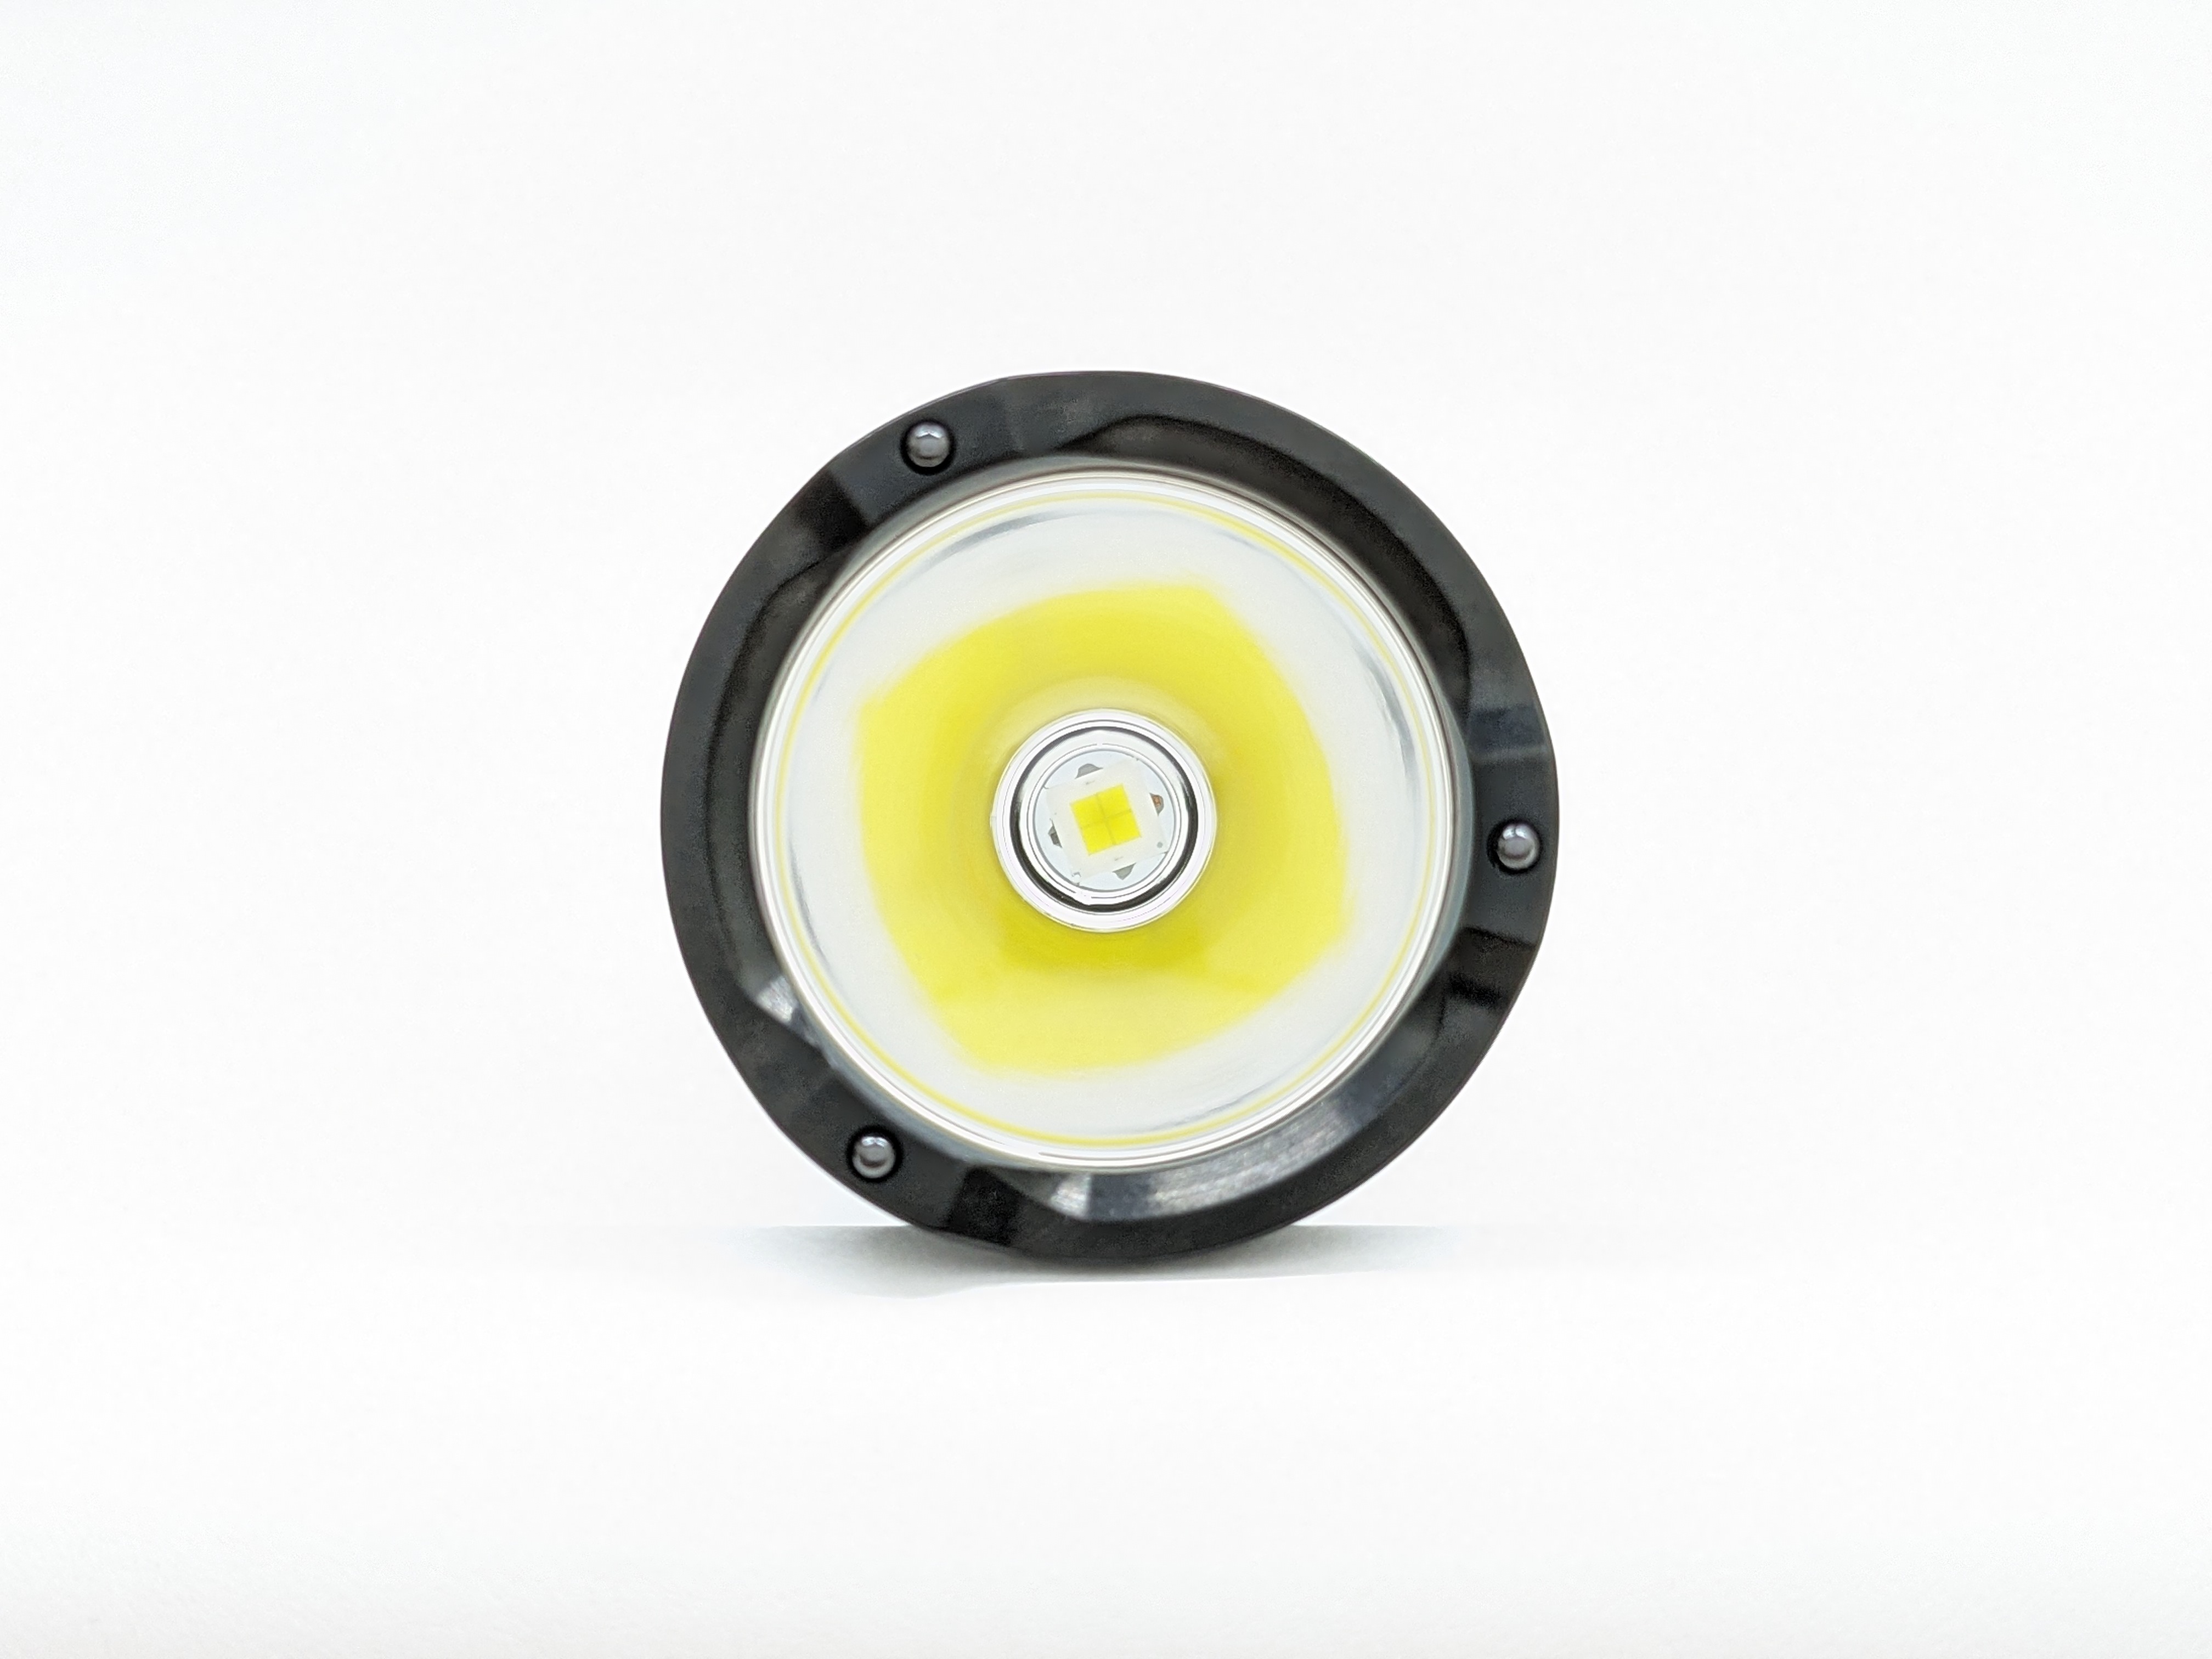
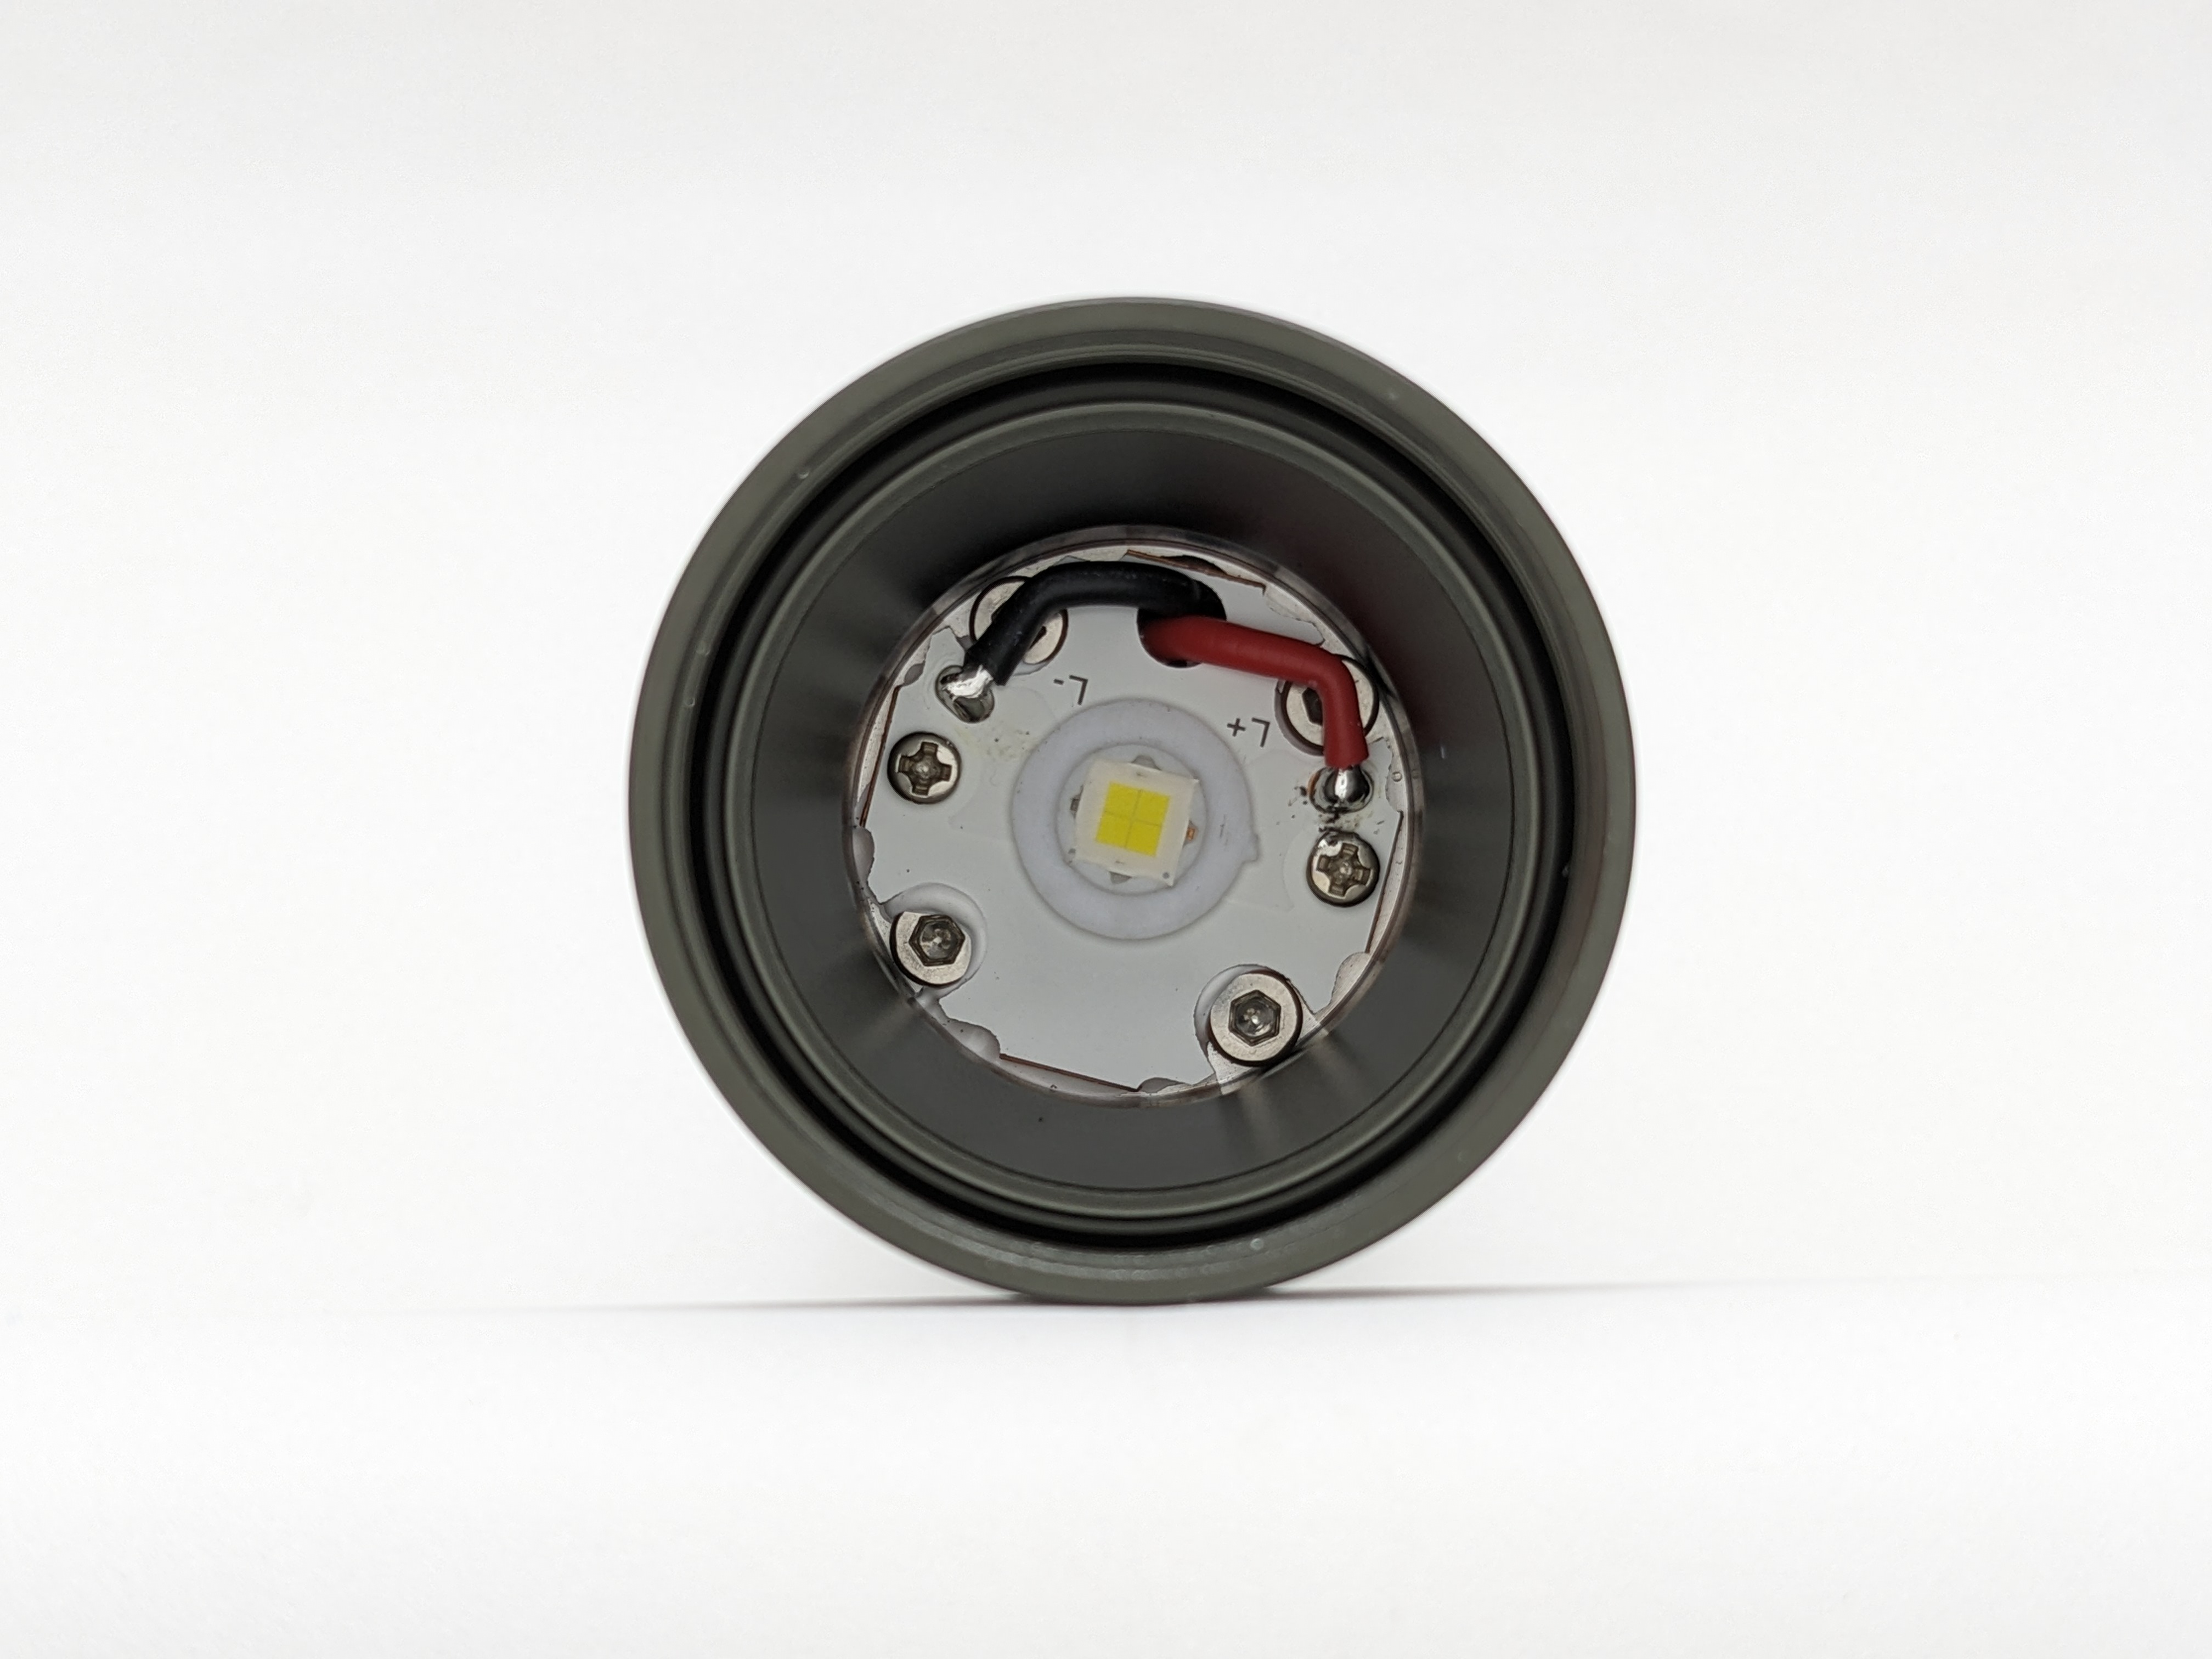
Jetbeam chose a Cree XHP50.3-HI LED, and I was surprised to find it’s neutral white, not cool white. That makes it look nicer, but it’s not quite as bright or efficient. That’s an unusual choice in a duty light so it will help M37 stand out from the competition.

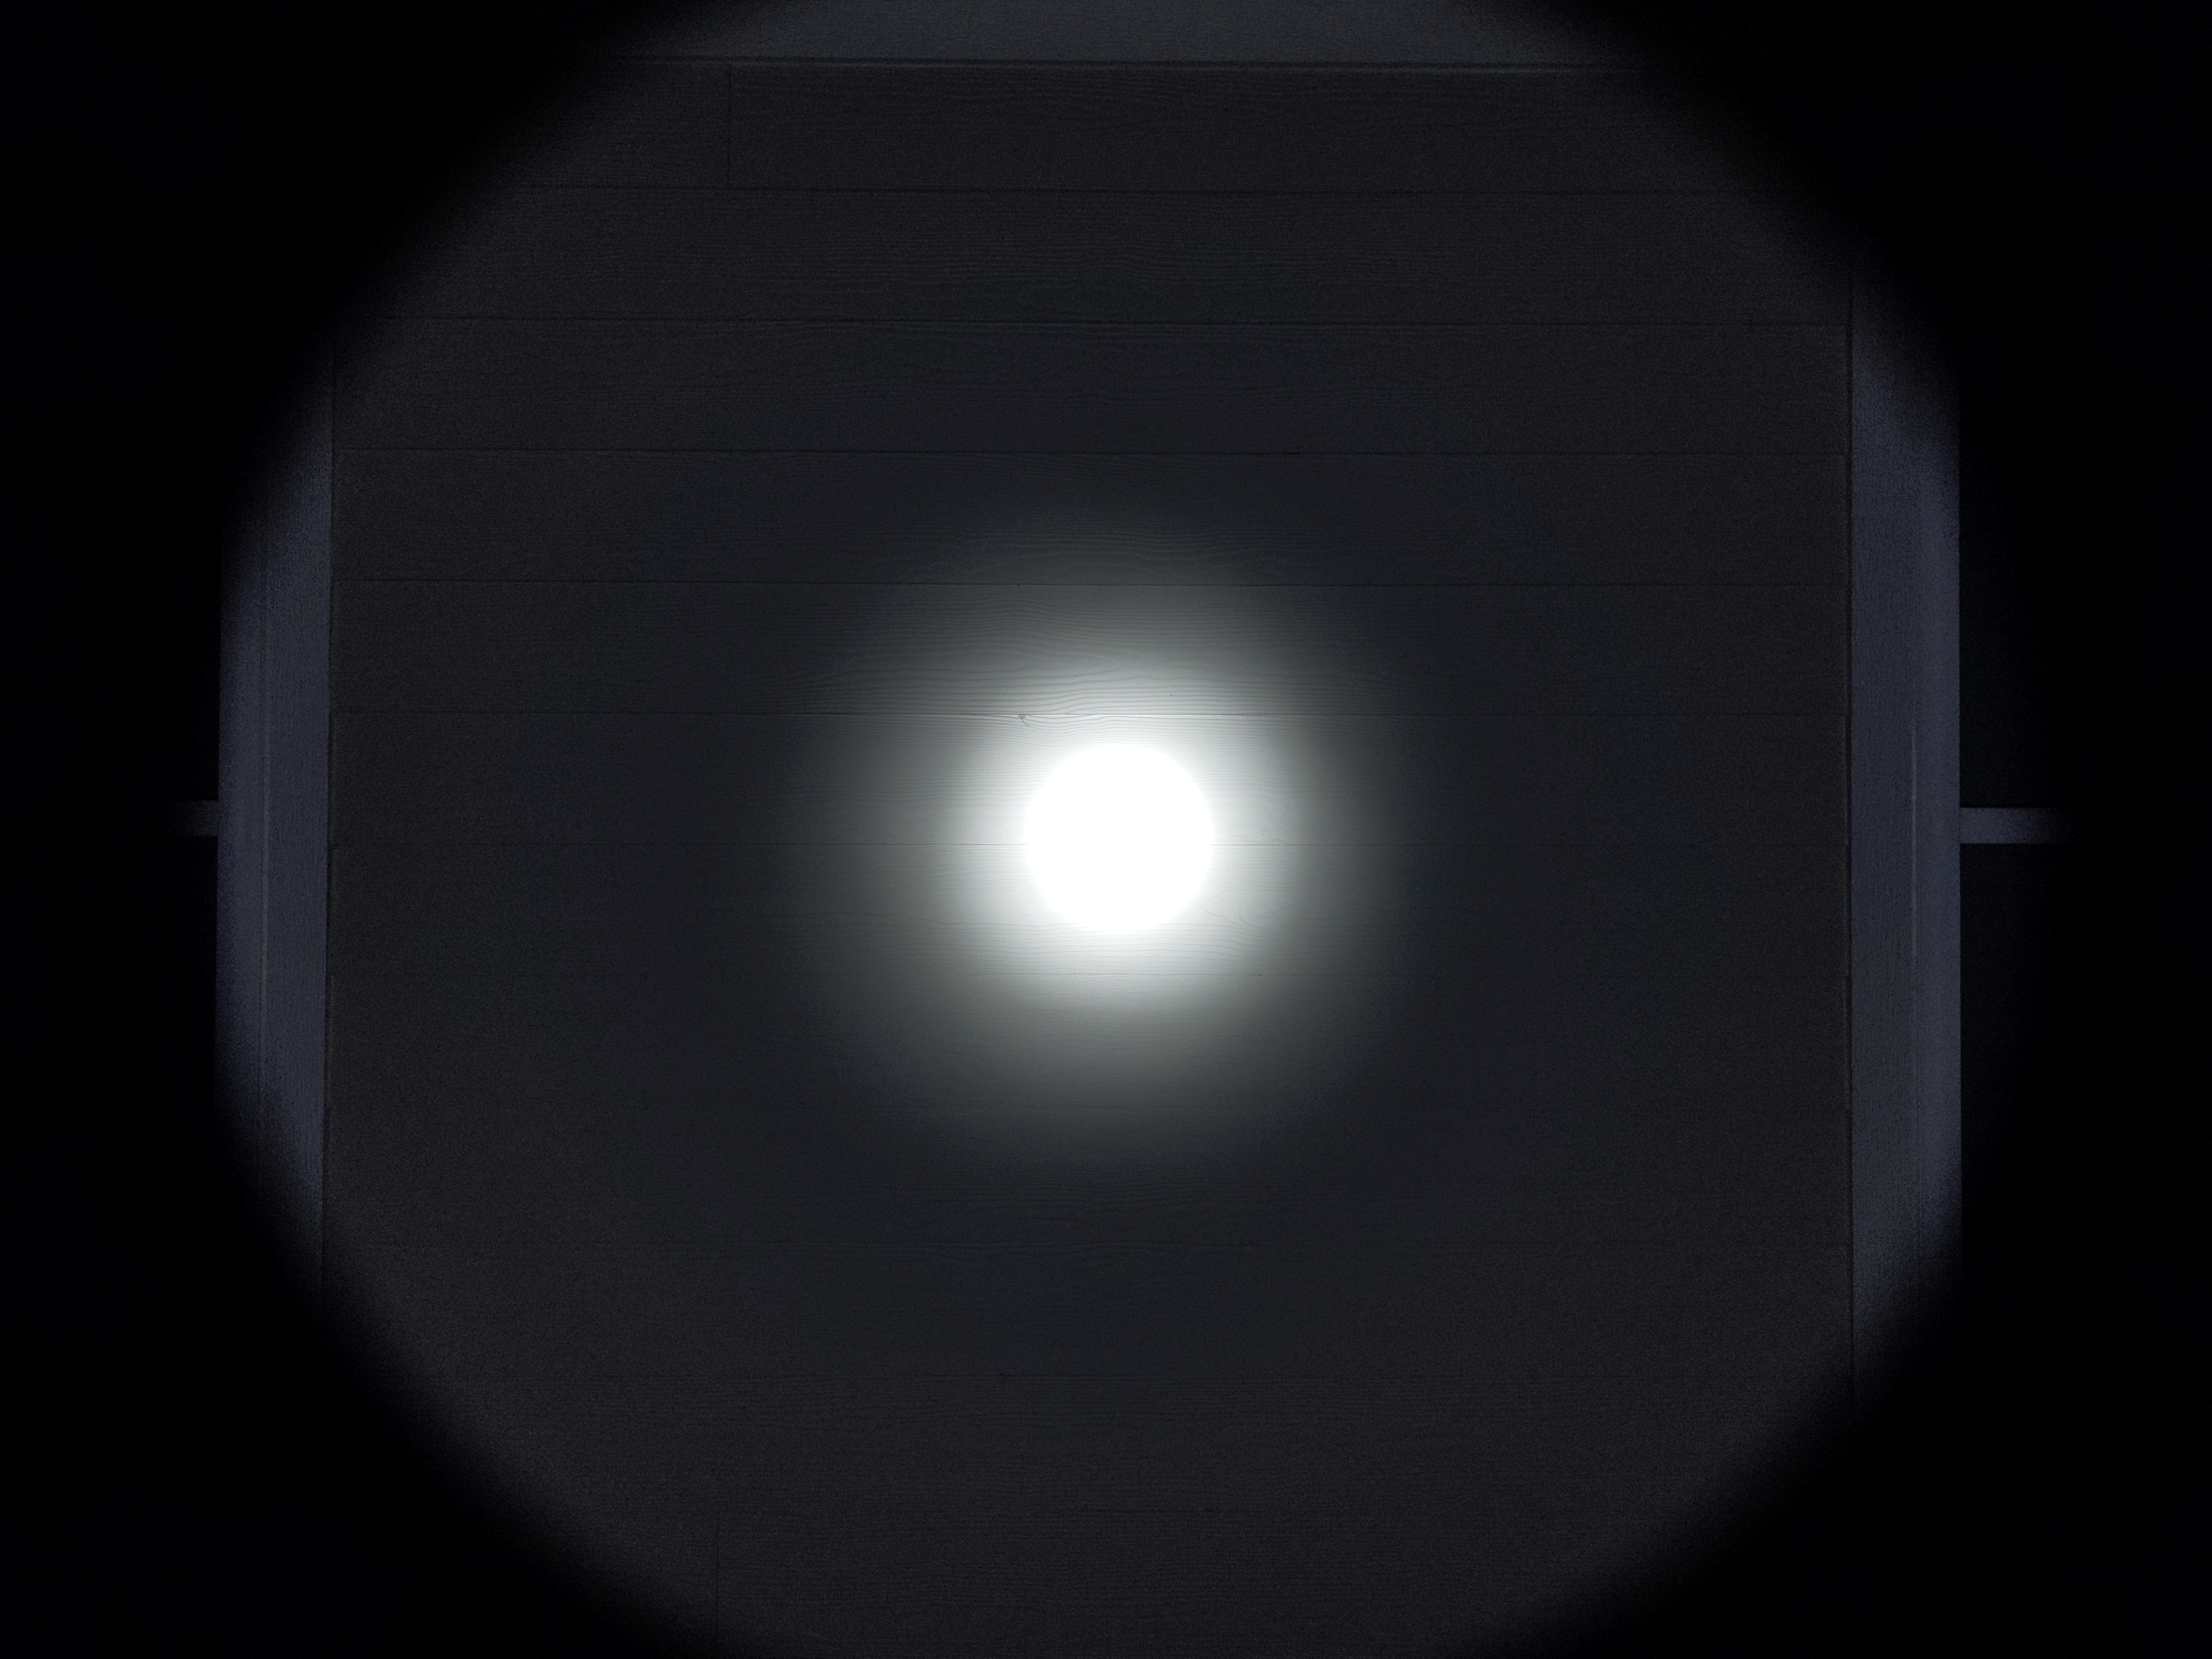
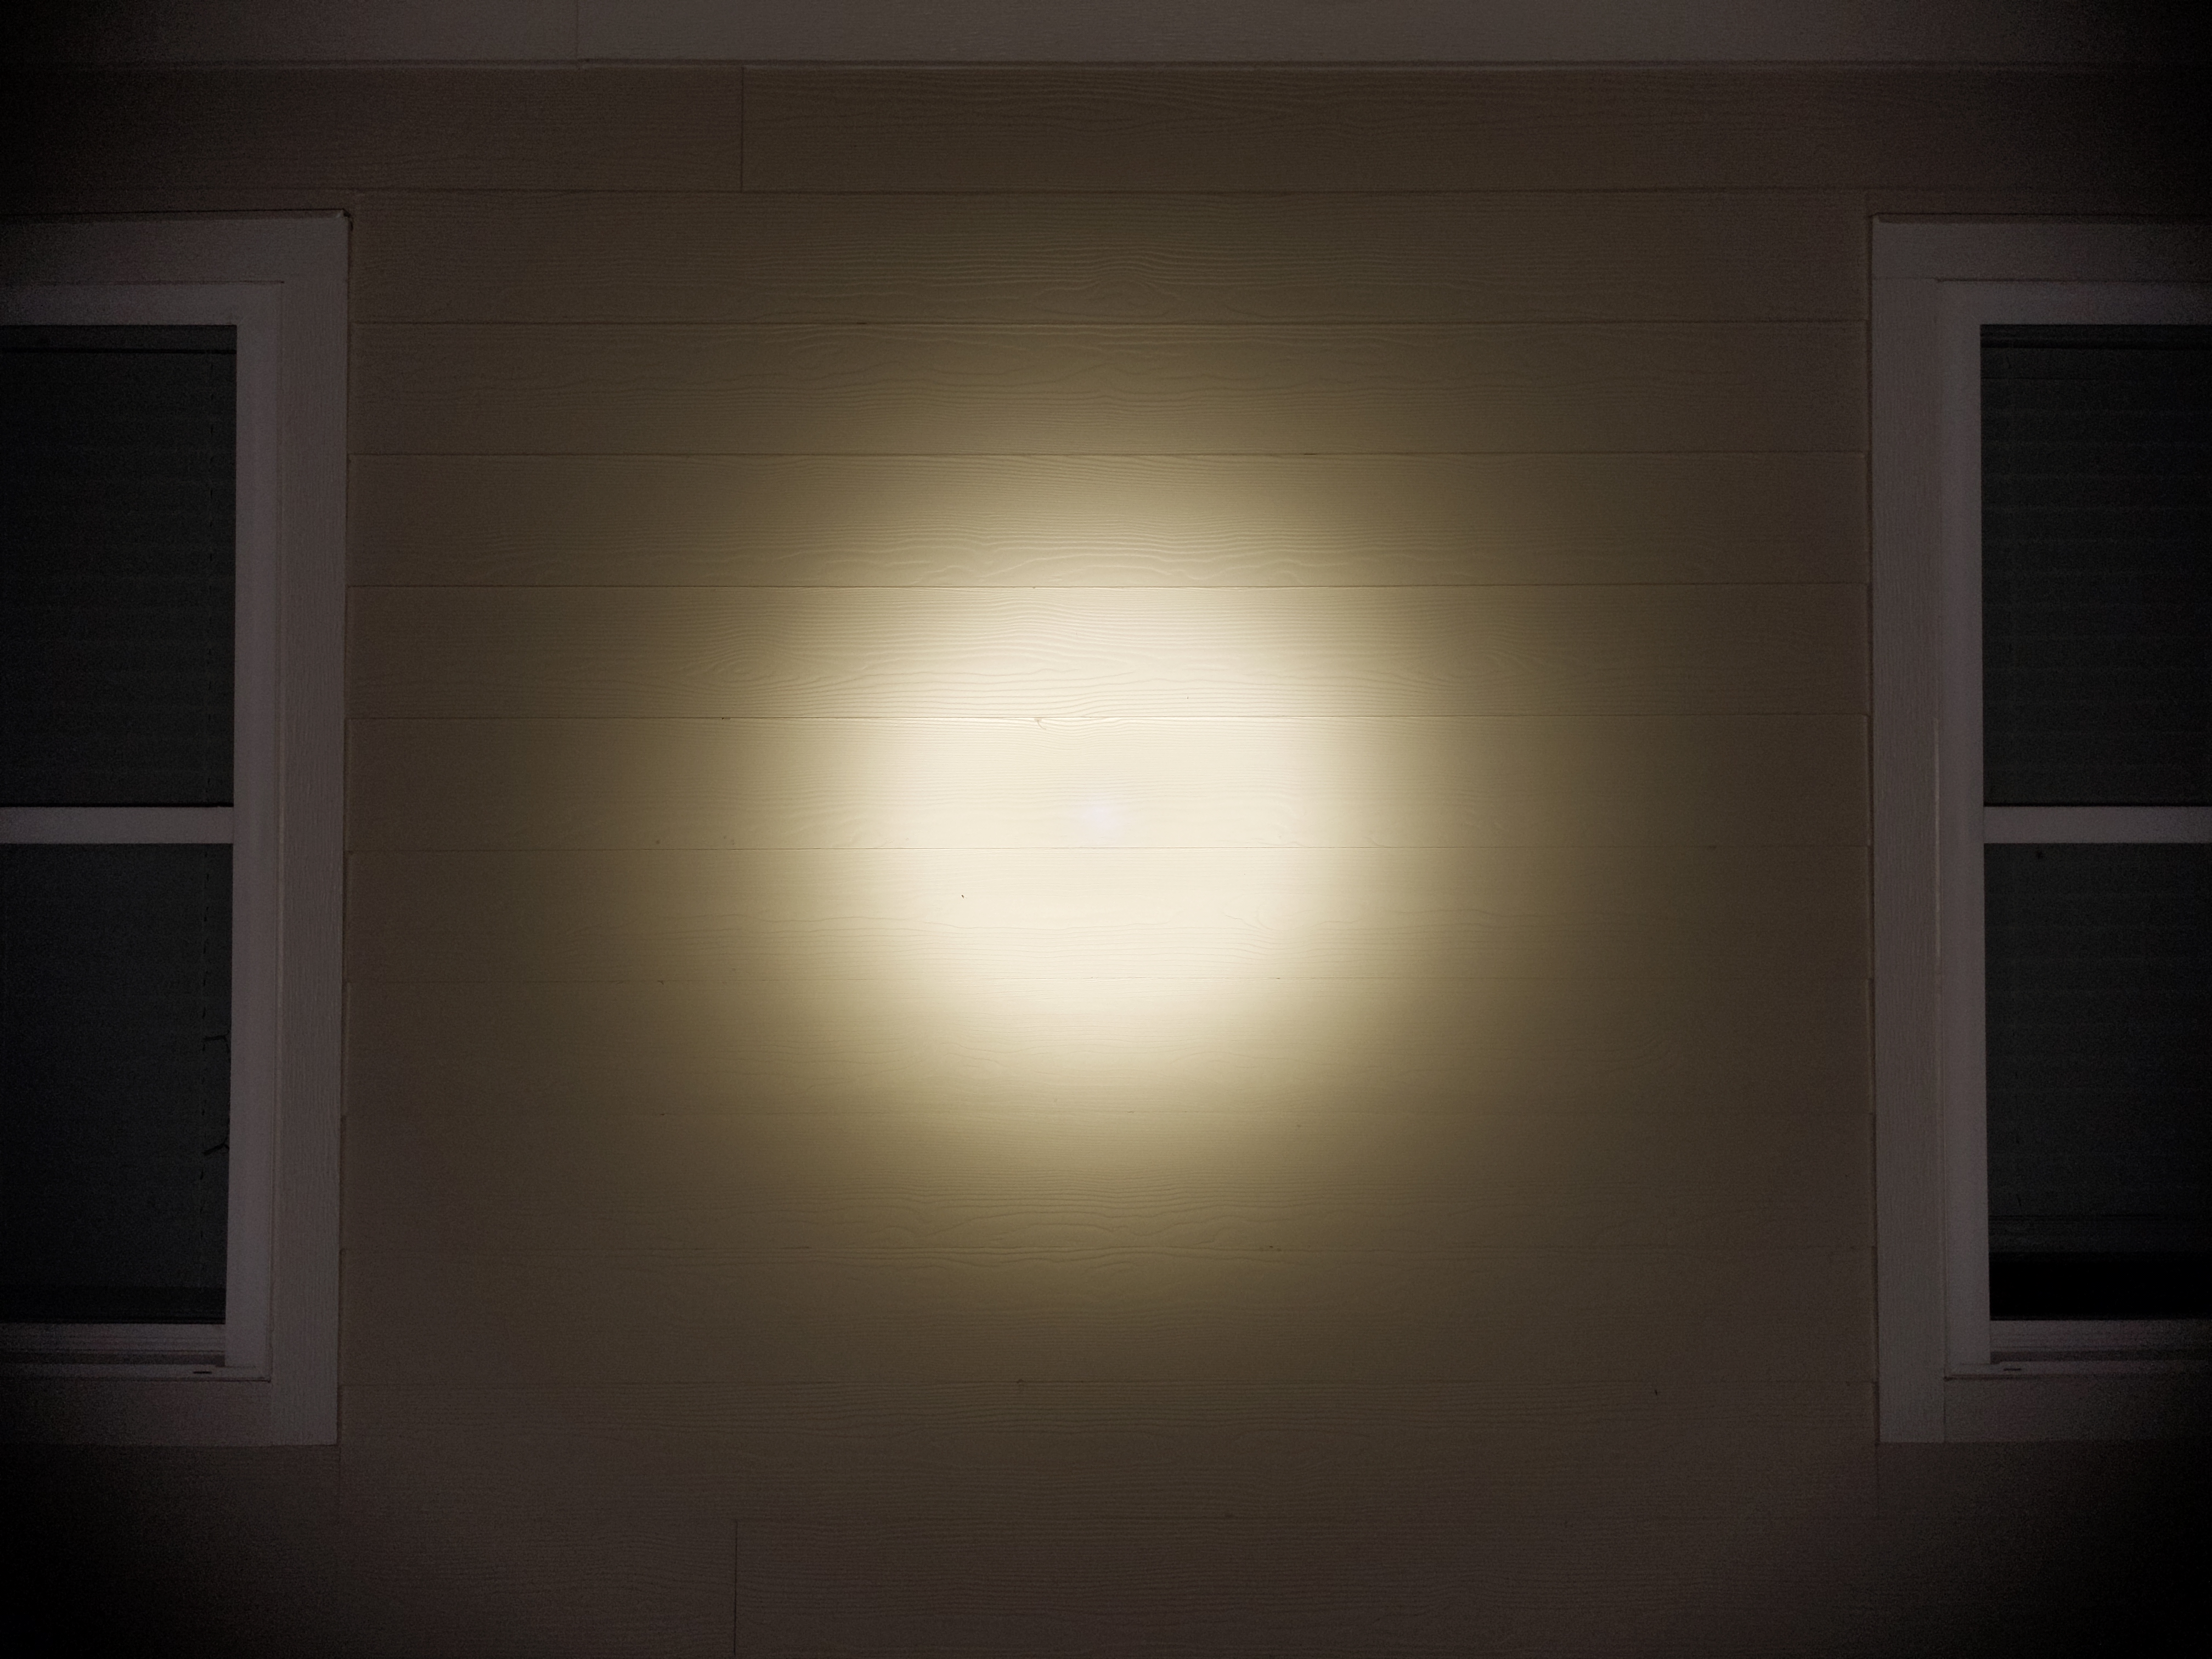
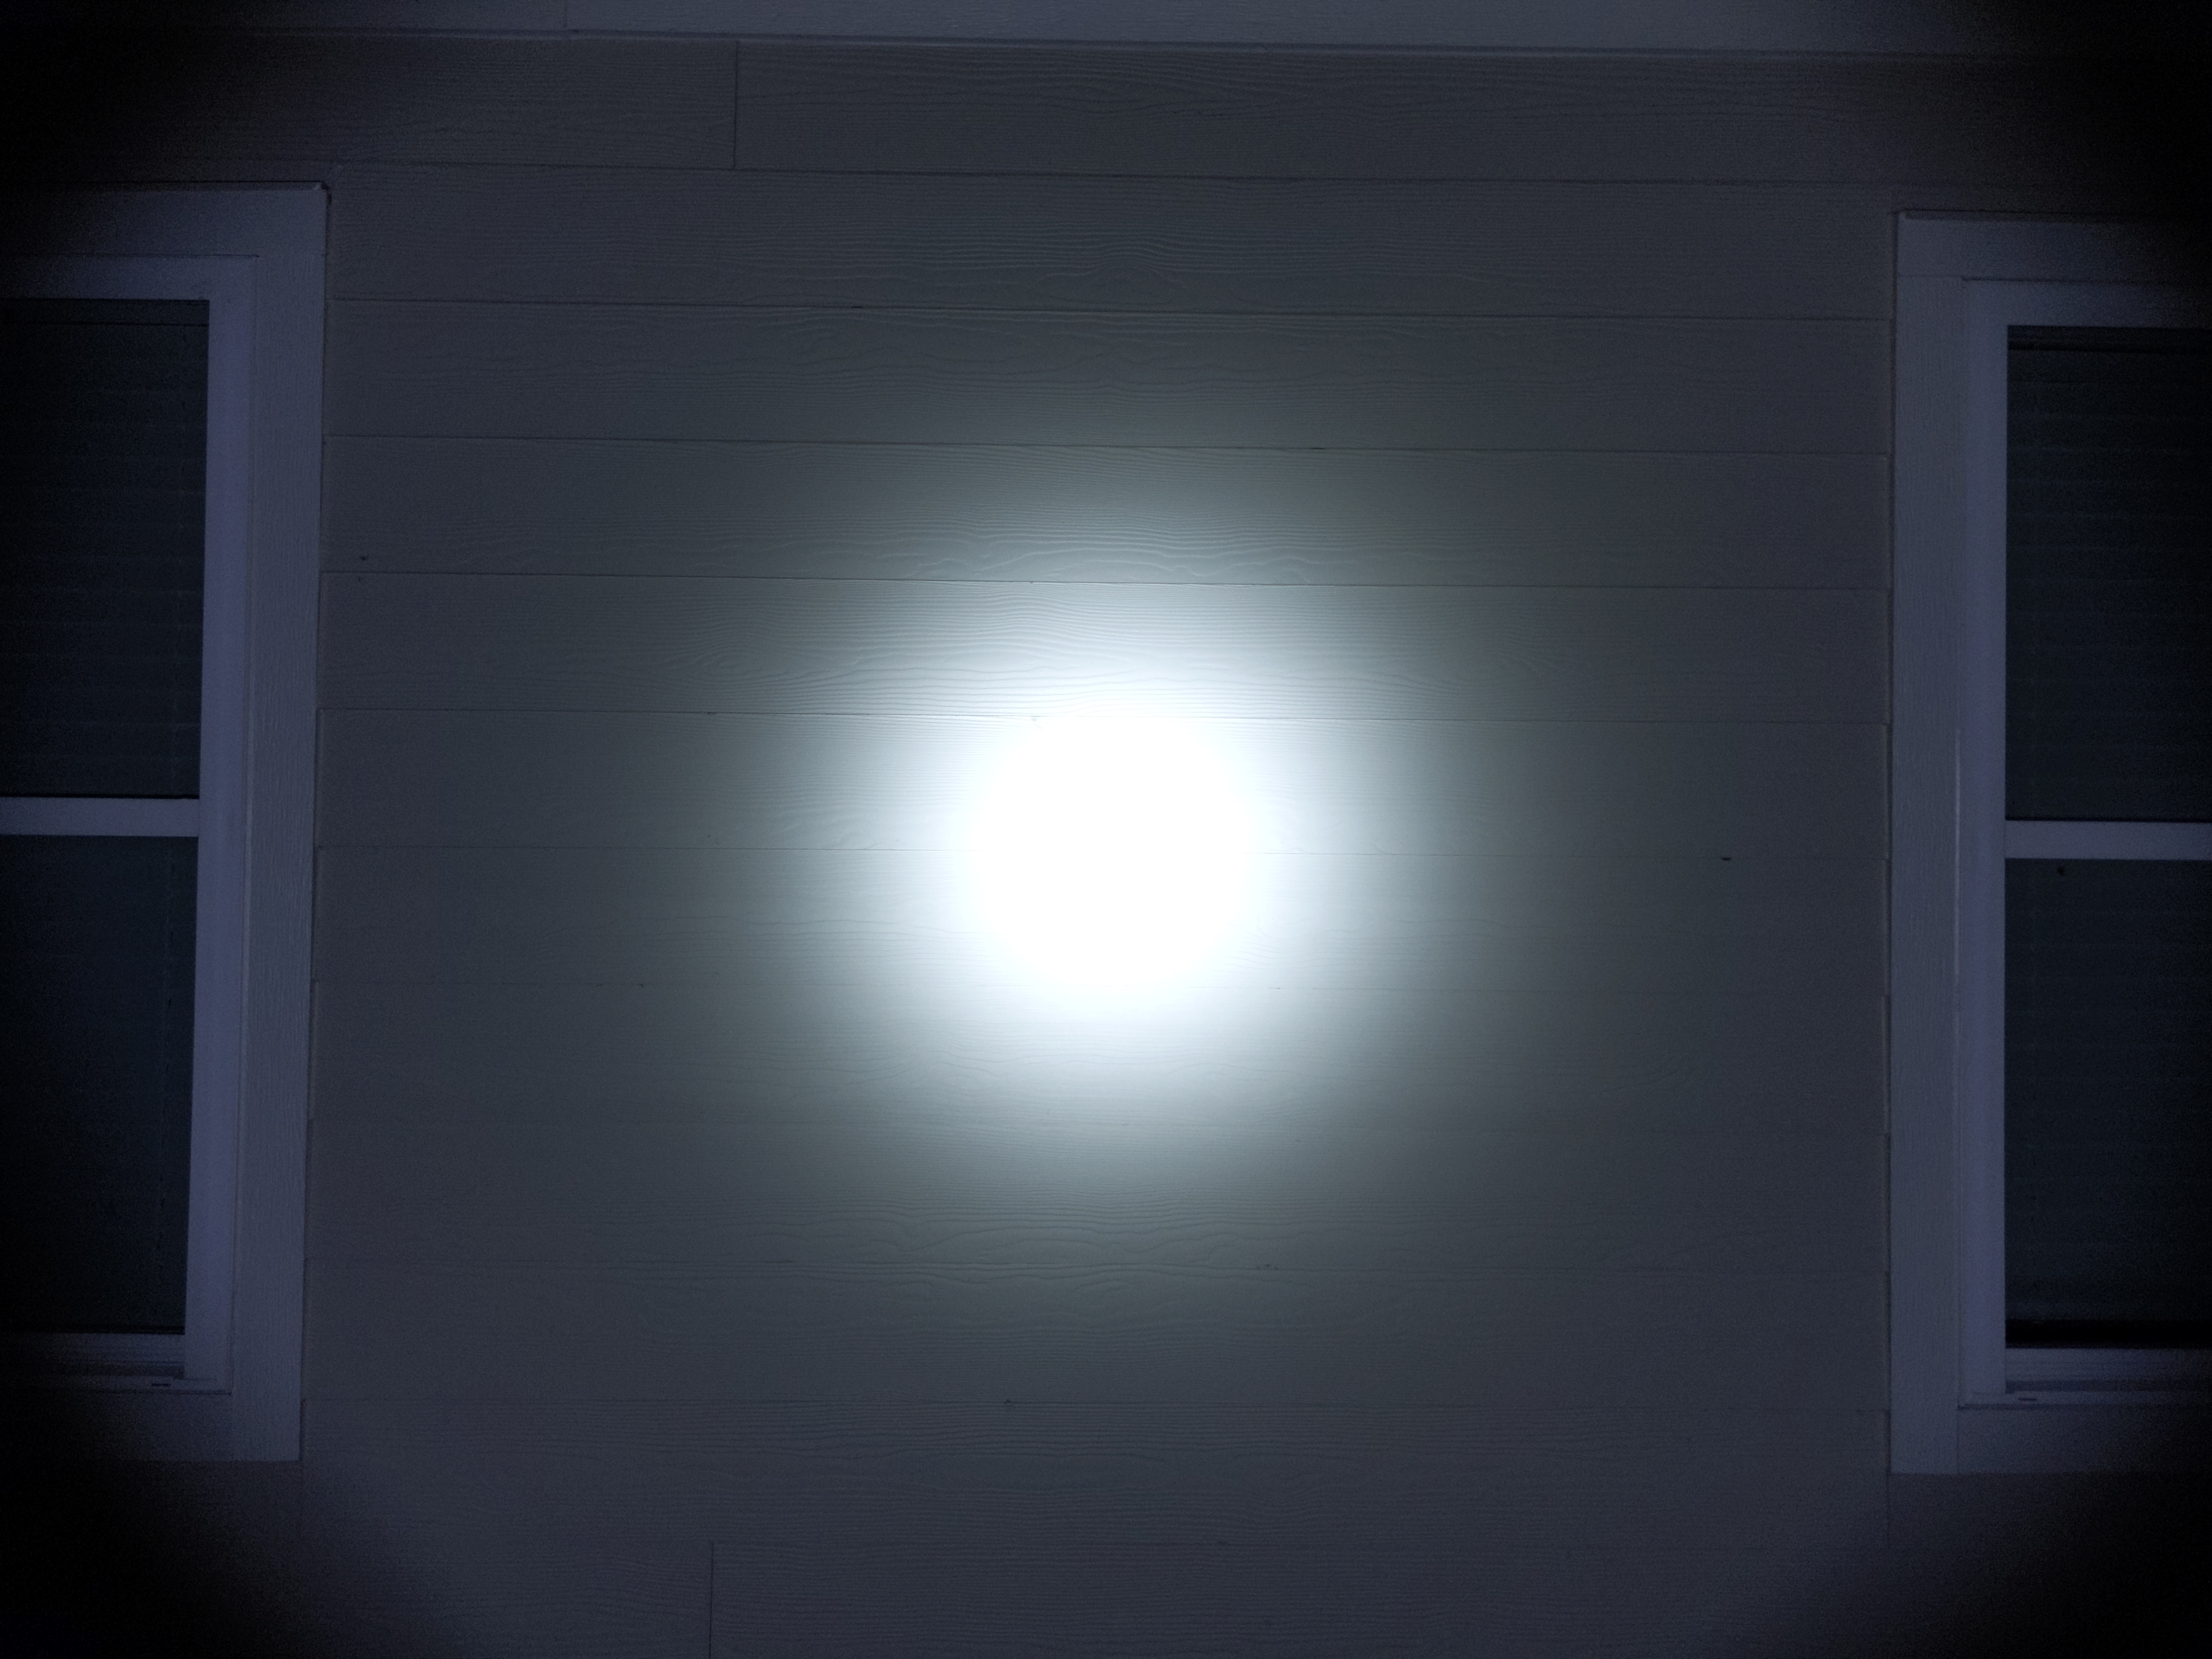
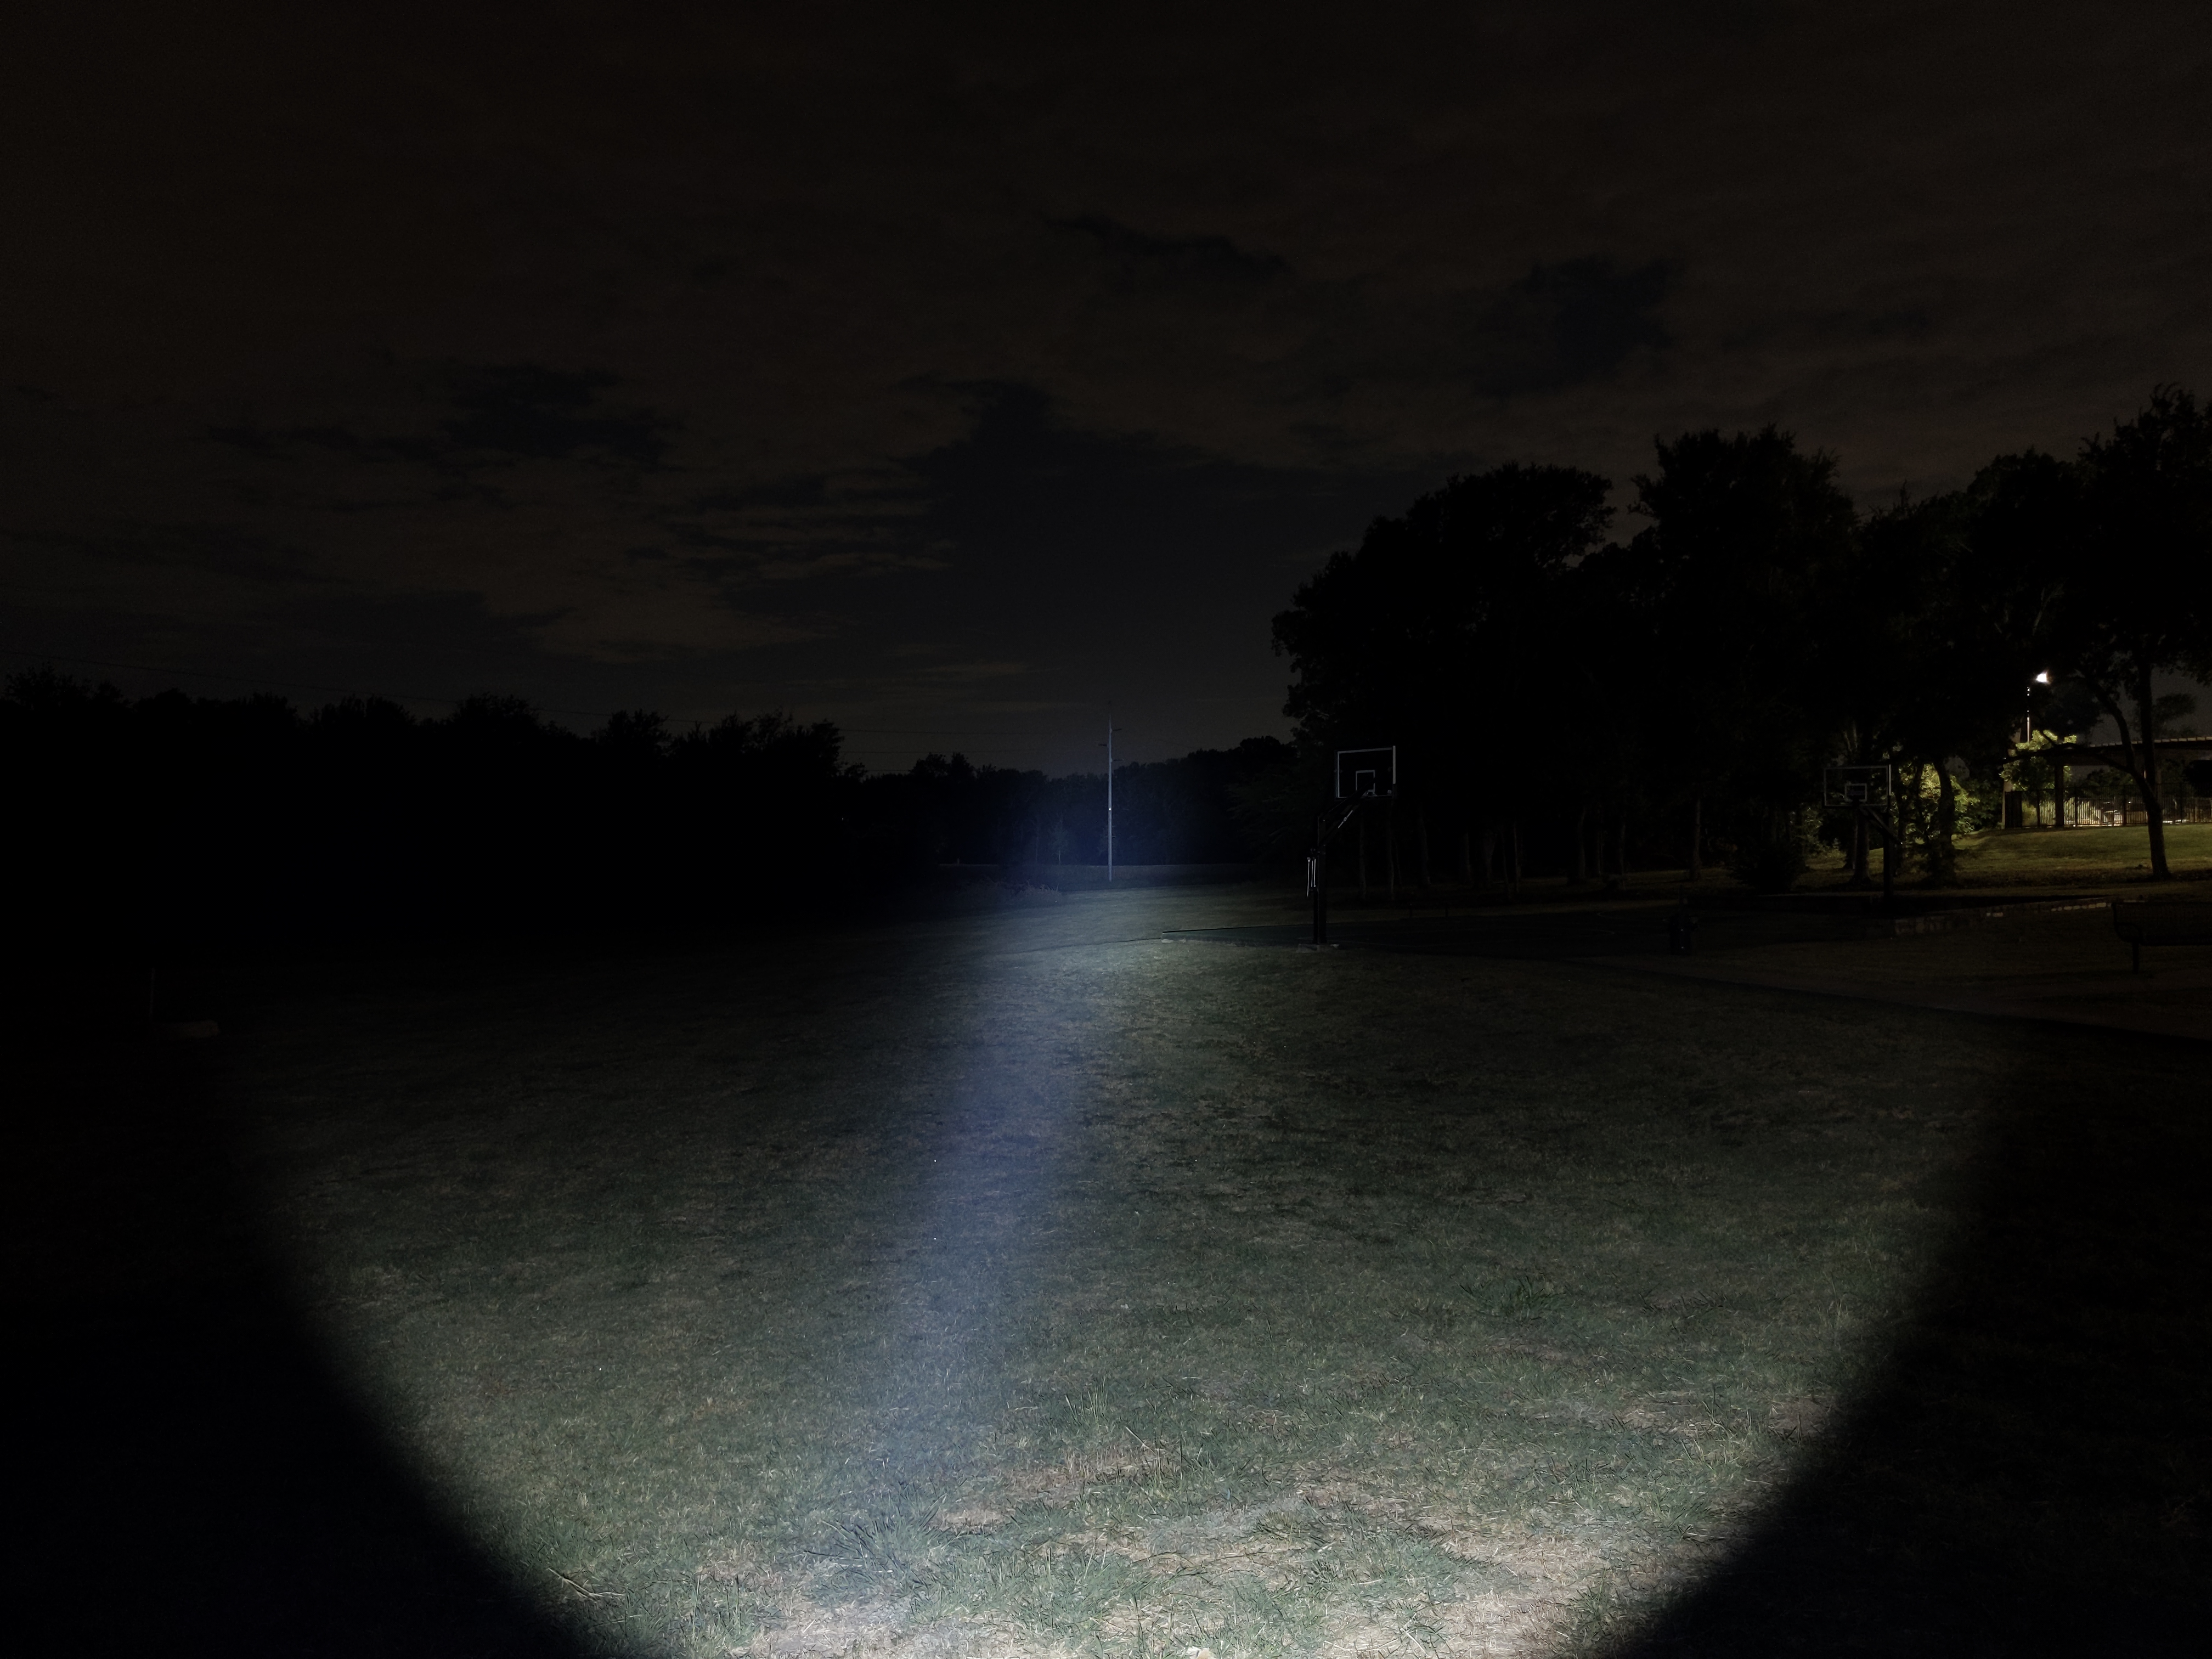
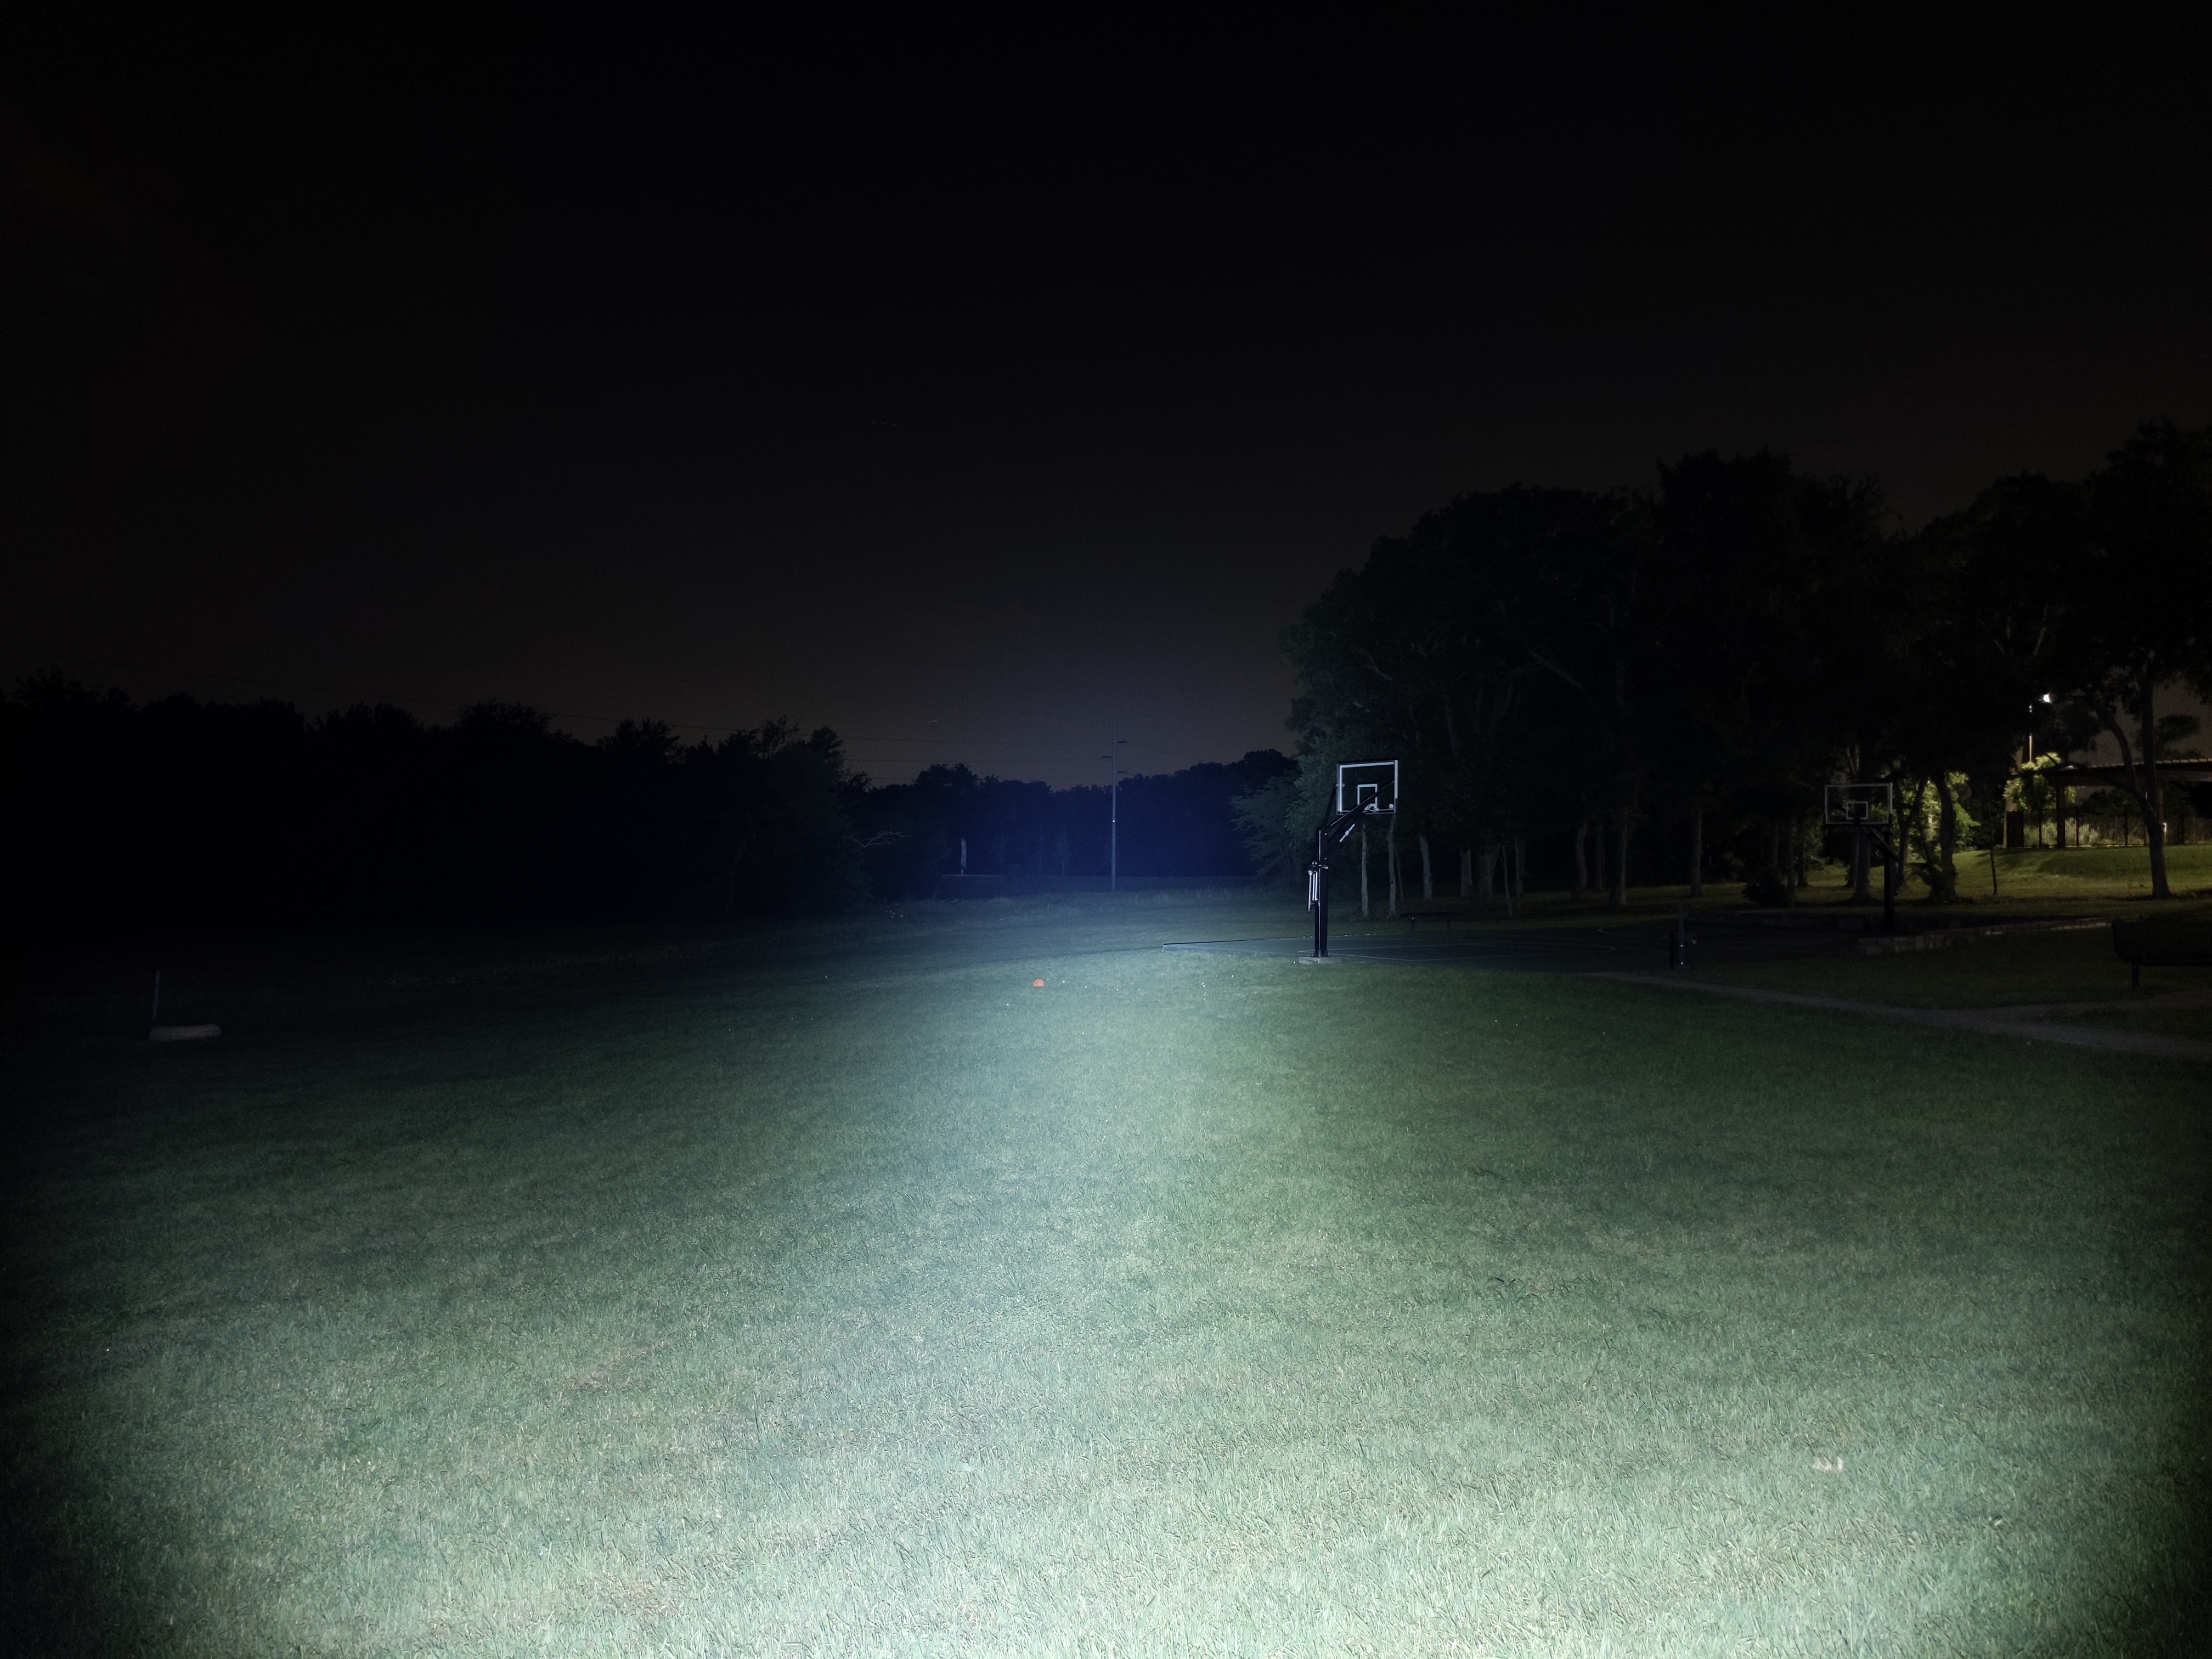
The beam is on the throwy side with a relatively narrow hotspot and spill, but not as narrow as a dedicated thrower or some other lights in this class. The crenelations on the bezel make the spill a little bit triangular. There’s a fair amount of corona around the hotspot. It’s almost like the reflector has an orange peel finish, but it’s actually smooth. There’s a little bit of tint-shift in the corona but it’s not bad.
In the beamshots below, camera settings are fixed and the wall is 2.8M away.

In the beamshots below, camera settings are fixed, the basketball goal to the right of the hotspot is 39M away, and the power pole in the center is 185M away.


Mode Chart
Disclaimer: All of my measurements are taken at turn-on. Lumen measurements were taken on a Texas Ace 3.5″ Lumen Tube. A candela measurement was taken at 10 meters with an Opple Light Master III on the highest brightness, and other candela figures were calculated relative to that. CRI, CCT, & DUV data were taken for each mode from a few feet away at the center of the hotspot with the Opple Light Master and Waveform DUV Calculator. Runtime tests were performed with the Ceilingbounce app on my smartphone. These tests were performed with a fully charged included battery unless otherwise specified. I cannot measure moonlight directly, so moonlight readings are calculated based on the brightness relative to the next-lowest mode. None of this is professional equipment, so take these measurements with a grain of salt.
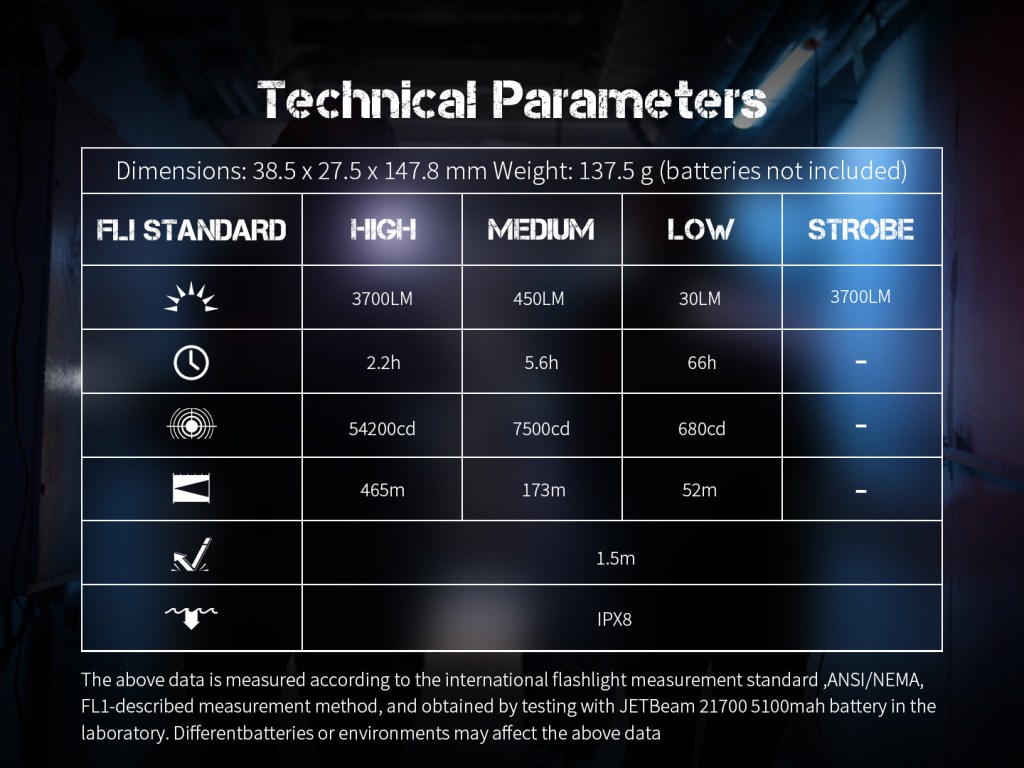
The official specs are above, followed by my own measurements below.
| Level | Lumens | Candela | Throw (Meters) | CRI (Ra) | Color Temp. (K) | DUV (Tint) |
| High | 2900 | 66000 | 510 | 65 | 4810 | 0.0076 |
| Medium | 390 | 8900 | 190 | 67 | 4780 | 0.0070 |
| Low | 33 | 750 | 55 | 66 | 4760 | 0.0086 |
Runtime

Performance is good. High only lasts ~30 seconds before stepping down, but then it stabilizes at just under 1000 lumens for 2 hours!
Thermal regulation: Timed step-downs only. No active thermal regulation. That means the light will perform consistently but may also overheat in hot weather or leave some performance on the table in cold weather.
LVP (Low Voltage Protection) is present and works well. When the battery is effectively empty, the light will shut itself off. It doesn’t rely on the battery’s protection circuit and the light can be re-activated in an emergency.
Driver & Regulation

The driver is a boost driver, the best kind of driver. Boost drivers typically provide high efficiency and the best regulation performance. In this case, efficiency is great. Regulation, not so much.
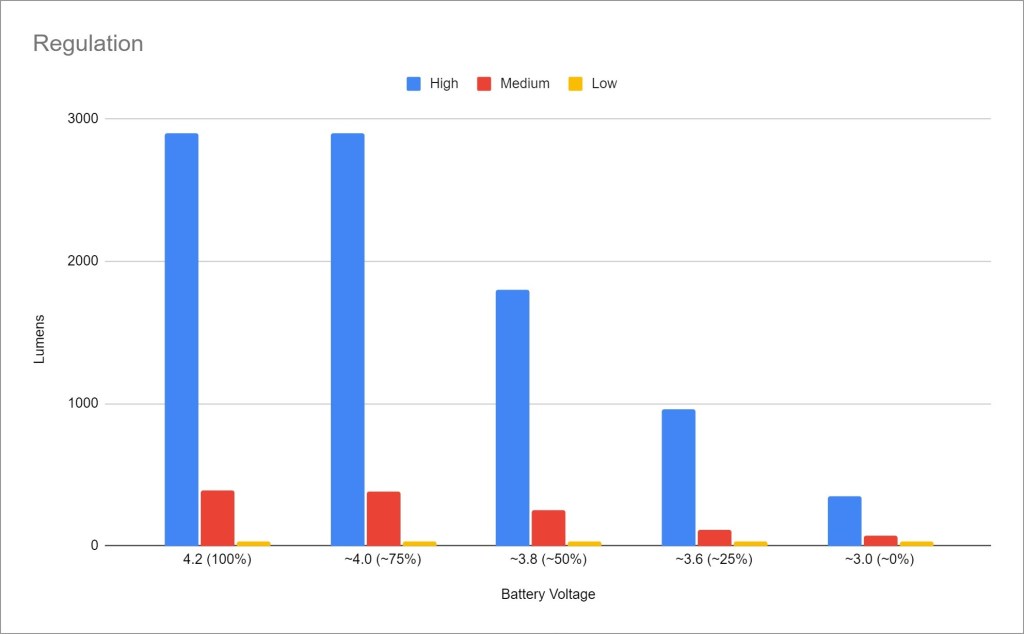
Regulation performance is poor. You only get full brightness on High and Medium down to ~50% charge. Using a lower-capacity higher-drain 21700 cell might help.
Note: All regulation measurements are taken at turn-on so they do not reflect any thermal or low voltage stepdowns that may occur. A value of 0 indicates low voltage shutoff immediately upon activation.
PWM: No PWM is visible to my eyes or camera, nor audible to my ears.
Parasitic Drain: There is no parasitic drain because this light uses a mechanical switch.
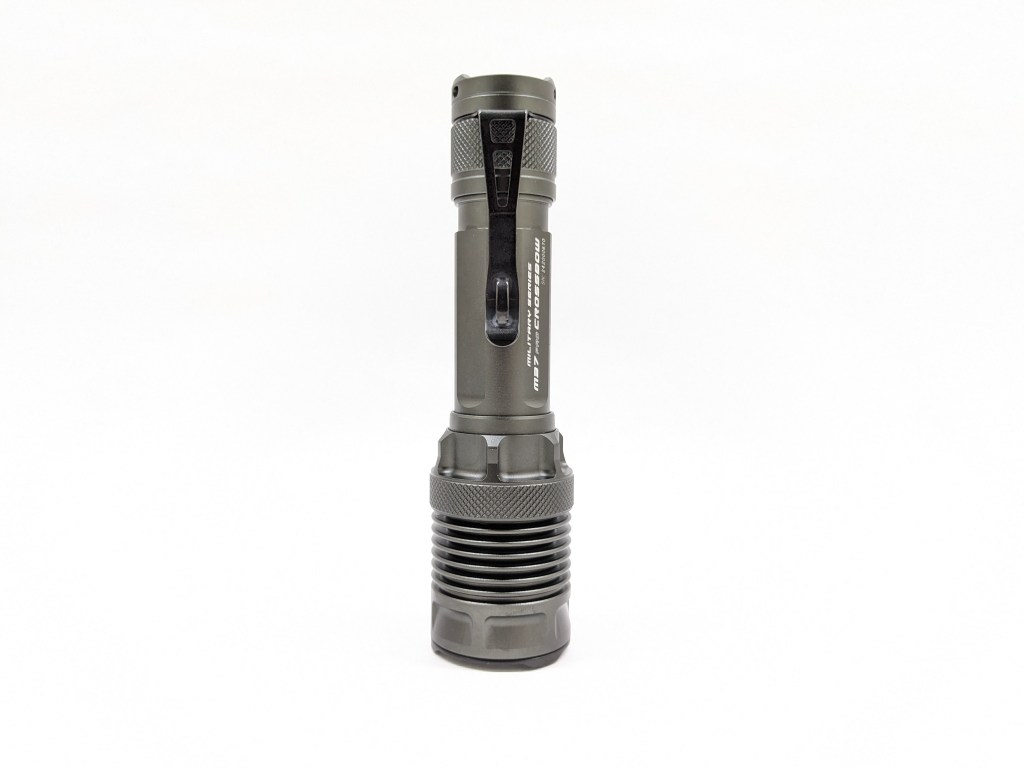
Switch
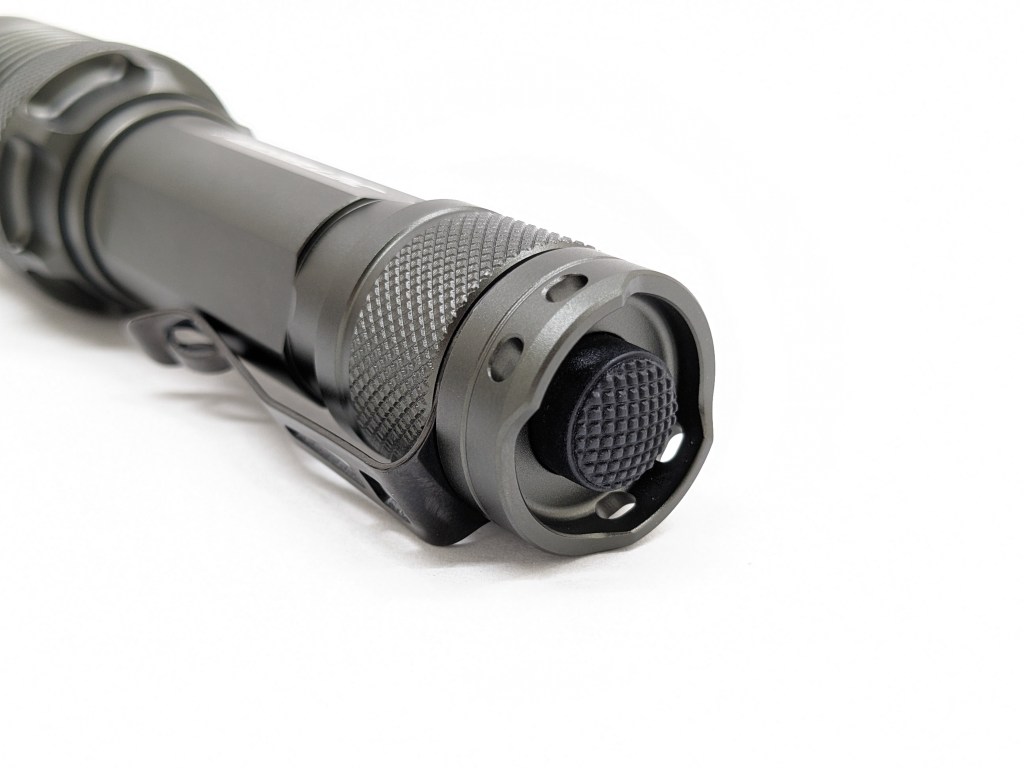
The switch is a forward clicky mechanical located on the tailcap. A forward clicky is an excellent choice for a duty light because it’s intuitive and allows momentary activation. Two ears stick up around the switch to protect it and provide lanyard attachment points. Unfortunately, the switch still protrudes past those ears so it can’t tailstand.
Carry & Ergonomics
Ergonomics are ok. I find that without the grip ring, it’s a little bit slippery in a reverse or cigar grip. Pushing the switch can also push the light forward in my hand. With the grip ring installed, it’s locked in and doesn’t move.
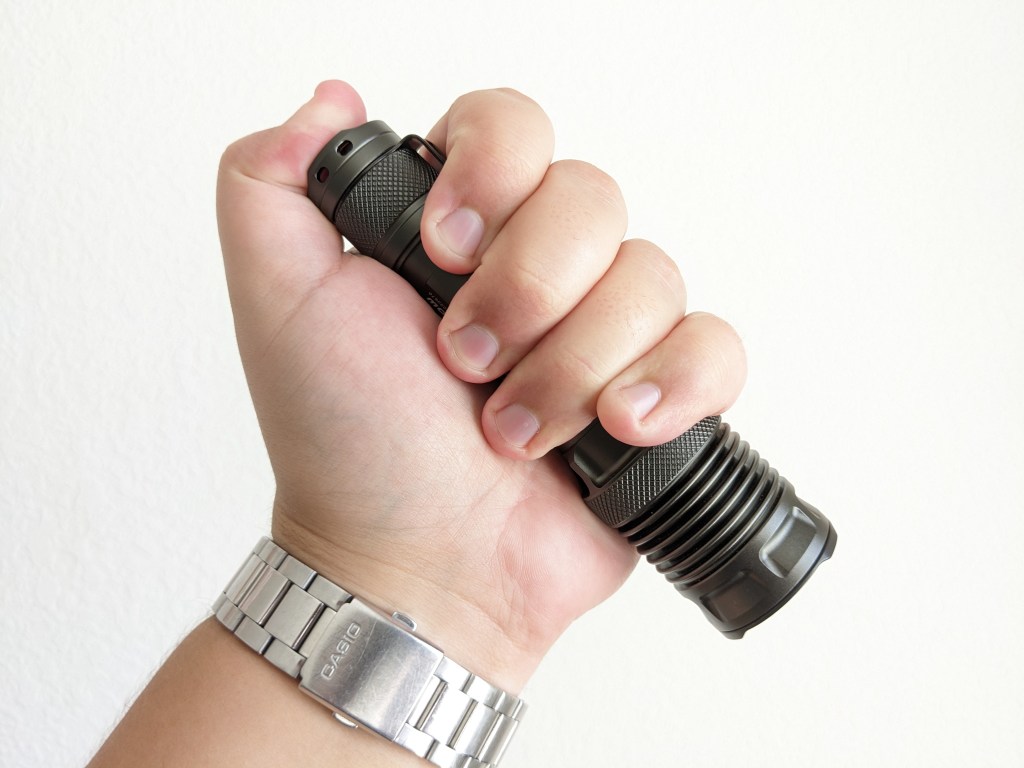
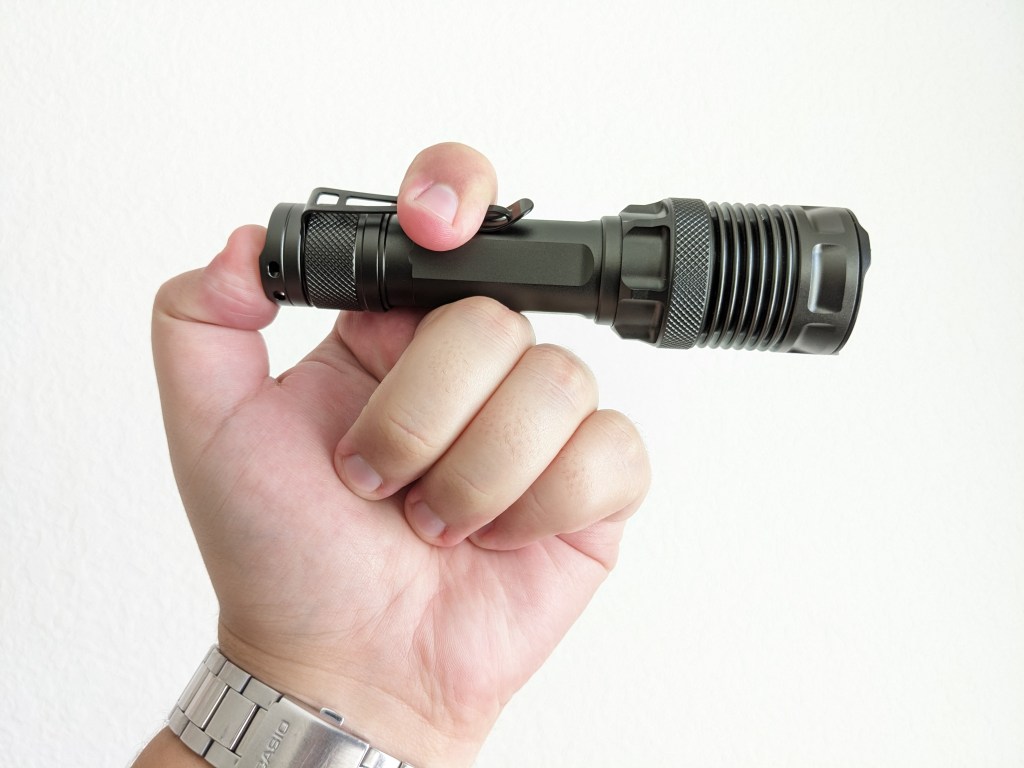
The clip is excellent. It’s captured and held on by a threaded collar on the tailcap. There’s no way it’s coming off by accident, but you can still easily remove it by unscrewing the collar on the tailcap. I like how it carries relatively deep compared to most competitors, and how it lands on a smooth flat spot on the body tube. No shredded pockets!

If you remove the clip, the collar that holds it down doesn’t screw all the way down so it will leave a gap in the tailcap. You can remove the collar completely if you want more access to the switch.

There’s also a rubber grip ring to help with a cigar grip. It works fine and is easy to install and remove. A holster is not included, which is odd, but not an issue for me. A Thyrm Switchback DF will technically fit on the light but it’s too loose to be useful.
Batteries & Charging

The battery included is a 5100mAh, protected, button-top, 21700 cell. It provides great runtime but it may also contribute to poor regulation. It’s a snug fit and makes a great “pop” sound when you remove the battery. 18650s and unprotected 21700 cells are too short to make contact.


Charging is facilitated by a USB-C port sealed and hidden under a threaded collar on the head of the light. It’s easy to open, but it won’t pop open by accident like rubber flaps sometimes can. Both A-to-C and C-to-C cables work. The light cannot be used while charging. There’s no powerbank function, and that’s a little disappointing.
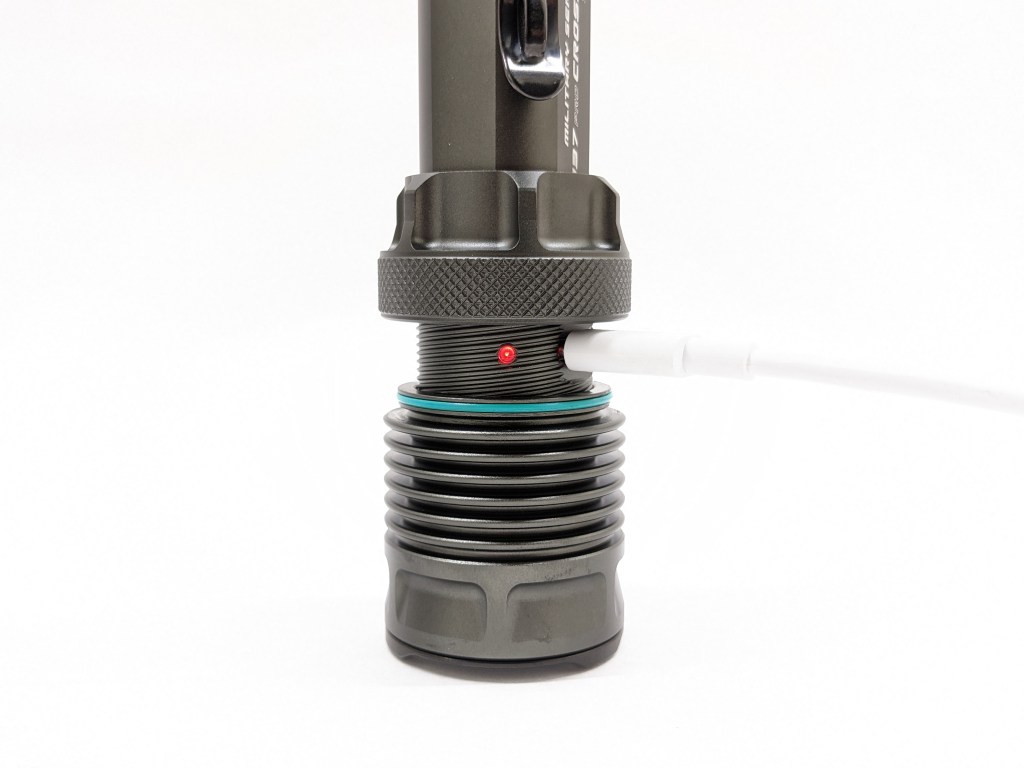
The battery indicator is also located under that port cover and is hidden unless the port cover is open. It lights up when charging (red means charging, green means full) and any time the light is turned on (green means 40-100%, red means 20-40%, and flashing red means <20%).
Competition
Here are some lights in the same class and how they compare.
- more expensive
- more brightness & throw
- electronic two-stage silent switch
- similar hidden USB-C port and magnetic charging
- excellent holster included
- requires proprietary battery
- no glass breakers
- cool white only
- no pocket clip
- more expensive
- independent dual-switch UI
- USB-C on tailcap under rubber flap
- less brightness and more throw
- worse pocket clip
- optional thread-in diffuser
- basic belt holster included
- neutral or cool white available
Nitecore MH25 Pro: traditional dual-switch alternative
- more expensive
- similar brightness, more throw
- the sharpest beam I’ve ever seen
- traditional dual-switch UI (plus optional instant Turbo)
- USB-C under a rubber port on the head
This section is not comprehensive. If I didn’t include a particular light here, it doesn’t mean it’s bad or doesn’t deserve to be here. I simply cannot list every possible competitor.
Conclusion
This is a neat light. I love the clip and threaded port cover. I like the price, LED, beam, aesthetics, switch, UI, brightness, and runtime. I don’t like the poor regulation performance. If you’re looking for a duty-style light with a neutral LED, sealed USB charging, and a great clip, look no further.
Thanks to FlashlightGo for sending me this light for review!